
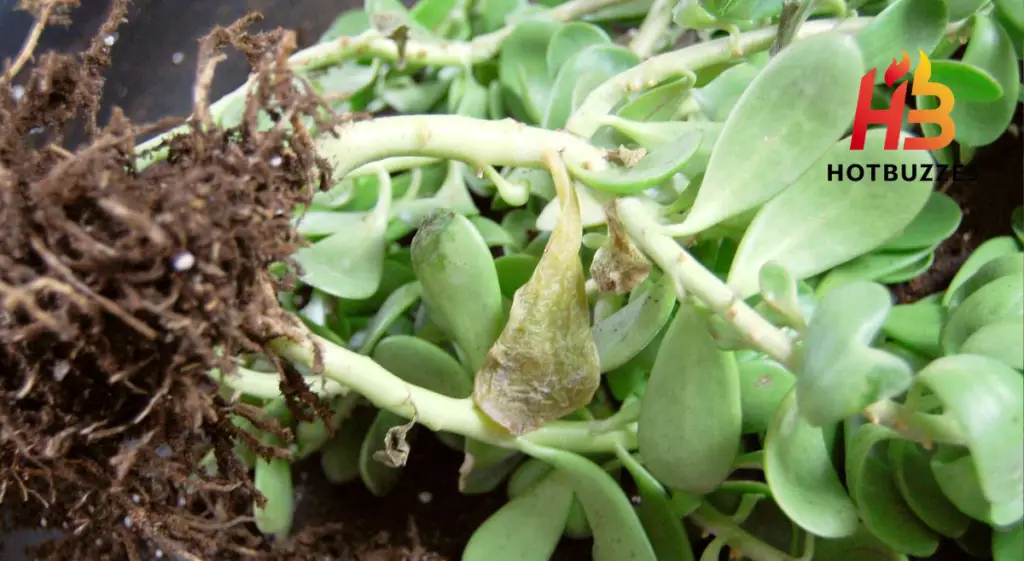
There is a moment every plant owner dreads. The plant looked fine a week ago. Now the leaves are turning yellow, the stems feel soft near the base, and no matter how much you water it, the wilting just keeps getting worse. You pull the plant out of its pot, and the smell hits you first, a sour, rotten odor rising from dark, mushy roots that should be firm and white.
That is root rot. And it is the single most common reason houseplants die. The good news is that root rot does not always mean the end for your plant. Catch it early enough, act quickly with the right steps, and most plants can be saved.
The key is understanding what is actually happening inside the root zone, recognising the signs before it goes too far, and following the correct treatment process without skipping any steps. This guide covers exactly that: how to Fix Root Rot in Plants, what root rot is, why it happens, how to identify it, how to fix it step by step, and how to make sure it never comes back.
What Is Root Rot?
Root rot is a disease that causes plant roots to decay and die. Despite what most people assume, overwatering alone is not the direct cause; it creates the conditions that allow root rot to develop, but the actual destruction is done by pathogens that already live in the soil.
According to Patch Plants, root rot is the decay of plant roots caused by prolonged exposure to waterlogged soil, oxygen deprivation, and fungal pathogens such as Pythium and Phytophthora. Roots suffocate without oxygen, become soft and brown, and can no longer absorb water or nutrients.
The four main pathogens responsible for root rot in houseplants are Pythium, Phytophthora, Rhizoctonia, and Fusarium. According to the Wisconsin Horticulture Extension at the University of Wisconsin, these are the most common root rot fungi, all with wide host ranges that allow them to attack a huge variety of houseplants.

Most root rot fungi prefer wet soil conditions, and Pythium and Phytophthora in particular produce spores that can survive in soil or plant debris for long periods. The Royal Horticultural Society describes Phytophthora species as microscopic, fungal-like organisms found in soil, where they may survive for many years even in the absence of a host plant. Discover safe and effective methods to remove spider mites and restore your houseplants to good health.
Phytophthora root rot is primarily a disease of waterlogged soil, where the water displaces air from the spaces between soil particles and plant roots literally drown unless they are adapted to wet conditions. Spot spider mites early and discover the best ways to eliminate them before they damage your plants.
Epic Gardening explains how different pathogens enter roots differently: Pythium infections often start at the tips of the roots and spread inward, while Phytophthora typically enters through damaged root tissue, and true fungi like Fusarium force their way into roots using structures called hyphae. The result in all cases is the same, brown, decaying root tissue that cannot function.
Signs of Root Rot to Watch For
Root rot starts where you cannot see it. Knowing what signs to look for, both below and above the soil, helps you catch it before it becomes unmanageable.
Yellowing Leaves
Yellowing leaves are one of the earliest visible signs. When roots are damaged, they can no longer absorb water and nutrients from the soil. The leaves respond by losing their green color as chlorophyll breaks down.
According to ForwardPlant’s root rot guide, symptoms of root rot include wilting and yellowing (chlorosis) of the leaves and stunting, while roots appear soft, dark, and mushy. Wisconsin Horticulture Extension adds that plants with root rots are often stunted and may have leaves with a yellow or red color, symptoms that suggest a nutrient deficiency but actually indicate a root problem.
The yellowing from root rot typically affects multiple leaves at once rather than just the oldest ones at the base, and it continues spreading upward as more roots fail.
Wilting Despite Wet Soil
A plant that droops and wilts even though the soil is clearly wet is one of the strongest indicators of root rot. The damaged roots cannot transport moisture up through the plant, so the stems and leaves become dehydrated even though water surrounds the root zone.
This symptom confuses many plant owners into watering more, which makes the problem far worse. If a plant is wilting and the soil is already wet, always check the roots before watering again.
Soft or Mushy Stem Base
When rot moves upward from the roots into the lower stem, the base of the plant begins to feel soft or spongy when pressed gently. This indicates root rot has progressed beyond the roots and is spreading into the main plant structure. At this point, the plant needs immediate treatment.
Foul Smell from the Soil
A healthy pot of soil has a neutral, earthy smell. Soil affected by root rot gives off a distinctly sour or rotten odor, similar to rotten eggs, which is caused by anaerobic decomposition happening in the oxygen-depleted root zone.
Wisconsin Horticulture Extension notes that affected roots may have a bad odor, and this is one of the earliest sensory warnings that root damage is already underway.
Dark, Slimy, or Mushy Roots
This is the definitive confirmation. Healthy roots are firm, white or pale tan, and flexible. Rotted roots are soft, brown or black, and feel mushy or slimy when touched. They may fall apart when handled.
Patch Plants describes the visual progression clearly: healthy roots are firm and white with fine white feeder hairs; early-stage rot shows pale yellow or light brown roots, slightly soft but still intact; active rot produces dark brown to black, mushy, brittle roots with a sour or fermented odor; advanced rot leaves stringy or hollow roots sometimes covered in grayish-white fungal material.
Stunted Growth and General Decline
A plant that suddenly stops growing during the active growing season, or that looks visibly worse week by week, is worth checking at the root level. Find out why your houseplant leaves are turning yellow and the simple steps to bring them back to life.
Epic Gardening explains that because all these forms of root rot are linked to excess soil moisture, symptoms often resemble other common problems, which is why many plant owners rule out basic issues before identifying it as a root disease.

Can Root Rot Actually Be Reversed?
The rotted root tissue itself cannot be reversed. Once a root turns brown and mushy, those cells are dead. Patch Plants states clearly that root rot cannot heal on its own; the rot will continue to spread to healthy roots until the plant dies if left untreated.
What can be done is to remove the dead tissue and give the remaining healthy roots the best possible environment to recover and produce new growth. According to a study referenced by Alibaba Lifetips, repeated drenches of 3% hydrogen peroxide reduced Pythium ultimum populations in potting mixes by 72% within 48 hours, but only when combined with root pruning and repotting into fresh, well-draining media.
How to Fix Root Rot: Step by Step
Step 1: Remove the Plant from Its Pot
Take the plant out of its container carefully. Tip it gently on its side and ease the root ball out, supporting the base of the stem. Do not pull the plant out by the stem; this can snap weakened stems or tear what is left of the root system.
Gently shake off as much of the old soil as possible from the root ball. Removing the soil exposes the full extent of the root damage and allows you to make accurate decisions before cutting. Stop yellowing leaves before they spread with these practical plant care tips and troubleshooting advice.
Step 2: Rinse the Roots Under Lukewarm Water
Rinse the entire root system under lukewarm running water. This removes remaining soil particles and helps wash away fungal spores clinging to the root surface. Use lukewarm water specifically; cold water shocks the roots, and hot water causes additional damage.
After rinsing, lay the root ball on a clean surface in good light so you can inspect the roots clearly before cutting. You are looking for the contrast between firm, white, or pale tan healthy roots and soft, dark, or slimy rotted ones.
Step 3: Sterilize Your Cutting Tools
This step is non-negotiable. Wisconsin Horticulture Extension specifically advises disinfecting tools with a 10% bleach solution or rubbing alcohol after working with root rot-affected plants, and the same logic applies before and during cutting. Pathogens on a blade surface transfer directly into clean root cuts as you work.
Wipe scissors or pruning shears thoroughly with rubbing alcohol before making any cuts. Re-sterilize the blade between cuts when moving from clearly rotted sections to healthier ones.
Step 4: Cut Away All Rotted Roots
Remove every root that is dark, soft, or mushy. Cut just above the damaged area into tissue that is still firm and pale. When in doubt, remove it; any rot left behind will continue spreading after repotting.
Patch Plants advises trimming away all affected roots until only healthy tissue remains, even if this means removing a significant portion of the root system. A smaller healthy root ball is far better than a larger one that still contains rot.
After trimming, allow the plant to air dry for a few hours before proceeding. This brief drying period allows the cut surfaces to begin sealing naturally.
Step 5: Treat Remaining Roots with Hydrogen Peroxide
This is the most important active treatment step and the one backed by the strongest scientific evidence. Alliance Chemical’s plant care guide recommends mixing 3% hydrogen peroxide at a ratio of one part peroxide to two or three parts water, then submerging the trimmed roots in the solution for five to ten minutes.
You will see fizzing, which is the oxygen going to work on microbial invaders. The hydrogen peroxide kills remaining bacteria and fungal spores on contact. Then breaks down into oxygen and water, both harmless to the plant.
Blooming Expert confirms that Use 3% hydrogen peroxide from a standard pharmacy. It is the correct strength for plant care. Soak the trimmed roots for 5 to 10 minutes before repotting. After repotting, use a lighter solution for the first watering. Mix 1 tablespoon of 3% hydrogen peroxide with 1 gallon of water. This helps prevent reinfection without over-sterilizing the soil.
Humboldt’s Secret Supplies explains: Hydrogen peroxide breaks down into oxygen and water in the soil. The extra oxygen reaches the roots. It also helps eliminate the fungi that cause root rot. It can also be applied as a soil drench during the next few waterings as a preventive measure.
One practical note from Blooming Expert: test older bottles of 3% hydrogen peroxide by putting a few drops on a metal surface. If it fizzes vigorously, it is still active. If there is no fizz, the solution has largely decomposed to water and will not be effective for treatment.
Step 6: Prune Leaves to Match Root Loss
This step is critically important and almost always skipped.A plant’s roots and leaves work together. The roots supply water and nutrients to the leaves. If you remove a large part of the root system, the remaining roots cannot support all the existing foliage.
Leaving all the leaves on puts the recovering root system under immediate stress as it tries to feed more surface area than it can handle. Remove leaves at roughly the same proportion as the roots you cut away.
If a third of the roots were removed, remove around a third of the leaves. Target yellowed, damaged, or older leaves at the base first. This simple step significantly improves recovery speed by bringing the demands on the root system back into balance with what the plant can actually provide.
Step 7: Disinfect or Replace the Old Pot
Fungal spores from Pythium, Phytophthora, and Rhizoctonia survive on pot surfaces for a long time. Putting a recovering plant back into an unsterilized container can cause immediate reinfection.
Wisconsin Horticulture Extension advises disinfecting clay pots with a 10% bleach or detergent solution or alcohol after working with root rot, and specifically warns against reusing plastic pots because they are often difficult to disinfect adequately.
Replacing the pot with a fresh sterile container is the safest option. If you do reuse the old pot, soak it in a solution of one part bleach to nine parts water for at least ten minutes, then rinse thoroughly before use.

Step 8: Repot in Fresh Well-Draining Soil
Never put the plant back into the old soil. Wisconsin Horticulture Extension is direct about this: do not reuse potting mix from houseplants affected by root rot, as it potentially contains root rot fungi. Discard the old mix entirely and repot in fresh, sterile potting soil.
Royal Horticultural Society recommends improving drainage as one of the primary ways to greatly reduce the risk of root rot recurring. This means using a well-draining potting mix, standard potting soil mixed with perlite or horticultural grit, rather than heavy, moisture-retaining compost.
UC IPM at the University of California also confirms that proper drainage and avoiding excess irrigation are the most important ways to prevent Phytophthora root rot from returning.
Pretty in Green recommends choosing a pot with a drainage hole and an organic potting mix specifically made for houseplants. Make sure the new pot has drainage holes; this is not optional. Without drainage, excess water pools at the bottom of the pot, and the root zone stays wet no matter how carefully you water.
How to Prevent Root Rot from Coming Back
Once root rot has been treated successfully, preventing it from returning is far simpler than treating it again. A few consistent habits cover the vast majority of cases.
Water only when the soil actually needs it. This is the single most effective prevention measure. Check the top two inches of soil before every watering. If it feels even slightly moist, wait. Only water when it is completely dry at that depth. Epic Gardening confirms that since all forms of root rot are linked to excess soil moisture, good moisture management is the foundation of prevention.
Always use pots with drainage holes. This is not a preference; it is a requirement. A pot without drainage will cause root rot eventually, no matter how carefully you water. Pretty in Green lists drainage holes as an absolute must for preventing root rot from recurring.
Use well-draining soil. Cornell University’s Greenhouse Horticulture program notes that Phytophthora is favored by deep planting and wet, poorly drained growing mixes. A standard potting mix with added perlite or horticultural grit drains faster and keeps the root zone aerated.
Use pasteurized potting mix. Wisconsin Horticulture Extension advises using a pasteurized commercial potting mix rather than soil from the garden. Garden soils frequently contain root rot pathogens that survive for long periods and will attack roots the moment waterlogged conditions give them an opening.
Sterilize tools and pots between uses. Royal Horticultural Society recommends destroying affected plant material and replacing the soil from the root zone when root rot is detected, and the sanitation of all tools is a core component of preventing the spread.
Do not let pots sit in standing water. Remove any water that collects in saucers within an hour of watering. Plants sitting in water-filled saucers are in near-constant contact with moisture at the root zone, creating ideal conditions for pathogen activity.
FAQs
Q1: Can I save a plant if all the roots have rotted?
It is very unlikely, but not impossible. If even a small part of the stem base or root crown is still firm and green, the plant may grow new roots. If the root damage is severe, take healthy stem cuttings. Propagate them in water. This is the most reliable way to save the plant, even if the original roots cannot recover.
Q2: Should I use a fungicide for root rot?
Fungicides can help in moderate to severe cases, particularly for outdoor plants or large containers. Cornell’s Greenhouse Horticulture program notes that the same fungicides effective against Pythium also work against Phytophthora because both are oomycetes, though sanitation measures are effective against all root rot fungi.
Q3: Does cinnamon help with root rot?
Cinnamon has mild natural antifungal properties. Lightly dust it onto freshly trimmed root cuts. It provides extra protection during recovery. It helps create a barrier against mild fungal activity at the cut surfaces.
Q4: How long does recovery take?
Most plants start to recover within two to four weeks after treatment. New leaf growth is often the first sign. Firmer, upright stems also show that the plant is recovering. Full recovery with a rebuilt root system typically takes one to three months.
Conclusion
Root rot is one of the most damaging problems a houseplant can face. It is also one of the most treatable if caught early. The damage happens silently underground. That is why regular root checks are important.
Watch for warning signs. These include yellowing leaves, wilting despite wet soil, a foul smell from the pot, and a soft stem base. Identifying these symptoms early gives your plant the best chance of recovery. Early action can mean the difference between saving your plant and losing it.
The treatment process is simple and follows a clear order. First, remove the plant from the pot. Rinse the roots thoroughly. Sterilize your tools. Cut away all dark, mushy roots. Soak the healthy roots in diluted hydrogen peroxide.

Asim Usman is a plant enthusiast and content writer who specializes in creating informative, reader-friendly articles on plant care and gardening. He combines thorough research with practical insights to provide accurate, easy-to-follow guidance that helps readers grow healthy plants with confidence. His goal is to make plant care simple, enjoyable, and accessible for everyone.