
One day, your plant looks healthy. A week later, the leaves look dull and dusty, with tiny pale spots scattered across the surface. You look closer and notice fine webbing at the base of the leaves and along the stems. If that is what you are seeing, spider mites have moved in.
Spider mites are one of the most frustrating houseplant pests you can deal with. They are tiny, they reproduce fast, they thrive in the conditions most homes naturally create, and a single female can start an infestation that spreads through an entire plant collection within days.
The webbing and the leaf damage they cause can look alarming, and many people lose plants to them simply because they do not act quickly enough or do not understand how to break the lifecycle. This guide covers exactly what spider mites are, how to identify them, what causes infestations, how to treat them effectively, and how to stop them from coming back.
What Are Spider Mites?
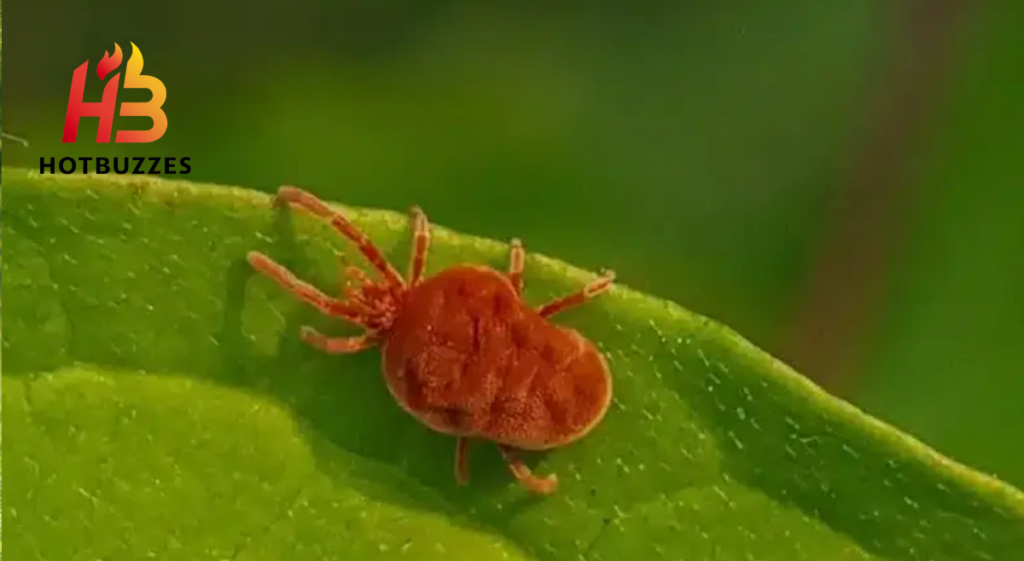
Spider mites are not insects. They are arachnids, the same class that includes spiders and scorpions, and they have eight legs rather than six. The most common species found on houseplants is Tetranychus urticae, known as the two-spotted spider mite or red spider mite.
According to Wikipedia’s entry on Tetranychus urticae, this species was originally native only to Eurasia but has spread to every part of the world and is now considered one of the most significant agricultural and houseplant pests globally.
Adult females measure approximately 0.4 mm in length, barely visible to the naked eye as tiny reddish, yellow, or black specks on plant surfaces. If your plant’s leaves are losing their color, explore the common causes and easy solutions.
Wikipedia’s entry on Spider Mites notes that Tetranychus urticae attacks an extraordinarily wide range of plants, including peppers, tomatoes, potatoes, beans, corn, and strawberries, as well as most common houseplants. It is the most widely known member of the family Tetranychidae, which contains over 1,200 species worldwide.

According to Koppert Biological Systems, there are more than 1,200 spider mite species worldwide, and many are major crop pests. The two-spotted spider mite is a single species. It is considered very important in greenhouses. It is also important in many outdoor crops. This importance is seen worldwide.
The genome of Tetranychus urticae was fully sequenced in 2011, as noted by Wikipedia, making it the first chelicerate genome to be fully sequenced. Scientific research has confirmed this mite’s ability. It can develop resistance to chemical pesticides.
This is a remarkable ability. It is a key reason for control failure. Natural treatments can work better. Rotating treatments can also work better. Relying on a single chemical is less effective.
How Spider Mites Damage Plants
Understanding the damage spider mites cause helps explain why acting quickly matters so much. Spider mites feed by piercing individual leaf cells and sucking out their contents. According to Koppert Biological Systems, the larvae, nymphs, and adults all cause damage by feeding on plant sap from the underside of leaves.
The empty dead cells turn yellow, creating the characteristic pale spotting visible on the upper surface of the leaf. Wikipedia describes the process clearly: spider mites destroy the plant cell by cell, leaving tiny pale spots or scars where the green cells have been.
Although each lesion is very small, an attack by hundreds or thousands of mites creates many lesions. This results in thousands of lesions on the plant. It significantly reduces the plant’s capacity for photosynthesis.
Koppert confirms that the destruction of cells results in reduced photosynthesis, increased transpiration, and reduced plant growth overall. As damage increases, whole leaves turn yellow. If the infestation is not addressed, the entire plant may eventually die.
A key fact from ScienceDirect is that spider mites’ short life cycle and high reproductive potential make them particularly prone to developing resistance to chemical pesticides. This is why natural treatments and rotation of methods are consistently recommended over single chemical treatments.
How to Identify Spider Mites
Spider mites are too small to see individually without magnification. What you see first are the signs they leave behind. Grow Tropicals describes the earliest sign as pale stippling or silvery speckling on the upper leaf surface.
Each tiny spot marks a place where a mite has pierced a leaf cell and extracted its contents. The damage starts looking like the leaf has been lightly dusted with sand or has tiny scratch marks across it.
As the infestation grows, you will notice fine webbing on the undersides of leaves, along stems, and at the junctions where leaves meet the main stem. This webbing is the distinctive spider mite calling card. Greenery Unlimited notes it looks like cobwebs on the plant, usually clustered around the stem.
One practical identification test is to hold a white sheet of paper under a suspect leaf and give the leaf a gentle shake. If tiny moving dots fall onto the paper, you have confirmed a spider mite infestation. The dots will be visible, barely, and will move slowly across the paper surface.
As the infestation progresses, leaves start to turn a mottled yellow or bronze, lose their healthy shine, and eventually dry out and fall off. In severe infestations, the webbing can cover entire sections of the plant, and the mites become visible as a mass of specks moving through the web.
What Causes Spider Mite Infestations?
Spider mites thrive in warm, dry conditions. The average home, particularly in winter when central heating dries out the air, is close to ideal for them. Garden Design explains that spider mites’ populations multiply rapidly as conditions become hot and dry, becoming most prevalent during summer and during the winter heating season indoors.
Low humidity is the single biggest environmental factor that encourages spider mites to thrive. Dusty leaves are another contributing factor. Pinch of Seeds notes that spider mites are attracted to dusty plant leaves because the dusty environment provides the perfect hiding and breeding ground. Regular leaf cleaning removes both dust and the mites that are already present.
New plants brought in from nurseries or garden centers are a common entry point for spider mites. The same applies to plants that have spent time outdoors during summer; they should be inspected carefully and quarantined for a few weeks before being placed near other houseplants.
Stressed plants are significantly more vulnerable than healthy ones. Plants that are underwatered, kept in low light, or already weakened by other problems have weaker defenses against spider mite feeding.

How to Get Rid of Spider Mites: Step by Step
The most important principle to keep in mind is that a single treatment is rarely enough. Grow Tropicals explains clearly: eggs are resistant to most contact treatments and will hatch within a few days of the initial spray. Any treatment needs to be repeated multiple times over two to three weeks to catch each new generation as it hatches.
Step 1: Isolate the Plant Immediately
The moment you spot spider mites on any plant, move it away from all your other plants. Spider mites spread through direct contact between plants, through the air when their tiny bodies drift on air currents, and on clothing and hands after handling an infested plant.
My City Plants recommends isolating infested plants promptly and treating all nearby houseplants with a preventive neem oil solution, even if they do not yet show signs of infestation. By the time you see mites on one plant, they may already be on neighboring plants at an early stage.
Step 2: Rinse the Plant with Water
Before applying any treatment, physically remove as many mites as possible with a strong stream of water. This does two things: it knocks off the mites and their webbing, and it removes the dust that spider mites use as cover.
Garden Design recommends using a hose nozzle to create a gentle but firm water spray, making sure to get the undersides of the leaves where mites concentrate. For houseplants, this can be done in a shower or bathtub.
After rinsing, allow the plant to dry before applying any treatment spray. Applying oil-based treatments to wet leaves can cause uneven coverage and leaf damage.
Step 3: Apply Neem Oil
Neem oil is the most widely recommended natural treatment for spider mites and for good reason. It is a natural extract of the neem tree that works by disrupting the mite’s feeding and reproductive systems on contact, and it has a residual effect lasting several days that continues to act after application.
According to Grow Tropicals, neem oil also acts on eggs as well as adults, making it more effective across the lifecycle than many other contact treatments. The standard mixing ratio is approximately 5 ml of neem oil with 2 to 3 ml of dish soap as an emulsifier per liter of water.
Greenery Unlimited notes that neem oil has been used for hundreds of years on crops and houseplants and is non-toxic to birds, animals, and most beneficial insects. To apply, mix thoroughly and spray the entire plant, tops of leaves, undersides of every leaf, stem junctions, and the growing tips.
The undersides of leaves are where spider mites congregate and where treatment is most critical. Grow Tropicals recommends applying in the evening to avoid any interaction with bright light that could cause leaf burn.
My City Plants recommends applying neem oil twice a week until the infestation is cleared. Garden Design suggests reapplying every seven to ten days to disrupt the egg-hatching cycle.
Step 4: Use Insecticidal Soap
Insecticidal soap works differently from neem oil. It kills mites on contact by disrupting their cell membranes, causing them to dehydrate and die. It has no residual effect; it only kills mites it directly contacts, which is why repeated applications are essential.
Grow Tropicals describes insecticidal soap as very effective when applied thoroughly and repeatedly, and recommends it as the main treatment option for more serious infestations. Apply every ten days until there are no further signs of mites.
A homemade version is easy to make. Garden Design recommends mixing one tablespoon of a mild liquid soap, such as castile or Ivory, into one quart of water and applying with a spray bottle. Spider Farmer suggests half a teaspoon of castile soap into two cups of water as another reliable ratio.
Neem oil and insecticidal soap work well used together or in alternation. Apply neem oil once, insecticidal soap the next, rotating through the treatment cycle. This reduces the chance of any mites surviving long enough to develop resistance.
Step 5: Try Rubbing Alcohol for Spot Treatment
For targeted treatment of visible mites and webbing, rubbing alcohol applied with a cotton swab or mixed into a spray is highly effective. My City Plants recommends mixing one cup of 70% rubbing alcohol with a few drops of dish soap in 30 oz of water, spraying the whole plant with special attention to the undersides of leaves, and repeating twice a week.
The alcohol breaks down the mite’s protective outer layer, causing rapid death on contact. Garden Design also mentions using a cotton swab dipped in diluted 70% rubbing alcohol to kill visible mites directly, useful for targeted treatment of heavily affected leaf areas before applying a broader spray.
Step 6: Increase Humidity
Treating the mites is essential, but so is changing the environment that made your plant attractive to them in the first place. Since spider mites thrive in dry conditions, raising humidity around the plant makes it a much less hospitable place for them to reproduce.
Garden Design suggests using a room humidifier, regularly misting plants with a spray bottle, or placing plants on trays filled with pebbles and a small amount of water. Struggling with fungus gnats? Learn how to get rid of them and protect your houseplants naturally.
The evaporation from the water in the tray raises humidity directly around the plant without causing the soil to stay wet. This is not a treatment on its own but a valuable ongoing prevention measure that keeps spider mite populations from rebuilding after treatment.

Step 7: Remove Heavily Damaged Leaves
Any leaves that are significantly yellowed, dried, or covered in webbing should be removed. These leaves are not going to recover, and leaving them on the plant creates a surface where mites can continue to shelter and lay eggs.
Use clean scissors to cut off damaged leaves. Place them directly into a sealed bag before disposing of them to prevent any mites still on the leaves from spreading.
My City Plants notes that in cases of severe infestation, pruning heavily affected areas followed by aggressive treatment gives the plant the best chance of recovery.
How Long Does Treatment Take?
Realistically, getting rid of a spider mite infestation takes two to four weeks of consistent treatment. Grow Tropicals recommends treating three to four times over a two-week minimum period. The reason is the lifecycle; eggs that survive the first treatment will hatch within a few days, and those new hatchlings need to be caught by the next round of treatment before they reach maturity and start laying eggs themselves.
Stopping treatment as soon as the visible mites disappear is a common mistake that leads to reinfestations. Continue treating for at least a week or two after you can no longer see any mites or webbing.
How to Prevent Spider Mites from Returning
Once an infestation is under control, keeping it from coming back comes down to a few consistent habits.
Quarantine new plants. Garden Design recommends keeping new houseplants away from other plants for 30 to 40 days before introducing them to the rest of your collection. This gives any hidden mite population time to become visible before it can spread.
Wipe leaves regularly. A damp cloth run across leaves every few weeks removes dust, which is a spider mite attractant, and also removes early-stage mites before they have a chance to establish.
Maintain humidity. Keep humidity levels higher around your plants, especially in winter. Spider mites struggle to reproduce quickly in humid environments. A hygrometer in the room can help you monitor humidity levels; anything above 50% is generally inhospitable for spider mite population growth.
Inspect regularly. Garden Design recommends checking plants as often as twice a week during warm, dry conditions when spider mites are most active. Catching an infestation when it involves just a few mites rather than thousands is dramatically easier to treat.
Apply preventive neem oil. My City Plants recommends applying neem oil to all plants as a preventive measure during spring and summer when spider mite activity is highest. A light monthly application keeps mite populations from establishing without requiring the intensive treatment a full infestation demands.
FAQs
Q1: Can spider mites spread from plant to plant?
Yes, easily and quickly. They spread through direct contact between plants, on air currents, and on hands and clothing after handling an infested plant. Isolate any infested plant immediately and inspect all nearby plants.
Q2: Are spider mites visible to the naked eye?
Individual mites are barely visible; they appear as specks of red, yellow, or brown that may seem to move slowly if you look very closely. The damage they cause, pale stippling on leaves, yellowing, and webbing, is usually what you notice first.
Q3: Can I use the same treatment every time?
Rotating between treatments, for example, using neem oil one week and insecticidal soap the next, is more effective than relying on one product repeatedly. Spider mites can develop resistance to treatments they are repeatedly exposed to, as confirmed by research in ScienceDirect.
Q4: Can spider mites live in soil?
Spider mites primarily live on and under plant leaves, not in soil. However, eggs and dormant mites can fall onto the soil surface. Treating the plant above the soil level is where treatment is most effective.
Q5: Is neem oil safe for all houseplants?
Neem oil is safe for the vast majority of houseplants. However, always test a small area of the plant first and wait 24 hours before treating the whole plant. Avoid applying neem oil in direct sunlight or when temperatures are very high, as this can cause leaf burn.
Conclusion
Spider mites are a serious houseplant pest, but they are beatable with the right approach and the patience to see the treatment through. The combination of isolating the plant, washing it down, applying neem oil and insecticidal soap repeatedly, and raising the surrounding humidity covers every stage of the mite lifecycle and removes the environmental conditions that made the infestation possible in the first place.
The mistake most people make is stopping treatment too soon. Eggs survive the first spray. New generations hatch within days. Commit to at least two to three weeks of regular treatment after the visible mites disappear, and keep inspecting your other plants to catch any spread that has already happened.
Prevention is far easier than treatment. Regular leaf wiping, quarantining new plants, maintaining humidity, and occasional preventive neem oil applications can keep spider mites from ever becoming a serious problem in your plant collection.

Ali Hassan is a plant enthusiast and content writer who creates practical, easy-to-follow articles about plant care, gardening, and indoor plants. He combines thorough research with reliable horticultural resources to provide accurate, beginner-friendly advice. His goal is to help readers grow healthier plants and make plant care simple, enjoyable, and accessible for everyone.