
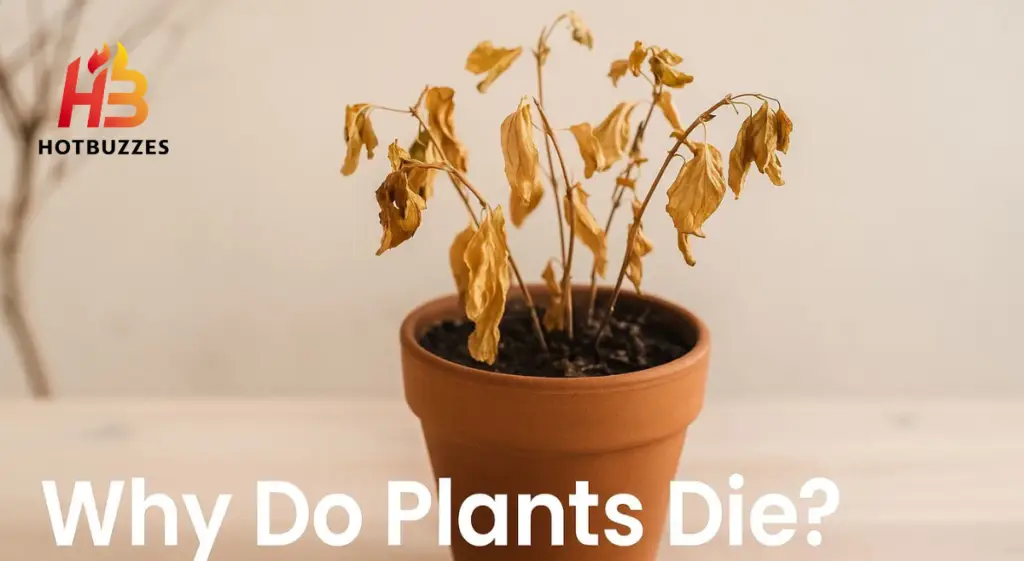
You walk over to your plant, and something looks very wrong. Leaves are drooping, turning yellow, or falling off. The stems feel soft. The soil either smells strange or has pulled completely away from the pot edges. Whatever it looked like when you first brought it home, it certainly does not look like that now.
Before you throw the plant away, stop. Plants are far more resilient than most people give them credit for. A plant that looks almost finished can come back with the right diagnosis and the right treatment.
The critical mistake most plant owners make is either panicking and doing everything at once, repotting, fertilizing, moving, and changing watering in the same week, or giving up too early before the plant has had enough time to respond.
According to Patch Plants, reviving a dying plant is a methodical process that requires accurate diagnosis, targeted action, and patient observation rather than desperate measures applied all at once. That is exactly what this guide provides: a clear, step-by-step process that works across most common houseplants.
First: Is the Plant Actually Dead?
Before doing anything else, check whether the plant still has life in it. A plant that looks completely dead sometimes is not. Patch Plants recommends a simple stem scratch test: use your fingernail or a small knife to gently scratch the surface of a stem.
If you see green tissue underneath, the plant is alive. Green inside the stem means the vascular system is still functioning, and recovery is genuinely possible.
Urban Plant’s revival guide suggests a similar test for woody stems or outdoor plants: bend a small twig or stem gently. If it snaps easily and looks dry and brown inside, that section is dead. If it bends without snapping and shows green inside, there is still life.

Neoplants’ revival guide puts it simply: if your plant still shows any green on leaves, stems, or roots, it is not too late. If the plant is completely dried out with zero green or flexible growth anywhere, composting it and moving on is the honest choice. But if there is any sign of life, the following steps give it a real chance.
Step 1: Observe Before You Act
The most important thing you can do in the first 24 hours is look carefully at the plant without touching or treating it. Patch Plants is direct about this: how to revive a dying plant always starts with observation, not action.
Accurate diagnosis is the foundation of any successful revival. Treating the wrong cause delays real recovery and can cause additional damage on top of what already exists. Explore the top reasons your Monstera isn’t growing and the best ways to encourage lush new foliage.
Sit with the plant. Look at it from different angles. Note every symptom you can see. Write them down if it helps. The symptoms your plant is showing are not random; they point directly to specific causes, and reading them correctly is the difference between a plant that recovers and one that gets worse despite your efforts.
Step 2: Read the Symptoms and Diagnose the Problem
Each symptom points to a different cause. Here is how to match what you are seeing to what is actually wrong.
Yellow leaves, soft, mushy stems, wet, soggy soil, and a foul smell:
This combination points almost certainly to overwatering and root rot. According to Tom’s Guide’s plant revival article, yellowing leaves accompanied by soft or mushy stems are the classic overwatering symptom. Good Earth Plants confirms that wet soil alongside wilting is the number one indicator of overwatering, the roots are drowning and beginning to decay.
Dry, crispy leaf edges and tips, curled leaves, soil cracked or pulling away from pot edges:
These points indicate underwatering or severe dehydration. Patch Plants describes this as leaves that feel thin and papery rather than firm and plump, with soil that has completely dried and may have pulled away from the inner edges of the pot.
Good Earth Plants notes that when underwatering reaches this extreme stage, watering from the top no longer works well because the soil has become a hardened dry brick, and water runs around the sides rather than soaking in.
Pale, washed-out leaves, stems stretching or leaning toward the nearest window, slow or no growth:
This is a light problem. According to Green Thumb Nursery, the light a plant receives dictates the speed of its photosynthesis. Too little light and the plant cannot produce the energy it needs to maintain its existing leaves, let alone grow new ones.
Brown or dried patches on one side of the leaves, usually facing a window:
This is sun scorch. Good Earth Plants describes dried brown to black areas on the side of the plant facing a window as classic sunburn; the plant has been exposed to harsh direct sunlight that its leaves are not adapted to handle.
Tiny insects, webbing under leaves, sticky residue on stems, white cottony clusters in leaf joints:
These are pest infestations. Spider mites, mealybugs, aphids, scale, and fungus gnats are the most common. Bumble Plants recommends checking for signs of insects and sticky residue as part of an initial observation. Pest damage is often gradual and may have been happening for weeks before the plant shows an obvious decline.
Step 3: Fix the Watering Problem First
Watering is the cause behind the majority of plant problems, so this is always where to start.
For overwatering:
Stop watering completely. Move the plant to a spot with good airflow to help the soil begin drying out. Green Thumb Nursery recommends moving it to a shady area and letting it dry before watering again, or changing the pot entirely and placing it in fresh soil. Do not water again until the top two inches of soil are completely dry.
For severe overwatering with root rot suspected:
This requires more active intervention than just stopping watering. Remove the plant from its pot and inspect the roots. Healthy roots are firm and white or pale tan. Rotted roots are dark brown or black and feel soft and slimy.
According to Alibaba Gardening’s revival guide, healthy roots should comprise at least 30% of the original root mass for recovery to be likely. If more than 70% of roots are mushy and black, the chances are low, but if any firm roots remain, treatment is worth attempting.
Cut away all rotted roots with sterilized scissors, soak the remaining roots in a diluted hydrogen peroxide solution (one part 3% hydrogen peroxide to three parts water), and repot in fresh, well-draining soil. Do not water heavily after repotting; give the recovering roots a chance to stabilize.
For underwatering:
The approach depends on how severe it is. Good Earth Plants recommends bottom-watering for severely dehydrated plants: place the entire pot in a sink or bucket of water and leave it for 15 to 30 minutes. This allows the dry, compacted soil to rehydrate slowly and thoroughly from the bottom up, which is far more effective than pouring water on top of hardened soil that will just run straight through.
Patch Plants notes that reviving a plant from underwatering is often the quickest rescue of all; thorough watering can restore most underwatered plants within 24 to 48 hours once the roots rehydrate properly.

Step 4: Check and Inspect the Roots
Whether watering is the problem or not, root inspection tells you more about what is really going on than anything else visible above the soil. Patch Plants identifies root inspection as the single most important step in reviving a dying plant: the foliage tells you something is wrong, but only the roots reveal what and how serious it actually is.
Gently remove the plant from its pot. If the root ball holds together firmly with visible roots running through dense soil, the plant has a reasonable chance, and if the roots circle tightly around the inside of the pot with almost no soil visible, the plant is root-bound and needs repotting into a container one to two inches larger. If the roots are dark, soft, or slimy, treat for root rot as described above.
Even if the roots look basically healthy, if the plant has been in the same pot for two or more years, consider refreshing the soil. Old potting mix loses its structure over time, compacts down, and holds less oxygen. Fresh soil with good drainage gives recovering roots a significantly better environment to work with.
Step 5: Trim Dead and Damaged Leaves and Stems
Once you have addressed the root zone, work on what is visible above the soil. Removing dead and damaged material is not just cosmetic; it is genuinely important for recovery. Neoplants explains clearly: dead tissue will not come back, and leaving it on the plant forces the plant to continue sending resources toward tissue that cannot recover.
Removing dead leaves and stems redirects those resources toward new, healthy growth. Tom’s Guide recommends pruning away damaged portions after addressing the underlying cause. Use clean, sharp scissors and cut cleanly just above a node or where the stem meets the main body of the plant.
Comfort Plants’ revival guide recommends a methodical approach: work from the bottom of the plant upward, removing the most obviously dead material first. Anything that is completely dry and brown, or completely soft and mushy, should be removed. Leaves that are still partially green can often stay; partial green means partial function.
Use sterilized scissors for all cuts. Wipe the blades with rubbing alcohol between cuts, particularly when moving from clearly diseased or infested areas to healthier parts of the plant.
Step 6: Fix the Light Situation
With root problems addressed and dead material removed, look honestly at where the plant is positioned relative to the light it receives. Good Earth Plants calls trying to grow a plant without adequate light a sure-fire way to fail, and notes that most hardy houseplants need a minimum amount of sunlight to thrive.
Bright indirect sun, near a window but not in the direct beam of the sun, is the right starting point for almost all common houseplants. If the plant has been sun-scorched with brown patches on the leaves facing a window, move it away from that direct light immediately and trim the burned areas.
Good Earth Plants notes that shade-grown plants can get sunburned very quickly when exposed to full sun. If the plant has been in a dim corner and is showing pale, stretched growth, move it gradually toward better light rather than all at once.
A sudden shift from very low to very bright light can shock a weakened plant. Move it closer to a window over the course of a week, increasing light exposure progressively.
Step 7: Treat Pests If Present
If you identified pest activity in step two, this is when to treat it. Addressing pests while simultaneously fixing other stressors prevents the infestation from taking hold on a weakened plant.
Tom’s Guide recommends isolating the affected plant immediately when pests are found to stop them from spreading to other plants. For small infestations, wipe leaves down with a soft cloth dampened with insecticidal soap or a mild solution of water and dish soap, paying particular attention to leaf undersides where pests concentrate.
For specific pests: mealybugs and aphids respond well to rubbing alcohol applied directly to the pest with a cotton swab. Spider mites need increased humidity around the plant alongside neem oil treatment applied to the whole plant. Fungus gnats require the soil to be allowed to dry out completely between waterings, combined with yellow sticky traps near the soil surface to catch adults.
Tom’s Guide is clear about the timeline: regular treatment over several weeks, and sometimes months for severe infestations, is typically necessary to eliminate pests and their eggs. Stopping treatment after one or two rounds almost always leads to re-infestation.
Step 8: Adjust Temperature and Humidity
A recovering plant needs stable environmental conditions. Stress from temperature fluctuations or very dry air slows down recovery and can undo progress made through other steps. Learn the common causes of root rot and the practical steps to help your plants recover.
Tom’s Guide recommends keeping temperatures stable and placing the plant in a spot free from drafts, heating vents, or blasts from air conditioning while it recovers. Most houseplants prefer temperatures between 15 and 27 degrees Celsius (60 to 80 degrees Fahrenheit) and do not respond well to sudden drops or sharp rises.
For plants that prefer higher humidity, tropical species like monstera, peace lily, and calathea, grouping them with other plants creates a naturally more humid microclimate. A small humidifier placed nearby is the most effective solution for genuinely dry indoor air.
Tom’s Guide notes that if the plant enjoys higher humidity, a humidifier gives it an extra boost during the recovery period when it needs all the support it can get.
Step 9: Do Not Fertilize Yet
This step is about what not to do, and it is one of the most important. Fertilizing a stressed, weakened plant almost always makes things worse rather than better. According to Alibaba Gardening, fertilizer application during revival causes chemical burn to already damaged roots, reducing recovery chances by around 40%.
The nutrients in fertilizer are processed by healthy roots. When the root system is damaged, compromised, or in recovery, fertilizer salts accumulate in the soil and burn the tender new feeder roots trying to grow.
Tom’s Guide confirms: hold off on fertilizing until you see new growth. Once new leaves or stems appear, that is the signal that the root system has recovered enough to handle feeding. Begin at half the usual strength and limit applications to once a month during the growing season.
Neoplants addresses the popular home remedy question directly: Does sugar water help dying plants? It may offer a small temporary energy boost, but it is not a cure, and too much can promote mold. Stick to proper watering, light adjustment, and eventual fertilizing for real, lasting recovery.

Step 10: Create a Stable Recovery Environment and Be Patient
After completing the treatment steps, the final step is to stop intervening and let the plant recover. Tom’s Guide emphasizes patience above everything else at this stage: some plants bounce back within a few weeks, while others may need a few months to fully regain their strength.
Urban Plant recommends not moving or disturbing the plant too often while it is recuperating. Keep it in a suitable spot for light and temperature, and maintain a stable routine. Avoid the temptation to over-care; checking the soil every day and adjusting care with each small change creates additional stress on a plant that needs consistency.
Monitor the plant closely for new growth, which is the most reliable sign that recovery is underway. Bumble Plants recommends keeping a simple log of watering, light exposure, and care changes. This helps you track what is working and catch any remaining issues early.
According to Alibaba Gardening, recovery timelines vary significantly by plant type. Fast responders like pothos, spider plants, and ZZ plants typically show visible improvement within seven to ten days.
When to Accept the Plant Cannot Be Saved.
Being honest about when a plant is beyond recovery matters because time and effort spent on a truly dead plant could go toward other plants in your collection.
Alibaba Gardening identifies signs that indicate recovery is no longer possible: complete stem rot extending below the soil line with no green tissue anywhere, an entire root system reduced to black mushy remains with a foul odor, complete defoliation with no visible new growth nodes, and no response to appropriate treatment after six weeks for fast-growing species.
Green Thumb Nursery offers a practical and positive perspective on this: compost the plant and feed that compost to your other plants. The cycle of life continues, and your other plants benefit. Every plant you struggle with teaches you something that makes the next one easier.
FAQs
Q1: How long does it take to revive a dying plant?
It depends on the plant species and the severity of the problem. Fast-responding plants like pothos and ZZ plants can show improvement within a week. Medium-speed plants like Monstera take two to three weeks.
Q2: Should I repot a dying plant?
Only if the roots are the problem, either root-bound or suffering root rot. Repotting a stressed plant unnecessarily adds more stress on top of existing problems. If watering, light, or pests are the issue, fix those first without repotting.
Q3: Can I fertilize a dying plant to help it recover?
No. Fertilizer on a weakened plant causes root burn and slows recovery. Wait until you see consistent new growth, usually four to six weeks into recovery, and then begin with half-strength fertilizer.
Conclusion
A dying plant is not always a lost plant. Most houseplants that look finished are still carrying some life, in a green stem, a firm root, a node that has not yet given up. That life is what you are working with when you follow these steps.
The process is straightforward. Observe before acting. Diagnose the specific cause based on what the plant is telling you through its symptoms. Fix the watering first. Inspect the roots. Remove dead material. Adjust the light.
Treat pests if present. Create a stable recovery environment. Then wait, and resist the urge to keep intervening once the right conditions are in place.
Plants recover on their own timeline, not ours. What they need from us is the right environment and the patience to let that environment do its work. Get the diagnosis right, apply the correct treatment, and give it time. Most plants will show you they are still fighting.

I started growing houseplants a little over 3 years ago with a single pothos cutting and a windowsill. Since then, my collection has grown to more than 40 plants (snake plants, ZZ plants, peace lilies, a couple of orchids). I’m still intimidated by, and one aloe that has survived three moves despite my best efforts to kill it.
I’m not a botanist or a certified horticulturist, I’m a hobbyist who’s made most of the beginner mistakes so you don’t have to: overwatering, underwatering, ignoring root rot until it was too late, and putting a sun-loving plant in the darkest corner of my apartment. HotBuzzes is where I share what I’ve actually learned from keeping plants alive (and occasionally failing), along with research from reliable sources to back it up.