
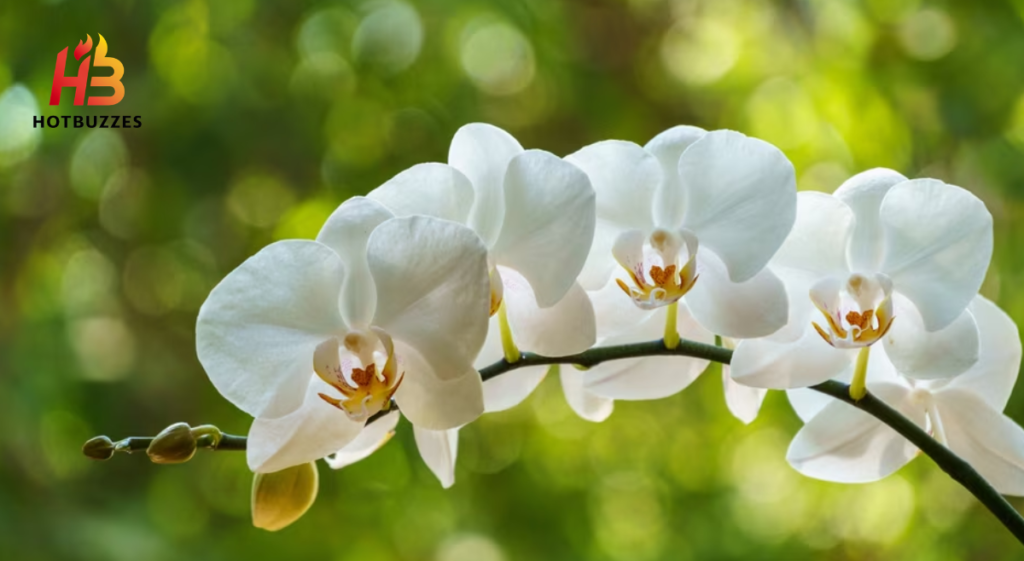
Most people who fail with orchids fail because of a single misconception: that orchids are fragile, demanding plants that require specialist knowledge, greenhouse conditions, and expensive equipment to keep alive. None of that is true for the orchids most commonly sold as houseplants.
The Phalaenopsis orchid, the moth orchid, is the plant you will find in supermarkets, garden centres, and gift shops around the world. It blooms for three to nine months at a stretch, asks for very little beyond the right potting mix and a sensible watering routine, and tolerates the warmth of centrally heated homes better than many standard houseplants.
The confusion comes from the scale of the orchid family itself. According to Blooming Expert’s March 2026 complete Phalaenopsis care guide, the Orchidaceae family contains over 28,000 species, one of the two largest flowering plant families on Earth.
Care advice written for a cool-growing Cymbidium is completely useless for a warm-growing Phalaenopsis, and what suits a Cattleya would stress a Paphiopedilum. Most generic orchid care articles blur these distinctions. This guide does not. Everything here is written specifically for the Phalaenopsis orchid that you almost certainly own or are about to buy.
The Biology That Explains Everything
Understanding what a Phalaenopsis orchid is at the biological level answers almost every care question. Blooming Expert explains that Phalaenopsis orchids are epiphytes. They are native to the tropical forests of Southeast Asia, the Philippines, and northern Australia.
In the wild
In the wild, they grow as epiphytes, perched on tree branches and rock surfaces, never in soil. Their thick, fleshy roots cling to bark and absorb moisture and nutrients from humid air and rainwater that trickles down the canopy. This epiphytic habit explains almost every care requirement that confuses new growers.
Wikipedia’s entry on Phalaenopsis confirms this: the genus was first formally described by the botanist Carl Ludwig Blume in 1825. The name comes from the Greek phalaina, meaning moth, because the flowers were thought to resemble moths or butterflies in flight. Wikipedia notes the genus contains approximately 70 species distributed across South and Southeast Asia, all sharing the same epiphytic or lithophytic growing habit.
Their epiphytic origin explains why orchids grow in bark instead of soil. It also explains why their roots turn green when wet and silver when dry. They prefer to dry out between waterings and need plenty of air around their roots. Every care rule follows from this biological fact. Orchids are not mysterious or demanding. They simply evolved in conditions very different from the ground-level soil environment most houseplants grow in.

Greg App’s Phalaenopsis care database adds a charming biological note: Phalaenopsis flowers evolved to attract pollinators, and their unique shape helps keep insects safe while collecting and dispersing pollen. The long bloom period that makes them so desirable as houseplants is a direct consequence of this pollinator-attraction strategy, the flowers must stay open long enough to achieve their biological purpose. Learn what tissue culture propagation is and how it helps produce healthy, disease-free plants.
Light: Reading the Leaves to Know If You Have It Right
Orchids need plenty of light but should be kept out of direct sunlight, which can burn their leaves and flowers. Like many tropical houseplants, they prefer bright, indirect light. Phalaenopsis orchids also give clear signs of whether they are receiving the right amount of light.
Leaf Reading
University of Maryland Extension’s Phalaenopsis care guide provides the most diagnostic leaf-reading guide available from a university source. Plants receiving the proper amount of light will have light green leaves. Low light conditions produce leaves that are dark green and feel very stiff. In very bright light, the leaves develop pink or reddish edges and turn yellow-green or nearly yellow.
This means the orchid’s leaves function as a built-in light meter. Dark, stiff, deep green leaves indicate light is too low, as the plant produces more chlorophyll to capture available light. Reddish or yellowish leaf margins tell you the light is too intense and the plant is experiencing sun stress. Soft, pale-to-medium green leaves tell you the light level is correct.
University of Maryland Extension recommends placing Phalaenopsis orchids in normal room temperatures with indirect light from an east- or west-facing window. During the shorter days of winter, they can be moved to a south-facing window or receive some direct sunlight. An east-facing window is often the best choice because it provides gentle morning light without the intense afternoon sun.
Soltech adds that orchids can grow in interior rooms or on office desks under a grow light. In spaces with little natural light, place the light within one or two feet of the plant. Run it for twelve to fourteen hours a day to provide the bright, indirect light needed for reliable blooming.
The Only Correct Way to Think About Watering
Watering is where most orchid deaths begin, and the mistake is always the same direction, too much, too often.The New York Botanical Garden’s research guide on Phalaenopsis gives the most authoritative practical guidance on watering technique. Place the plant in a sink and allow water to soak through and drain out completely.
Tepid Water
Use tepid water, it dissolves fertiliser salts and avoids shocking the roots. Bark potting mix initially repels water before becoming saturated, so water until the bark is genuinely saturated rather than stopping when the surface looks wet. Do not let the plant sit in a dish of runoff water. Gently dry any water that has splashed on the leaves or stems to avoid rot.
NYBG also gives one of the most specific anti-ice-cube recommendations from any authoritative source: do not water your orchid using ice cubes. This method, popular in some retail plant care cards, causes temperature shock to tropical roots and produces uneven watering that creates shallow root growth. The convenience of ice cubes does not outweigh the care damage they cause.
Soltech describes an alternative watering method that works well for beginners: water generously and allow the roots to soak in the water collected by a tray for fifteen to twenty minutes, then remove the pot and allow it to drain completely. This bottom-watering approach ensures thorough saturation of the bark medium without leaving the roots sitting in standing water indefinitely.
The frequency guidance from The Sill’s orchid care guide is practical and memorable: water every one to two weeks, allowing the potting medium to dry out between waterings. Expect to water more often in brighter light and less often in lower light. If you are unsure whether the orchid is ready, Soltech gives the most reassuring rule a beginner can adopt: if you are not sure if your orchid is ready for its next watering, wait a day to be safe. Overwatering kills orchids. Waiting one extra day rarely does.
University of Maryland Extension adds an important note specific to Phalaenopsis biology: unlike many orchid genera, Phalaenopsis do not have water-storage pseudobulbs. This means they cannot buffer against water stress the way Cymbidium or Oncidium orchids can. Low humidity and too little water will result in wrinkled leaves, a specific symptom that is diagnosable before permanent damage sets in.
Potting Medium: Why Bark and Not Soil
This is the most common mistake beginners make when repotting an orchid. They use regular potting soil because it is readily available. Soil kills orchids, and often quickly. Blooming Expert explains why: Phalaenopsis orchids are epiphytes. Their roots grow on bark in open air and need oxygen as much as moisture.
Standard potting soil compacts around the roots and blocks airflow. This creates oxygen-poor conditions and causes root rot within weeks. Orchid roots are adapted to dry between waterings and receive constant air circulation.
OrchidWeb’s care guide recommends a light, porous medium capable of holding moisture while draining thoroughly upon watering. Fine to medium-grade fir bark is the standard choice and is available at most garden centres specifically labelled for orchids. Bark provides the combination of moisture retention and airflow that epiphytic roots evolved to expect.
The Sill notes that smaller orchids are initially potted in either coco plug or sphagnum moss. Sphagnum moss retains more moisture than bark and suits drier home environments where bark dries too quickly between waterings.
The pot itself matters as much as the medium. NYBG confirms clear plastic pots as the most practical choice because they allow root monitoring without disturbing the plant. Terracotta pots dry bark faster because of their porous walls. This is an advantage in humid homes but a disadvantage in dry ones. Whatever pot is used, drainage holes are non-negotiable.

Temperature: The Day-Night Differential That Triggers Blooming
Temperature management for Phalaenopsis orchids is more nuanced than most houseplant guides acknowledge, and understanding the day-night temperature differential is the key to triggering reliable reblooming.
OrchidWeb gives the daytime and nighttime targets clearly: Phalaenopsis do best in intermediate to warm conditions, preferring daytime temperatures of 70 to 80 degrees Fahrenheit (21 to 27 degrees Celsius) and nighttime temperatures of 60 to 65 degrees Fahrenheit (16 to 18 degrees Celsius). Since this temperature range is similar to that of many homes, Phalaenopsis make ideal houseplants without requiring any temperature adjustment in most cases.
The New York Botanical Garden provides the most specific reblooming guidance available from a botanical institution: in nature, orchids experience a ten-degree Fahrenheit temperature difference between day and night. This differential is important when trying to initiate flowering, particularly in autumn when several weeks of 55 degrees Fahrenheit night temperatures are helpful. After about two weeks of cooler nights, a vigorous plant will initiate a new flower spike that lengthens slowly, and buds will emerge a few months later.
This is the single most important piece of information for anyone whose orchid has finished blooming and is not producing a new spike. The temperature drop trick is the most reliable reblooming trigger available, and it requires no special equipment, just moving the plant to a cooler room or near a slightly drafty window for two to three weeks in autumn.
The Sill gives the full temperature tolerance range: an average home temperature of 65 to 75 degrees Fahrenheit is ideal. The plant can tolerate as low as 55 degrees Fahrenheit and as high as 85 degrees Fahrenheit. This wide tolerance explains why Phalaenopsis succeeds in so many different home environments without requiring specialist temperature control.
Humidity: What the Numbers Actually Mean in Practice
Humidity is one of the most frequently misunderstood aspects of orchid care, partly because the recommended levels sound intimidating and partly because most people have no practical sense of what 50 to 70 percent humidity feels like in a room. Find out which rare houseplants are trending in 2026 and why collectors love them.
OrchidWeb confirms the target: Phalaenopsis thrive under high humidity and benefits from humidity levels between 50 and 70 percent. This can be achieved at home with a humidifier or a humidity tray. The critical instruction is always the same: make sure the plant is not standing in water, or the roots will rot.
The Sill gives the more accessible real-world version of this: while orchids can tolerate normal room humidity, Phalaenopsis do not like dry air. Keep humidity anywhere from 40 to 70 percent. During fall or winter, boost humidity with a humidifier or wet pebble tray.
The practical interpretation for most home environments: 40 percent is acceptable, and the orchid will survive. Above 50 percent is where it genuinely thrives. The leaves are plumper, the roots are healthier, and the bloom period tends to extend at higher humidity. A small, inexpensive hygrometer placed near the plant tells you exactly where your home sits and whether any additional humidity measures are needed.
University of Maryland Extension explains that Phalaenopsis orchids do not have pseudobulbs for storing water. They rely on consistent ambient humidity to supplement the moisture their roots absorb from the potting medium.
Low humidity combined with too little watering produces the wrinkled leaves that indicate the plant is running a moisture deficit. Wrinkled leaves recover when conditions are corrected, but repeated episodes cause cumulative stress that reduces blooming performance.
Feeding: The Rule That Every Orchid Source Agrees On
The rule for fertilising orchids is simple: feed weakly, weekly. The New York Botanical Garden popularised this advice and explains why. Orchid potting mixes contain very few nutrients, so fertiliser replaces what the plant would naturally absorb from decomposing organic matter in its native habitat.
The recommendation is a balanced, powdered fertiliser at one-quarter of the recommended strength on the label, applied every time or every other time you water.
Blooming Expert describes fertilising diluted to quarter-strength applied with every watering as one of the most impactful care habits for keeping Phalaenopsis healthy and blooming. The reason for such diluted feeding is that orchid roots, evolved to absorb from rain and humid air rather than nutrient-rich soil, are sensitive to fertiliser salt concentrations that most other houseplants handle without any issue.
OrchidWeb lists over-fertilising as one of the common care causes of bud drop, the frustrating situation where flower buds form but fall off the plant before opening. This is the most visible consequence of feeding at too high a concentration, and it is the reason the quarter-strength rule is non-negotiable rather than a suggestion.
The practical routine that works for most beginners: use a balanced liquid orchid fertiliser mixed to one quarter of the packet-recommended strength and apply it every second watering during the growing season, spring through summer. Reduce to once a month in autumn and winter when growth slows naturally.
After the Flowers Fall: What Happens to the Spike
This is the moment that confuses most new orchid owners. The flowers fade and fall. The long green spike that held them remains. What do you do with it?
New York Botanical Garden gives specific guidance: check that your orchid has generous humidity and a ten-degree temperature differential between day and night, and review the plant’s light and nutrition requirements. A plant that flowers multiple times from a spike in a single season may lose vigour, meaning leaving the spike to continue producing secondary flower clusters repeatedly can weaken the plant over time.
The two main options are trimming the spike to just above a visible node, the small bump on the stem, which sometimes triggers a secondary flower cluster from that node within a few months, or cutting the spike down to the base of the plant to allow the plant to direct all energy toward root and leaf development before producing a completely new spike.
Soltech notes that a Phalaenopsis presents flowers for at least three and up to nine months, which means the post-bloom period is genuinely brief relative to the flowering period. The most reliable approach for beginners is cutting the spike to the base after flowering ends, optimising care conditions, and allowing the plant to initiate a new spike naturally, which typically takes six to twelve months from the base with the temperature drop trick applied in autumn.
When a new spike emerges, it looks like a small green nub with a pointed tip emerging from between the leaves near the base, keep the plant in a stable position. Moving an orchid with a developing spike causes it to bend toward the new light source, producing a crooked spike rather than the elegant arching display that makes Phalaenopsis so visually appealing.

Bud Drop: Why It Happens and How to Prevent It
Bud drop is the most frustrating thing that happens to new orchid owners. Buds form, grow, plump up, and then drop off the plant before ever opening. Understanding the causes allows you to prevent almost all of them.
OrchidWeb lists the complete set of causes. Care-related causes include overwatering, underwatering, use of softened water (which contains salts that damage roots), and over-fertilising. Environmental causes include temperatures reaching too high, light levels staying too low, spikes being subjected to a cold draft, and fume exposure from household chemicals, including paint, cleaning products, and ethylene gas from ripening fruit placed nearby.
The ethylene gas point is particularly surprising and worth noting specifically. Ripening fruit, apples, bananas, and pears produce ethylene naturally, causes orchid buds to drop when placed nearby. Keeping a fruit bowl near a flowering orchid is enough to trigger bud drop within days. Moving the plant to a different room from the ripening produce solves this immediately.
The draft point is also underappreciated. A flower spike developing in the path of an air conditioning vent, heating duct, or cold draught from a window will drop its buds even when every other care factor is perfect. Stability of temperature and airflow around a developing spike is as important as the temperature itself.
FAQs
Q1: My orchid has not bloomed in over a year. What is wrong?
The most common cause is insufficient light or the absence of the day-night temperature differential needed to trigger a new spike. NYBG recommends moving the plant to a brighter position and ensuring it experiences a ten-degree Fahrenheit temperature drop at night for two to three weeks in autumn. A vigorous plant will initiate a new flower spike within weeks of this temperature treatment.
Q2: My orchid’s roots are coming out of the top of the pot. Is this a problem?
No. Aerial roots that grow outside the potting medium and into the air, are completely normal for epiphytic orchids. Blooming Expert confirms they are a natural feature of epiphytic root systems and do not indicate the plant is unhealthy. Do not cut them off or push them back into the bark. They absorb moisture and oxygen from the surrounding air exactly as they would in the wild.
Q3: How do I know when to water my orchid?
Check the roots through the clear pot. Soltech confirms that silver-grey roots indicate the plant is ready for water. Green roots indicate the medium is still moist. If in doubt, wait one more day. Overwatering is the most common cause of orchid decline, and waiting an extra day causes no harm.
Conclusion
The Phalaenopsis orchid succeeds best when the grower stops thinking of it as a mysterious or demanding plant and starts thinking of it as what it actually is: a tropical epiphyte that evolved on tree bark in a warm, bright, humid forest.
Replicate those conditions simply and consistently, bright indirect light from an east window, watering when the roots turn silver, a bark medium that dries between waterings, stable warmth with a slight nighttime cool down, and feeding at quarter strength, and the plant does the rest.
The blooms it produces last longer than almost any other flowering houseplant. The care it asks for in return is genuinely modest. And the satisfaction of watching a new spike emerge and slowly unfurl into a cascade of flowers that were triggered by your own understanding of what the plant needed is one of the more rewarding experiences available in houseplant growing.
Orchids are not difficult. They are specific. Learn the specifics, and they become one of the easiest and most rewarding plants you will ever grow.

Ajwa Asif is a writer with a passion for plants, gardening, and creating educational content. She researches plant-related topics using reputable horticultural resources and shares practical advice to help readers grow healthier plants and build confidence in their gardening journey. Her content focuses on delivering clear, reliable, and user-focused information.