
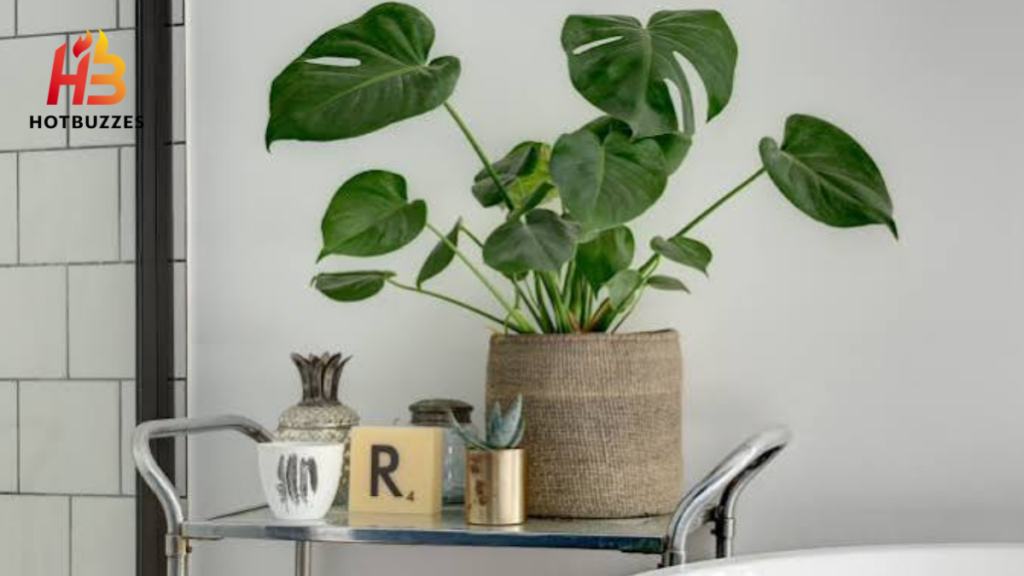
Monstera deliciosa is widely known as the Swiss cheese plant. It gets this name from its distinctive split leaves. It is one of the most commonly propagated houseplants. A single healthy stem can produce several new plants. Each one carries the same fenestrated foliage that made the parent plant so popular in the first place. Unlike some finicky houseplants, monstera roots readily from a stem cutting. However, one specific structure, the node, must be present on the piece being propagated. This makes it a far more forgiving subject for a first attempt at propagation than many other popular houseplant species.
This guide covers every major propagation method for monstera. It includes simple water propagation and air layering directly on the parent plant. It also covers node biology, timing, aftercare, and the specific problems that tend to derail a first attempt. A side-by-side comparison table is included as well. The guide also covers research-backed facts about node biology and fenestration.
Understanding Monstera Node Biology
Before cutting anything, it helps to understand exactly what makes a piece of monstera stem capable of becoming a new plant, since this single piece of biology underlies every method covered later in this guide.
What a Node Actually Is
A node is a growth point on a plant stem where leaves, buds, or branches emerge, and it is the only part of a monstera stem capable of producing new roots, according to Brittany Goldwyn’s propagation guide. Cutting a stem section without including at least one node results in a piece that simply cannot root. This remains true no matter how long it sits in water or soil. The node itself is the only source of the specialized tissue capable of generating new growth. No amount of extra care or attention can substitute for its presence.
Why Aerial Roots Matter but Are Not Required
Aerial roots are thick, brown, finger-like growths that emerge from a monstera’s nodes as it climbs in the wild. They can help but do not replace the node itself, according to LeafyPixels’ propagation guide. UConn Extension recommends taking cuttings that include these aerial roots when present. A cutting with an aerial root already attached generally roots somewhat faster than one without. However, a node alone can still produce new roots. This is true even without a visible aerial root.
Respecting Cutting Polarity
A cutting must be oriented the same way it grew originally, with the node facing down, since a piece planted or submerged upside down will not root, according to Plant Care Basics’ propagation guide. This rule is called polarity and is non-negotiable. Losing track of which end originally faced downward is a surprisingly easy mistake to make once a stem has been cut into several pieces. Marking the bottom of each cutting immediately after cutting is worth the extra few seconds it takes.
When to Take a Monstera Cutting
Timing affects how quickly and reliably a monstera cutting roots, and a few factors are worth considering before making the first cut, since the same technique applied at the wrong time of year can take twice as long to show results.
Best Season for Propagation
The best time to propagate monstera deliciosa cuttings is during its active growing season, spring and summer, according to ByBrittanyGoldwyn’s propagation guide. Warmer temperatures and longer daylight hours during this period support faster rooting. Cuttings taken during the cooler, more dormant fall and winter months generally take noticeably longer to root. This is true even when they are kept in a warm indoor spot.

How Much to Take From a Single Plant
As a general rule, never remove more than 25 to 30 percent of a plant’s foliage at once, according to Monstera Expert’s propagation guide. A mature monstera could potentially provide three to five viable cuttings and remain healthy. Allow the parent plant to recover for three to six months before taking additional cuttings. This gives it time to regrow the foliage and energy reserves lost during the previous propagation session.
Water Propagation
Water propagation is the most commonly used method for monstera, largely because it makes the rooting process easy to observe and requires no special materials beyond a plain glass jar already sitting in most kitchen cabinets.
Setting Up the Water Method
The cutting is placed in a jar of water. The water should be deep enough to submerge the node and any attached aerial roots. Keep every leaf above the water’s surface, according to Plant Care Basics. Larger monstera cuttings can be top-heavy. Use a heavier vase or stake the cutting with a soft tie to prevent a small jar from tipping over. UConn Extension echoes this recommendation via LeafyPixels’ propagation guide.
Maintaining Water Quality
Replacing the water every three to four days prevents bacterial and fungal growth, according to Rosy Soil’s propagation guide. Change it sooner if the water appears cloudy. This helps avoid stressing the developing roots. Filtered water is generally preferred over untreated tap water. Heavy chlorination or mineral content can occasionally slow root development in sensitive cuttings.
Rooting Timeline and Transition to Soil
Roots typically take about two to four weeks to form in warm, bright conditions, according to UMN Extension via LeafyPixels’ propagation guide. Cool winter rooms can extend this timeline considerably. Once roots reach roughly two to three inches long with some secondary branching, the cutting is ready to move into soil, according to LeafyPixels. Water-rooted cuttings tend to have a somewhat weaker root structure than those rooted directly in a solid medium. A gentle transition into soil is important at this stage.
Soil Propagation
Rooting a monstera cutting directly in soil skips the water stage entirely and can produce a sturdier root system from the outset.
Planting the Cutting
The cutting is planted in well-draining soil with at least one node positioned beneath the soil surface, according to Rosy Soil’s propagation guide. Keep the soil consistently moist while the roots establish. Water from the top and let any excess drain freely out of the pot. Avoid letting water sit and pool at the bottom. This helps prevent waterlogged conditions that can cause a newly planted cutting to rot before it has a chance to root.
Adjusting Watering Once Established
Once the cutting has settled in and begun producing new growth, watering can shift to a more typical monstera schedule, according to Rosy Soil. Allow the top one to two inches of soil to dry out between waterings. New leaf growth may take some time to appear even after roots have formed. The plant is still adjusting to drawing water and nutrients through soil rather than directly from a jar of standing water. Discover the best way to propagate Philodendron cuttings for strong roots and healthy new growth.
Sphagnum Moss Propagation
Sphagnum moss propagation offers a middle ground between the visibility of water propagation and the sturdier roots typical of soil propagation.
Preparing the Moss
Lightly damp sphagnum moss, sometimes mixed with perlite, is used to nestle the cutting’s node, according to ByBrittanyGoldwyn’s propagation guide. Keep humidity high around the cutting with a loosely placed plastic bag. The moss should feel moist but never dripping wet. Overly saturated moss increases the risk of rot at the node, much like overly wet soil would.
Monitoring and Maintaining Moisture
Checking the moss’s moisture level about twice a week helps keep conditions steady, according to Rosy Soil’s propagation guide. Re-moisten it with a spray bottle whenever it begins to feel dry. Moss holds moisture more evenly than loose soil. It also allows more airflow than standing water. This makes it a reasonable middle-ground choice for a plant parent who has struggled with rot in water or dryness in soil during previous attempts.
Propagation Methods Compared
The table below summarizes the core differences between the main monstera propagation methods covered in this guide.
| Method | Rooting Time | Risk of Rot | Ease of Monitoring | Root Strength |
|---|---|---|---|---|
| Water | 2 to 4 weeks | Moderate, if water is not changed regularly | Very easy, roots visible | Weaker, needs gentle transition to soil |
| Soil | 2 to 4 weeks, often slightly longer to confirm | Low to moderate, if overwatered | Difficult, roots hidden underground | Strong, already adapted to soil |
| Sphagnum moss | 2 to 4 weeks | Low, if moss moisture is properly managed | Moderate, requires unwrapping to check | Moderate to strong |
| Air layering | Weeks to a few months while attached | Very low | Easy, visible through moss wrap | Strongest, plant supports growth |
Air Layering
Air layering is widely regarded as the safest and most reliable monstera propagation method. The cutting continues drawing resources from the parent plant while it develops roots. This makes it a favorite among growers working with a plant they cannot afford to lose.
Why Air Layering Works So Well
Air layering allows a cutting to grow roots while still attached to the parent plant. It removes the unrooted phase of propagation entirely. This gives the cutting the best possible chance to succeed, according to Monstera Guide’s propagation overview. The guide describes this method as having a very low chance of rot. It also has a very low chance of leaf or node loss compared to other methods.
The Air Layering Process
Make a cut below a node on the stem. Wrap moist sphagnum moss around the node, incision, and any nearby aerial root. Secure the moss with plastic wrap and twist ties, as recommended by Leaf and Paw’s step-by-step guide. Unwrap the moss bundle every few days and re-moisten it with a spray bottle. Roots typically begin developing from the node within a couple of months. Once roots form, cut the stem free from the parent plant at the original incision point. Then, pot the new cutting in soil on its own.
Limitations of Air Layering
According to Monstera Guide, air layering does not work for top cuttings that lack aerial roots. It also cannot rehabilitate an existing rootless cutting or an entire rootless plant. This method requires a node to remain attached to a living, established plant. Therefore, you cannot use air layering on a cutting that you have already separated from its parent plant.
Rooting a Leafless Node Segment
For anyone wanting to maximize the number of new plants from a single stem, monstera can be propagated from just a node segment without any leaves attached, sometimes called a wet stick in the plant community.
Why This Method Is More Advanced
This approach is riskier and slower than propagating a full leafy cutting, according to Monstera Expert’s propagation guide. A leafless node has no foliage to photosynthesize. It cannot support its own growth while roots are developing. It remains popular among experienced growers. A single mature stem can be divided into considerably more individual propagation attempts. This is possible because you can cut the stem at points without full leaves.
The Process
A section of stem containing at least one healthy node is placed in sphagnum moss or perlite and kept consistently moist, according to Monstera Expert. A propagation box, clear plastic bag, or humidity dome can maintain elevated humidity around the bare node. Patience matters more with this method than with a leafy cutting. A wet stick has no visible sign of progress. It has no wilting leaf to signal distress. It also has no healthy leaf to signal success. You must wait until roots and eventually a new shoot begin to emerge.
Propagation by Division
Division is technically less a propagation method than a way of splitting an already multi-stemmed plant into separate pots.
When Division Applies
Division can be done only if multiple plants are growing together in a single pot. This is common with monstera purchased from big-box stores or nurseries. These plants often pack several individual plants into one container to create a fuller-looking display, according to ByBrittanyGoldwyn’s propagation guide. Remove the entire root ball and gently separate the individual plants at the root level. Then, pot each one separately. This produces multiple full-sized plants far faster than any cutting-based method. Each division already has its own established root system.
Handling the Root Separation
The roots of multiple monstera plants grown together in the same pot are often somewhat tangled. Separating them carefully matters here. Avoid tearing away large sections of healthy root tissue. Rinsing the combined root ball with water makes the tangled roots easier to see. It also makes them easier to separate cleanly compared to working through soil-caked roots.
Aftercare for Newly Rooted Cuttings
A cutting needs a solid root system before ongoing care begins. This applies to cuttings propagated through water, soil, moss, or air layering. After rooting, its care is similar to that of a mature monstera. Only a few adjustments are needed to support its developing roots.
Light Requirements
According to Monstera Expert’s propagation guide, Monsteras thrive in bright, indirect light. Morning sun is usually fine, but protect the plant from harsh, direct afternoon rays. Keep a newly potted cutting slightly farther from intense light than a fully established plant. Its developing root system cannot yet support the higher water demands that strong light places on the leaves.
Gradual Watering Adjustments
According to Monstera Expert, gradually shift an established cutting to a normal watering routine. Let the top one to two inches of soil dry out between waterings, as you would with a mature Monstera. Avoid rushing this transition or continuing heavy watering from the initial rooting phase. These practices can cause root rot shortly after you pot up the cutting.
Providing Support Early
Monstera is a natural climber. Giving a young, newly potted cutting a small stake or moss pole encourages upright, supported growth. This can eventually lead to larger, more mature foliage. Waiting until a plant becomes large and top-heavy can require more careful handling. Training a smaller, more flexible plant onto a stake early on is easier.

Common Propagation Problems and Fixes
A handful of recurring issues account for most failed monstera propagation attempts. Recognizing them early can make a real difference in the overall success rate. A small adjustment can often turn what looks like a failed cut into a successful one.
Cuttings Without a Node
A cutting without a node simply cannot root. This applies regardless of the method used. It will not root in water, soil, or moss. Always check for a visible node before making a cut. This is the best way to avoid wasting a healthy piece of stem on a cutting that cannot succeed.
Rot at the Cut or Node
Water that is not changed regularly can encourage bacterial and fungal growth. Excessively wet soil and moss can do the same. These conditions can rot a cutting’s node before roots have a chance to form, according to Rosy Soil’s propagation guide. Trim away any soft, discolored, or foul-smelling tissue if rot has already taken hold. Start fresh with clean water or a moist, not soaked, medium. Rotted node tissue does not recover on its own.
Top Heavy or Tipping Cuttings
Larger monstera cuttings can be top-heavy. This is especially true for cuttings with a full-sized leaf attached. They can tip a small water jar or newly potted container, according to LeafyPixels’ propagation guide. Use a heavier vase to keep the cutting upright. A soft tie and stake can also help while it roots. Addressing this early is much easier. It prevents the cutting from falling over and damaging its developing roots.
Slow or Stalled Rooting
Short days and cooler temperatures slow rooting considerably. They do not necessarily stop it altogether, according to Plant Care Basics’ propagation guide. A grow light run for twelve to fourteen hours a day can help. It can offset the slower rooting typical of the lower light months. Before assuming a cutting has failed, check that the node is still firm. If it is not mushy, allow more time under warmer, brighter conditions. This often resolves what initially looks like a stalled attempt.
Research-Based Facts About Monstera Propagation and Fenestration
Beyond the practical propagation steps, a few documented facts explain the underlying biology that shapes how monstera grows, both during propagation and long after a cutting has become an established plant in its own right. Learn why your cuttings may fail to root and how to prevent common propagation mistakes.
Fenestration Is Determined at Leaf Initiation
A leaf’s fenestration pattern, the splits and holes that give monstera its Swiss cheese appearance, is fixed at the moment the leaf is initiated within the growth point, not after it unfurls, according to Alibaba’s science-backed fenestration guide. This means a solid, unfenestrated leaf that has already unfurled will never develop additional holes later, and any changes in care only affect the fenestration pattern of leaves that have not yet emerged.
Why Propagated Cuttings Often Regress to Juvenile Leaves
When environmental conditions change, such as when a cutting is separated from its parent plant, a monstera can regress and begin producing less mature, less fenestrated leaves for a stretch before eventually returning to its previous pattern, according to Planet Houseplant’s fenestration guide. This is a normal, temporary response to the stress of propagation rather than a sign that something has gone wrong, and most cuttings gradually resume producing more mature, fenestrated leaves once they are well established in their new pot.
The Hormonal Basis of Fenestration
Juvenile monstera lack the specific gigibberellin-to-cytokininormone ratio needed to trigger the genes responsible for fenestration, and this hormonal shift typically occurs only after two to four years of healthy growth, depending on the specific cultivar and growing conditions, according to Alibaba’s fenestrated plants guide. This explains why even a perfectly healthy, well-cared-for young cutting will reliably produce solid, heart-shaped leaves for a period of time before any splits or holes begin to appear, regardless of how ideal its light and care conditions happen to be.
How Fenestration Relates to Propagation Timing
Understanding the connection between fenestration and plant maturity helps set realistic expectations for anyone propagating monstera specifically to grow a large, fully fenestrated specimen.
Node Count and Fenestration Onset
Most monstera specimens begin fenestrating reliably after six to eight fully expanded leaves have developed on a single vine, provided light and other conditions are optimal, according to Alibaba’s fenestrated plants guide. A propagated cutting essentially restarts part of this developmental clock, particularly if it was taken from a very young section of the parent plant, which is part of why a freshly rooted cutting often produces several rounds of smaller, less fenestrated leaves before its foliage begins to resemble the mature parent plant it came from.
Light’s Role in Supporting Fenestration
Consistent fenestration in an already mature monstera generally requires a photosynthetic photon flux density of around 250 micromoles per square meter per second or higher, according to Alibaba’s fenestrated plants guide, with solid leaves dominating below roughly 150 micromoles per square meter per second. While most home growers do not measure light in these precise scientific units, the practical takeaway is that a propagated cutting kept in a dim corner is likely to produce noticeably slower, less fenestrated growth than the same cutting placed in a bright, well-lit spot, even once it has otherwise rooted successfully.
Choosing the Right Method for a Given Situation
With several viable propagation methods available, matching the specific method to a grower’s circumstances and goals makes the entire process considerably smoother.
For Beginners Learning Node Anatomy
Water propagation offers easy monitoring and requires minimal supplies, making it a particularly good fit for a first-time propagator who is still learning to identify nodes and judge root development, according to LeafyPixels’ propagation guide. The visible, easily checked root growth also provides useful, immediate feedback that helps build confidence before moving on to less visually monitored methods like soil or air layering.
For Preserving a Particularly Valuable Plant
Air layering carries the lowest risk of rot and node loss of any method covered in this guide, which makes it the preferred choice when propagating a rare or particularly valuable monstera cultivar, according to Monstera Guide’s propagation overview. Because the cutting remains attached to and supported by the parent plant throughout the rooting process, this method essentially removes the single riskiest phase of propagation before the new plant is ever separated on its own.
For Maximizing Cuttings From a Single Stem
Leafless node segment propagation, while more advanced and slower than other methods, allows the greatest number of individual propagation attempts from a single stem, according to Monstera Expert’s propagation guide, which makes it a useful option for anyone specifically trying to generate as many new plants as possible from a limited amount of available cutting material.
Tools and Supplies for Propagation
Gathering the right materials before making the first cut keeps the process smooth from start to finish. Choosing the right propagation method can make rooting easier, so compare water and soil propagation before you start.
Cutting Tools
A pair of clean, sharp pruning shears or scissors is essential, since a dull or dirty blade can crush stem tissue rather than make a clean cut, increasing the risk of infection at the wound site. Wiping the blade with rubbing alcohol before and between cuts, especially when taking multiple cuttings from the same or different plants, helps prevent transferring bacteria or fungal spores from one cut to another.
Rooting Containers and Mediums
Clear glass jars work well for water propagation, since they make root development easy to monitor without needing to disturb the cutting, while small pots with drainage holes suit soil propagation. Sphagnum moss, perlite, and a well-draining aroid soil mix, combining ingredients like bark, peat, and perlite, cover the medium needs for the other propagation methods described throughout this guide.

Optional Helpful Extras
A spray bottle makes re-moistening sphagnum moss considerably easier than pouring water directly from a container, and a humidity dome or simple clear plastic bag can help maintain elevated humidity around moss-wrapped cuttings or leafless node segments. A moss pole or stake, while not strictly necessary during the rooting phase itself, is worth having on hand once the cutting is potted, since introducing support early makes for easier long-term training than waiting until the plant has grown large and unwieldy.
SAP Safety and Handling Precautions
Monstera sap contains calcium oxalate crystals that can cause mild to moderate skin and mouth irritation, which is worth keeping in mind throughout the propagation process.
Handling Cuttings Safely
Wearing gloves while making cuts and handling fresh cutting material reduces the risk of skin irritation for anyone with sensitive skin, and washing hands thoroughly after handling cuttings is a reasonable precaution even without gloves. Keeping cutting tools and fresh cuttings away from small children and pets during the propagation process avoids any risk of an accidental taste test on a plant that, while not highly toxic, can still cause genuine discomfort if chewed or ingested.
Treating Pests Before Propagating
Any pest infestation present on the parent plant, such as spider mites or mealybugs, should be treated before taking cuttings, since propagating from an infested plant simply copies the same pest problem into every new jar or pot, according to LeafyPixels’ propagation guide. Inspecting the stem and underside of leaves closely before cutting, rather than assuming a plant is pest-free just because no obvious damage is visible, helps avoid this particular setback before it starts.
Propagating Different Monstera Species
While this guide focuses primarily on Monstera deliciosa, several related species and cultivars share the same general node-based propagation approach with a few notable adjustments.
Monstera Adansonii
Monstera adansonii follows the same basic node rule as deliciosa, but its stems are noticeably thinner and dehydrate faster, according to LeafyPixels’ propagation guide, which means cuttings of this species benefit from slightly closer attention to moisture levels during the rooting phase compared to the thicker, more forgiving stems of deliciosa. Its smaller size overall also makes it a popular choice for growers with limited space who still want to practice the same propagation techniques on a more compact plant.
Variegated Cultivars
Non-fenestrating or slow-fenestrating cultivars like ‘Albo Variegata’ and ‘Thai Constellation’ follow the same developmental rules as standard green monstera, but their reduced chlorophyll density from variegation means they often require even more light to trigger fenestration and may ultimately produce smaller or fewer holes than an equivalent green plant, according to Alibaba’s fenestration guide. Propagating a variegated cutting also carries an additional consideration beyond node placement, since the variegation pattern on the resulting new plant depends heavily on which section of the parent stem’s tissue the cutting was taken from.
Post-Propagation Growth Milestones
Knowing what to expect in the weeks and months after a cutting has successfully rooted helps set realistic expectations for how quickly a propagated monstera will start to resemble a mature plant.
The First New Leaf
The first new leaf to emerge after a cutting has rooted and been potted is often smaller and simpler than the leaves the cutting originally had, reflecting both the plant’s juvenile growth phase and the stress of the propagation process itself. This is a normal part of establishment rather than a sign of a problem, and subsequent leaves typically increase in size and complexity as the young plant settles into its new pot.
Building Toward Fenestration
As covered in the research section above, most propagated cuttings need to develop several fully expanded leaves before fenestration reliably begins appearing, which in practice often means a year or more of steady growth under bright, indirect light before a propagated cutting starts producing the deeply split leaves associated with a mature monstera. Providing consistent care during this stretch, rather than expecting immediate results, is what ultimately determines how quickly a young cutting transitions into a fully fenestrated specimen.
Fertilizing Cuttings During and After Propagation
How and when to introduce fertilizer is a common source of confusion for anyone propagating monstera for the first time.
Why Fertilizer Should Wait
A fresh cutting relies on the energy already stored in its stem and leaves rather than needing external feeding while it develops its first roots, and introducing fertilizer too early can actually stress a cutting that has no functioning root system yet to process the added nutrients. Holding off on any fertilizer until a cutting has visibly rooted and begun producing new growth avoids adding an unnecessary stressor during the most vulnerable early stage of propagation.
Introducing Fertilizer Once Established
Once a cutting has been potted into soil and is showing signs of active new growth, a diluted, balanced liquid fertilizer applied once every four to six weeks during the growing season supports the transition from a small, newly rooted cutting into an established plant. Skipping fertilizer entirely during the slower fall and winter months and resuming only once the plant shows renewed active growth in spring mirrors the same seasonal feeding pattern recommended for mature monstera plants generally.
Repotting a Propagated Monstera as It Grows
A newly rooted cutting will not stay in its starter pot indefinitely, and knowing when and how to size up avoids both premature repotting and the opposite problem of leaving a plant root-bound for too long.
Signs a Young Plant Needs a Larger Pot
Roots visibly emerging from the drainage holes, or noticeably slower growth despite otherwise good light and watering, both suggest a propagated monstera has outgrown its current pot and would benefit from being moved to a slightly larger container. Moving up only one to two inches in pot diameter at a time, rather than jumping to a dramatically larger pot all at once, helps avoid the excess soil moisture retention that an oversized container can create around a still-developing root system.
Choosing the Right Soil for Repotting
A chunky aroid mix, generally combining bark, peat, and perlite in roughly equal parts, suits monstera at every growth stage from a newly rooted cutting through a large, mature specimen, according to Plant Care Basics’ propagation guide. A simple squeeze test, pressing a damp handful of the mix together to check whether it holds a loose clump rather than compacting into a dense, clay-like ball, offers a quick way to confirm a soil mix has the right balance of moisture retention and drainage before potting a young plant into it.
Training a Propagated Monstera to Climb
Because monstera is naturally a climbing vine, training a young, propagated plant onto a support structure early shapes how it grows for years to come.
Why Vertical Growth Matters for Leaf Size and Fenestration
Vertical growth against a support, closely mimicking how monstera climbs tree trunks in its native habitat, is one of the environmental cues linked to the plant transitioning into its mature, more fenestrated growth phase, according to multiple fenestration sources referenced throughout this guide. A monstera left to sprawl along the ground or trail without any support tends to produce smaller, less developed leaves than the same plant trained to climb, even under otherwise identical light and care conditions.
Introducing a Moss Pole Early
Sinking a moss pole into the pot at the time of repotting, rather than waiting until the plant has grown large and top-heavy, makes the initial staking process considerably easier, since a smaller plant’s stem is more flexible and easier to gently tie into place. Attaching only the thicker, more established stems to the pole with a soft tie, while allowing aerial roots to naturally find their way into the damp moss surface on their own, encourages the plant to anchor itself onto the support structure much the way it would attach to a tree trunk in the wild.
Comparing Monstera Propagation to Other Common Houseplants
Understanding how monstera propagation compares to other popular houseplants highlights why it has such a strong reputation as a relatively easy plant to multiply.
Faster and Slower Rooting Comparisons
Plants like pothos and philodendron often root in water within one to two weeks, somewhat faster than the typical two- to four-week window for monstera, while other aroids and larger foliage plants can take considerably longer. Monstera sits in a comfortable middle ground, rooting reliably within a predictable timeframe without requiring the specialized conditions some slower-rooting or more delicate species demand.
Why Monstera Is Considered Beginner-Friendly Despite Its Size
Despite producing large, sometimes unwieldy cuttings, monstera’s forgiving node biology, straightforward polarity rule, and tolerance for several different propagation mediums make it accessible even to someone who has never successfully propagated a houseplant before. This combination of a visually rewarding result, the dramatic split that many people specifically want more of, and a genuinely beginner-friendly process helps explain why monstera propagation content remains so consistently popular across plant care communities and social media.
Gifting and Sharing Propagated Monstera
Because a single monstera plant can yield several viable cuttings, propagation naturally lends itself to sharing plants with others.
Preparing a Cutting as a Gift
A rooted cutting, already showing a couple of inches of healthy root growth, makes a considerably more reliable gift than an unrooted stem section, since the recipient does not need to manage the riskiest early rooting phase themselves. Including a brief note on the specific propagation method used, along with the general light and watering needs a young monstera has, helps a recipient unfamiliar with the plant get off to a confident start.
Trading Cuttings With Other Growers
Plant swap groups, whether in person or through online plant communities, have become a popular way for monstera owners to trade cuttings of different cultivars without needing to purchase an entirely new plant. Because monstera cuttings are relatively hardy compared to more delicate houseplant cuttings, they generally tolerate a day or two of transit inside a slightly damp paper towel and a sealed bag reasonably well, making them well suited to this kind of exchange.
Building a Larger Monstera Collection Through Propagation
For anyone specifically interested in growing a larger monstera collection, propagation offers a considerably more economical path than purchasing every individual plant from a nursery.
Cost Comparison to Buying Mature Plants
A single mature monstera plant, particularly a larger specimen with several fully fenestrated leaves, can be considerably more expensive than propagating an equivalent plant from a cutting over the course of a year or two. While propagation requires patience that an immediate nursery purchase does not, the cost savings can be substantial for anyone building out a collection of several plants rather than acquiring just one.
Filling Out a Room With Matching Plants
Propagating multiple cuttings from the same parent plant produces a collection of genetically identical plants that will share the same growth habits, leaf shape, and, for variegated cultivars, generally similar variegation patterns. Grouping several propagated monstera plants of different sizes together, some newly rooted and others further along in their development, creates a layered, cohesive display that would be considerably more expensive to assemble by purchasing several individual mature plants outright.
Long-Term Care Beyond Propagation
Once a propagated monstera has become a fully established plant in its own right, its ongoing care shifts from the rooting-focused concerns covered throughout this guide toward the standard maintenance any mature monstera requires.
Pruning and Shaping
Occasional pruning helps control a mature monstera’s size and encourages fuller, bushier growth rather than a single long, sparse vine, and any healthy stem removed during this kind of routine pruning can itself become the starting material for an entirely new propagation project. This creates a natural, ongoing cycle where a single well-established monstera is regrowing new cuttings for years, long after the original propagated plant has itself matured into a full-sized specimen.
Recognizing a Plant Ready for Its Own Propagation
A propagated monstera is generally ready to serve as a source of new cuttings itself once it has developed multiple healthy nodes along an established stem, typically after a year or more of steady growth following its own initial rooting. At that point, the same node identification, timing, and method selection principles covered throughout this guide apply just as directly to a plant that started life as a cutting as they did to the original parent plant it came from.
Seasonal Adjustments for Propagation Success
While spring and summer are the recommended windows for taking new cuttings, propagation attempted at other times of the year still benefits from a few seasonal adjustments.
Propagating During Fall and Winter
Cuttings taken outside the active growing season root more slowly, but supplementing natural light with a grow light run for twelve to fourteen hours a day, as noted earlier in this guide, helps offset the shorter days and lower light intensity typical of winter. Keeping the rooting station in a consistently warm spot, ideally within the 65 to 80 degrees Fahrenheit range mentioned by Plant Care Basics’ propagation guide, also matters more during colder months, since a cool windowsill that feels comfortable to a person may still be too cold to support efficient root development in an unrooted cutting.
Adjusting Expectations Rather Than Forcing Growth
Rather than trying to force a winter cutting to root at the same pace as one taken in summer, adjusting expectations and simply allowing more time is generally the more reliable approach, since pushing a stressed cutting with excessive fertilizer or unusually warm conditions can sometimes do more harm than good. A cutting that eventually rooted successfully in eight weeks during winter, rather than the typical four weeks of a summer cutting, has still succeeded, even though the process took longer than it would have during the ideal growing season.
Signs a Cutting Has Successfully Rooted
Because roots often develop out of sight in soil or moss, knowing what specific signs confirm success helps avoid unnecessary disturbance from repeated checking.
Confirming Roots in Water
In water propagation, confirming success is straightforward, since roots become visible through the glass, typically starting as short, pale threads before thickening and lengthening over the following weeks. Once roots reach roughly two to three inches with some visible branching, as covered earlier, the cutting is ready for its transition into soil.
Confirming Roots in Soil or Moss
For cuttings rooting in soil or moss, a very gentle, minimal tug that meets slight resistance suggests roots have begun anchoring the cutting in place, though this check should be done sparingly to avoid disturbing delicate new growth. A more reliable, if less immediate, sign is the emergence of new leaf growth, since a cutting only redirects energy toward producing new foliage once it has established enough of a root system to support that growth.
Frequently Asked Questions
Q1. Can a monstera cutting root without a node?
No. The node is the only part of the stem capable of producing new roots, so a cutting taken without one, regardless of how healthy the leaf attached to it looks, will not root in water, soil, or moss.
Q2. How long does it take for a monstera cutting to root?
Most cuttings develop roots within two to four weeks under warm, bright conditions, though cooler rooms or lower light, particularly during fall and winter, can extend that timeline considerably. Air-layered cuttings and air-layered segments often take longer, sometimes stretching to a couple of months.
Q3. Is water propagation or soil propagation better for Monstera?
Neither is strictly better. Water propagation is easier to monitor and works well for beginners, while soil propagation tends to produce a sturdier root system from the start and avoids the extra step of eventually transitioning the cutting from water into soil.
Q4. Why did my propagated monstera cutting produce a solid, unfenestrated leaf?
This is normal. Propagated cuttings often temporarily regress to juvenile, unfenestrated growth as they adjust to being separated from the parent plant, and most gradually return to producing more mature, split leaves once well established in their new pot.
Q5. How many cuttings can I safely take from one monstera plant?
A general rule is never to remove more than 25 to 30 percent of a plant’s foliage at once, which typically allows three to five viable cuttings from a mature, healthy plant. Waiting three to six months before taking additional cuttings gives the parent plant time to recover.
Q6. What is the safest propagation method for a rare or expensive monstera variety?
Air layering is widely considered the safest method, since the cutting continues drawing support from the parent plant while roots develop, which removes the unrooted, most vulnerable phase of propagation before the new plant is ever separated on its own.
Conclusion
Propagating monstera at home comes down to one central rule: every viable cutting needs at least one healthy node, since that single growth point is the only part of the plant capable of producing new roots. From there, the choice between water, soil, sphagnum moss, air layering, or a leafless node segment is largely a matter of matching the method to available time, risk tolerance, and how much the parent plant’s material is worth protecting, since each approach trades some combination of speed, visibility, and rot risk for the others. Getting the timing right, propagating during the warmer growing season, and giving a newly rooted cutting the same bright, indirect light and careful watering a mature monstera needs do more to determine success than any single technique choice on its own.
It is also worth remembering that a freshly propagated cutting will not immediately look like a smaller version of its fully mature parent plant, and that is entirely normal rather than a sign of a failed attempt. Fenestration is tied to genuine physiological maturity, not simply time passed, and a newly rooted cutting often needs to work through several rounds of smaller, solid leaves before its foliage begins developing the deep splits and holes associated with an established monstera. With patience, consistent bright light, and a bit of vertical support to encourage upright growth, a single stem cutting taken today can, in a few years, become every bit as striking as the plant it was originally cut from.

Ali Hassan is a plant enthusiast and content writer who creates practical, easy-to-follow articles about plant care, gardening, and indoor plants. He combines thorough research with reliable horticultural resources to provide accurate, beginner-friendly advice. His goal is to help readers grow healthier plants and make plant care simple, enjoyable, and accessible for everyone.