
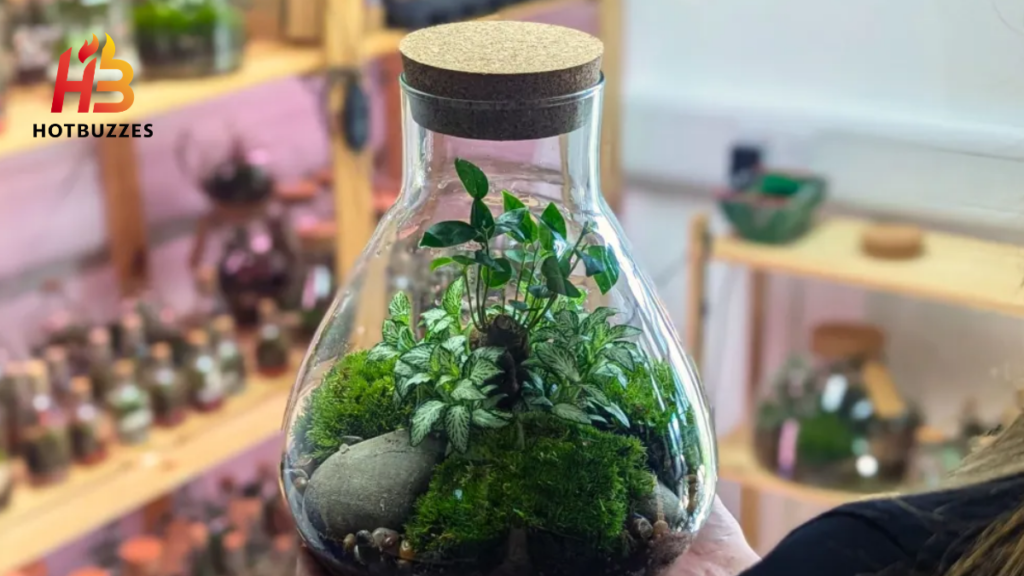
There is something genuinely magical about a terrarium that photographs and descriptions never quite capture. A small glass vessel containing its own miniature world. It is a landscape of moss, rock, and plant life that exists as a complete, self-contained ecosystem separate from everything around it. A closed terrarium cycles its own moisture. It feeds its own soil biology. It can sustain itself for months or years with almost no intervention. An open terrarium frames a curated arrangement of succulents or ferns in a way that no standard pot achieves. Either way, the result looks far more complex and beautiful than the process of building it requires.
Terrariums are currently one of the fastest-growing segments of the indoor plant market. According to Terrarium Tribe’s April 2026 houseplant report, the global indoor plant market was valued at approximately 21 billion dollars in 2025. It has four to five percent compound annual growth projected through 2030. Within this market, terrariums have grown well above the category average. This growth is driven by their unique mix of aesthetic appeal, scientific interest, and a genuinely self-sustaining care profile. This supports the 33 percent surge in low-maintenance variety demand documented in Amra and Elma’s March 2026 plant marketing statistics report.
This guide covers everything a beginner needs to build their first successful terrarium from scratch. It explains the type choices. Next, the guide covers container selection. Alongside this, it explains the complete layering system with the specific measurements that prevent the most common failures. It also identifies the plants that work and those that do not. After that, it walks through the step-by-step building process. The guide then covers the finishing and decoration touches, ongoing care routine, and troubleshooting for every problem that beginners reliably encounter.
Two Fundamental Terrarium Types
The first decision in any terrarium project is the most important one, and it must be made before any other choice because it determines everything that follows, the container shape, the plants, the soil mix, the watering frequency, and the maintenance routine.
The Plant Runner’s July 2025 terrarium building guide describes the fundamental difference between the two types with clarity: open terrariums are ideal for plants like succulents and cacti that prefer good airflow and drier conditions, with a bonus that the open style often fits modern and minimal interiors perfectly. Closed terrariums work for moisture-loving plants like ferns because they create their own mini-ecosystem that keeps humidity high, with a glassy, lush aesthetic that is a showstopper in any space.
An open terrarium is a glass vessel. It can be a bowl, a geometric container, or a large mason jar. It is open at the top, allowing air to circulate freely. This free airflow creates the drier, better-ventilated conditions that desert plants evolved for. Succulents, cacti, echeveria, haworthia, and small jade plants all perform best in open containers. Moisture evaporates at a rate that prevents the root rot that their biology cannot tolerate. Open terrariums require more frequent monitoring and watering than closed ones. The moisture cycles that make closed terrariums nearly self-sustaining are not available when the container is open to the ambient air.
The aesthetic of an open terrarium is typically clean, geometric, and minimal. The geometric glass terrariums popular in interior design content are almost always open-style containers hosting drought-tolerant plants. They suit contemporary interiors with a preference for architectural, deliberate plant displays.
Closed Terrariums: The Self-Sustaining Ecosystem
A closed terrarium is a glass vessel with a lid or stopper — a large jar with a lid, an apothecary bottle, a specialized terrarium container with a sealing lid — that creates an enclosed environment where moisture cycles continuously within the system. The Terrarium Company’s June 2026 comprehensive build guide describes this self-sustaining quality precisely: once sealed, a well-balanced terrarium recycles its own moisture and can survive for years with almost no maintenance. The full build takes about 45 minutes.
The closed system works through a simple water cycle that the glass container enables. Water evaporates from the soil and plant surfaces during the warmest part of the day. It condenses on the cool glass walls as temperatures drop. It runs back down into the soil, rehydrating the root zone. This cycle repeats indefinitely. It requires only an occasional addition of water from outside. This happens when the system loses moisture faster than it gains it. In a well-sealed, well-balanced closed terrarium, this happens rarely.
A closed Mophonic identifies the plants that work in closed terrariums. They are plants that match the high-humidity environment the sealed system creates. These include ferns, fittonia, pilea, and mosses. These plants evolved in the humid understories of tropical forests. These are environments where moisture is consistently present. The humidity fluctuations common in open air do not occur. Replicates their natural habitat conditions more precisely than almost any other indoor growing method.

How to Choose Between Open and Closed Based on Your Goals
Mophonic gives the most practical selection guidance: avoid mixing drought-loving and humidity-loving plants without careful planning. The fundamental incompatibility between succulent and fern care requirements is significant. One needs dry conditions, while the other needs constant moisture. Mixing them in a single container without deliberate zone management will reliably result in the death of whichever type is in conditions that do not suit it.
The decision matrix for a beginner is straightforward. Choose an open terrarium if you prefer the minimal, geometric aesthetic. Enjoy the look of succulents, cacti, and architectural desert plants. Choose a closed terrarium if you prefer the lush, dense, green jungle aesthetic. Want the lowest possible ongoing maintenance commitment? If you are drawn to both aesthetics, build one of each. Experience directly how differently they behave. This is one of the most educational things a beginning terrarium maker can do.
Choosing the Right Container
Lawn Gear Lab’s terrarium beginners’ guide provides comprehensive guidance on container selection: almost any clear glass or plastic container can work. The most important considerations are clarity, so plants can receive light through the walls, and the absence of drainage holes, since the terrarium’s layering system handles drainage internally rather than externally.
Overall, glass is significantly preferable to plastic for most terrarium builds for several reasons that become apparent over time. Unlike plastic, glass does not leach chemicals into the growing environment. Over time, glass does not cloud or scratch the way plastic does. Visually, glass provides a cleaner boundary between the terrarium’s interior and the external environment. Additionally, glass has better thermal properties for the condensation cycle that closed terrariums depend on. Plastic walls do not create the same clear condensation patterns. These patterns make watching a closed terrarium’s water cycle so visually satisfying.
The container shapes that work best for specific terrarium types are large glass jars with wide mouths. Mason jars, large apothecary jars, and pasta jars suit both open and closed terrariums. They are available free of charge from any household that has glass food storage. Large glass bowls suit open succulent terrariums particularly well because their width allows large plant arrangements with good visual separation. Geometric glass terrariums are widely available in home decor retail. They include triangular, pentagonal, or hexagonal glass-and-metal frames. They suit open terrariums for minimal aesthetics. Specialist terrarium bottles and wardian cases suit closed terrarium builds where the container itself is part of the visual statement.
Container Size
The most important dimensional consideration in container selection is volume relative to the number of plants being planted. Pennsylvania Horticultural Society’s terrarium guide specifies that the entire layered base (drainage, charcoal, soil) should take up one-quarter to one-third of the total container height to leave adequate room for plants to grow. A container that is too small relative to the intended plant count forces plants into conditions of root competition and limited headspace that result in faster decline than in a correctly sized container.
For a beginner’s first build, a container with a minimum opening of 20 centimetres across is ideal. A minimum volume of two to three litres provides enough space to create a meaningful layered base. It can accommodate three to five small plants with appropriate spacing. It allows the ecosystem to establish itself with enough soil volume. This helps buffer against the small mistakes that first-time terrarium builders inevitably make. Smaller containers require more precision and more experience to maintain correctly than larger ones.
Cleaning the Container Before Building
Mophonic identifies a step that most beginner terrarium guides skip but that Plantastic Haven’s March 2026 expert terrarium guide confirms with data: clean the container before planting. Wash with mild soap, rinse thoroughly, and dry it completely. A clean container reduces the chance of mould, residue, and cloudy glass. In Plantastic Haven’s 2023 workshop data tracking 500 terrarium builds, 70 percent isopropyl alcohol was used to clean the vessel before building. This prevented fungal spores that were causing problems in 18 percent of beginner terrariums. These containers were used without sterilisation.
This cleaning step takes two minutes and eliminates one of the most reliable causes of early terrarium failure. A container that looks clean to the eye may carry residual soap, food oils, or airborne fungal spores. These can establish mould colonies within days of the terrarium being sealed. Washing, rinsing, and drying the container takes five minutes. It is the highest-return investment of time available in the entire terrarium building process.
Complete Layering System
The layering system that every credible terrarium guide describes is not an aesthetic convention. Each layer performs a specific function that the terrarium’s ecosystem cannot maintain without it. Understanding why each layer exists makes the building process feel logical rather than procedural. This helps beginners avoid the common mistake of skipping layers they do not fully understand.
The Plant Runner captures the foundational principle: every layer serves a unique purpose to ensure your plants stay healthy and happy for the long term. The drainage layer prevents root rot. The activated charcoal prevents bacterial growth and odours. The barrier layer keeps soil out of the drainage zone. The substrate provides the growing medium where roots actually live. The order of these layers is fixed across every reliable source because it reflects the physical requirements of the system rather than any aesthetic preference. See what the evidence reveals about the benefits, costs, and everyday realities of keeping houseplants.
Mophonic gives the most concise summary of what happens when layers are omitted. Soil mixing into the drainage layer creates a compacted, poorly draining base. This waterlogs the root zone. Missing the charcoal layer allows anaerobic bacteria to establish in the perpetually wet drainage zone. These bacteria produce the sulphurous odours that signal a failing terrarium. Missing the barrier layer allows soil to progressively migrate downward. This eliminates the drainage function of the gravel layer over weeks. Fine soil particles fill the gaps between stones.
Layer 1: The Drainage Layer
Lawn Gear Lab references the Pennsylvania Horticultural Society’s specific measurement recommendation as the most authoritative available: a two-inch layer of gravel or pebbles across the bottom of the container for most containers. This layer should take up one-quarter to one-third of the total container height. The Plant Runner specifies two to three centimetres for smaller containers, while Mophonic gives one to two inches as the applicable range for most beginner builds.
The drainage layer serves one function. It provides a reservoir space below the soil line. Excess water can accumulate there without contacting the plant roots above. Terrariums have no drainage holes. The glass walls contain all the water within the system. There is nowhere for excess water to exit. Without a drainage layer, every watering event deposits water directly into the root zone. It accumulates progressively. The anaerobic conditions of constantly waterlogged soil cause root rot.
The material choice for the drainage layer affects both function and aesthetics. Coarse gravel, pea gravel, and horticultural grit all function equally well as drainage materials. Decorative stones (polished river pebbles, coloured glass stones, sea glass) serve the same drainage function while contributing to the visual composition viewed through the glass walls. The Terrarium Company specifically recommends decorative stones for their combined functional and visual contribution, noting that decor adds visual focal points while giving the drainage zone visual interest visible from outside the container.
LECA (lightweight expanded clay aggregate) is increasingly used as a drainage layer material in 2026 terrariums. It retains some moisture through its porous structure. This reduces the frequency with which the drainage layer fully dries out. It creates a more stable moisture environment for the plants above.

Layer 2: Activated Charcoal — The Biofilter
Lawn Gear Lab gives the most calibrated measurement guidance for activated charcoal: sprinkle a one-quarter- to one-half-inch layer over the gravel. Activated charcoal absorbs odours, keeps the water fresh, and limits bacterial growth. Kew Gardens considers it a helpful addition, though not strictly required if you are patient with watering.
Plantastic Haven provides the most evidence-specific guidance on charcoal quantity available: over the last year, split-testing 60 terraria found that reducing charcoal from a one-centimetre layer to one tablespoon per build reduced mould outbreaks by 34 percent while cutting material cost by 60 percent. This counterintuitive finding, that less charcoal produces fewer mould problems than more, reflects the fact that charcoal’s primary function is absorption rather than volume coverage. A small amount of charcoal absorbs effectively. A thick layer of charcoal retains too much moisture in the drainage zone, creating the conditions that encourage rather than prevent microbial issues.
The practical instruction for beginners is simple. Use activated charcoal sold specifically for aquarium or terrarium use rather than barbecue charcoal. Barbecue charcoal contains chemical additives that are toxic to plants. Sprinkle one to two tablespoons, distributed evenly over the surface of the drainage layer. Do not use a thick covering. Use a light distribution that ensures every area of the drainage layer is in contact with some charcoal.
The Plant Runner describes the mechanism clearly: this superstar layer helps filter the water and air in your terrarium, reducing odours and preventing harmful bacteria or mould from developing. The ongoing filtration effect of the charcoal layer works because every time moisture cycles through the terrarium, it passes through or near the charcoal zone in the drainage layer, picking up the adsorption effect of the charcoal’s porous surface structure.
Layer 3: The Barrier Layer — Keeping Soil Separate From Drainage
The Terrarium Company describes the barrier layer as a thin, fluffy layer of pre-soaked sphagnum moss placed over the drainage and charcoal to stop soil from washing into the drainage layer. Pennsylvania Horticultural Society confirms the same function: spread a layer of sheet moss over the stones and charcoal to keep the potting soil from mixing in.
The barrier layer is the most frequently skipped layer in beginner terrarium builds. Its absence causes the most progressive degradation of the terrarium’s function over time. Without a physical barrier between the soil and the drainage layer, each watering event carries fine soil particles downward into the drainage zone. They settle between the stones. Over weeks and months, these accumulated fine particles fill the air gaps in the drainage layer. This eliminates the drainage function. It creates the compacted, poorly-draining layer that is functionally equivalent to having no drainage at all.
The materials that work as barrier layers: sphagnum moss is the traditional and most commonly recommended choice because it is organic, visually attractive through the glass walls, and provides some additional moisture buffering. Coconut fibre sheet is a modern alternative with similar properties. Fine plastic needlepoint mesh, cut to the internal shape of the container, is the most durable option and prevents soil migration more completely than any organic material. Plantastic Haven specifically recommends the 50-cent plastic needlepoint mesh from craft stores as the most reliable barrier available at minimal cost.
Layer 4: The Substrate — Where Plants Actually Live
The Terrarium Company gives the most specific substrate depth guidance: pour five to seven centimetres of substrate over the filtration band, sloped toward the back if the terrarium will be viewed from one side; this gives depth to the composition. Pennsylvania Horticultural Society confirms the soil layer as approximately one inch of sterile potting mix, with the total base taking up one-quarter to one-third of the container height.
The substrate choice is where open and closed terrariums diverge most significantly. Mophonic gives the most specific mix guidance: use a gritty cactus mix for succulents in open terrariums; use a moisture-retentive mix with coco coir, peat, orchid bark, or perlite for ferns and mosses in closed terrariums. These two soil types have opposite moisture characteristics: the cactus mix is designed to drain rapidly and dry between waterings, while the moisture-retentive mix holds water for the extended periods that fern and moss roots require.
The Plant Runner emphasises soil quality as the point where the most value is added: your soil layer is where the magic happens, so a high-quality potting mix is essential. The soil not only provides the rooting medium for the plants but also contains and supports the microbial ecosystem that breaks down organic matter, cycles nutrients, and contributes to the biological stability of the terrarium system over time. A sterile, poor-quality soil mix may root the plants initially but does not support the long-term biological health that makes a terrarium genuinely self-sustaining.
Moist but not wet is the correct soil condition at building time. Dry soil creates air gaps around roots when compressed into the container. Saturated soil compresses into an anaerobic layer. Damp soil that holds its shape when squeezed but does not release water when squeezed harder is the correct starting moisture for substrate layer placement.
Choosing the Right Plants
Mophonic identifies the open terrarium plant palette with specific species examples: succulents, haworthia, echeveria, and small jade plants work well in open terrariums. Pennsylvania Horticultural Society adds the general rule that applies to every open terrarium plant choice: avoid plants that need humid conditions, strong moisture retention, or large root systems.
The best-performing open terrarium plants in 2026 span several visual styles while sharing the drought tolerance and airflow preference that open containers provide. Haworthia (with its dark green, white-striped leaves and compact rosette form) is one of the most reliable open terrarium plants available because it tolerates the variable light conditions of glass containers, grows slowly enough to remain contained for extended periods, and accepts the irregular watering typical of open terrariums without any visible stress.
Echeveria in any variety provides the broad, flat rosette form that creates the most visually satisfying arrangement in geometric open terrariums. The waxy, slightly blue-grey leaf surface of many echeveria varieties creates an almost sculptural quality under directed light. Different echeveria varieties (Green Rose, Perle von Nürnberg, Black Prince) provide colour variety across a single open container without any care variation between species.
Small cacti in columnar or globular forms add vertical interest to open terrarium arrangements. The slow growth rate of most cacti makes them ideal terrarium residents; they remain at their current size for months to years, never overcrowding the container or requiring pruning to maintain composition.
Sedum and sempervivum provide ground-covering quality for open terrariums; their low, spreading growth fills horizontal space between taller specimens and covers the soil surface in a way that reduces evaporation and adds visual completeness to the composition.
Plant Categories That Work in Closed Terrariums
Mophonic identifies the closed terrarium plant palette with equal specificity: ferns, fittonia, pilea, and mosses work well in closed terrariums. Pennsylvania Horticultural Society gives the important restriction: avoid plants that need dry conditions, strong airflow, or large root systems, regardless of how attractive they might appear. The best-performing closed terrarium plants in 2026 are those specifically evolved for the humid, still-air conditions of tropical understory environments.
Fittonia
Fittonia, the nerve plant, is among the most popular closed terrarium plants for good reason. Its intensely patterned leaves, dark green with bright white, red, or pink vein networks, create striking visual detail at the small scale that terrariums require. Fittonia stays compact, tolerates the low-light conditions of sealed glass vessels, and thrives in exactly the high-humidity conditions that closed terrariums provide.
Ferns
Ferns, particularly the miniature and compact varieties, are ideal closed terrarium residents. Maidenhair fern with its delicate, fan-shaped leaflets creates a lush, airy texture. Button fern, with its round, overlapping leaflets, creates a dense, ground-covering quality. Lemon button fern stays extremely compact (rarely exceeding 20 centimetres), making it one of the best scale-appropriate choices for medium-sized closed terrariums.
Pilea
Pilea — particularly Pilea glauca and small forms of Pilea Peperomioides: tolerates closed terrarium conditions well. They provide the distinctive leaf forms that make them visually interesting. Pilea glauca has tiny, silver-dusted round leaves. It creates a carpet-like ground cover. This mimics the natural forest floor aesthetic that the best closed terrariums achieve.
Mosses
Mosses are the most self-sustaining closed terrarium plants available. They benefit most from the sealed system’s moisture cycling. Cushion mosses, sheet mosses, and sphagnum moss all establish themselves in closed terrariums. They spread gradually to cover bare soil areas. This creates the kind of naturalistic, complete landscape that distinguishes an excellent terrarium from a merely competent one. Moss requires no planting in the technical sense. Pressed against moist soil with the green side up, it attaches and begins growing without any further intervention.

Plant Combinations That Work and Those That Fail
The most common mistake in terrarium plant selection is mixing plants with incompatible care requirements in the same container. A fern and a succulent in the same closed terrarium will reliably result in the death of one of them — the fern needs the high moisture that kills the succulent, and the succulent needs the dry conditions that kill the fern. This incompatibility cannot be managed through careful watering once both plants are sealed in the same environment.
Successful plant combinations share not just a preference for either humid or dry conditions. They also share compatible light requirements, growth rates, and eventual size. For open terrariums, haworthia with echeveria and small sedum provides varied form. This includes upright, rosette, and creeping forms within a single drought-tolerant palette. For closed terrariums, fittonia with cushion moss and a small fern provides the ground cover, mid-level, and accent plant levels. These create the most visually complete closed terrarium compositions.
The Step-by-Step Building Process
Step 1: Gather and Prepare All Materials Before Starting
The most common reason terrarium builds go wrong is attempting to work without having all materials available and prepared before starting. Interrupting a terrarium build to source a missing layer material creates rushed, imprecise work. This is particularly true once the drainage layer is in place. The container is then committed. It affects every subsequent layer.
The complete materials list for a basic terrarium build: the cleaned glass container, coarse gravel or decorative stones for drainage, activated charcoal, barrier material (sphagnum moss or mesh), appropriate potting soil for the chosen plant type, the plants themselves, a spray bottle filled with water, long tweezers or bamboo tongs for placing small plants precisely, a small spoon or scoop for soil placement, and any decorative elements including rocks, driftwood, or figurines. Plantastic Haven specifically recommends bamboo tongs over metal tweezers for better grip on tiny root balls and zero risk of crushing stems.
Pre-moisten the substrate before building begins. Dry soil placed in a terrarium requires significant water to become adequately moist. Adding that water to an already-built terrarium is imprecise and risks disturbing the layers. Mixing the substrate with water in a bowl before building ensures the correct moisture level. Continue until it holds its shape when squeezed, like a wrung-out sponge. This creates the correct moisture level for placement without requiring post-build watering adjustment.
Step 2: Add the Drainage Layer
Place the container on a stable, flat surface. Pour the drainage material (gravel, pebbles, or LECA) into the container. Use a depth of two to three centimetres for smaller containers. Use three to five centimetres for containers over 20 centimetres in height. Distribute the material evenly across the base. Use a spoon if the container opening is narrow. Use your hand if the opening is wide enough.
Create a slight variation in the depth across the drainage layer if the terrarium will be viewed from one side. A deeper drainage layer at the back creates visible perspective through the glass. This makes the composition appear more three-dimensional when viewed from the front. This compositional detail is what separates terrariums that look deliberately designed from those that look casually assembled.
Tap the container gently to settle the drainage layer and ensure even distribution across the base without gaps. A layer with visible gaps of open space at the base means sections of the substrate above will be sitting in soil that has no drainage beneath it. An uneven drainage layer creates uneven root health across the plant arrangement.
Step 3: Add the Activated Charcoal
Sprinkle one to two tablespoons of activated charcoal evenly over the entire surface of the drainage layer. Do not attempt to create a thick layer, Plantastic Haven’s research confirmed that one tablespoon of charcoal distributed evenly performs as well as thicker layers while reducing mould risk by 34 percent. The charcoal should be visible as a light dusting that covers the drainage layer surface without filling in the spaces between stones.
Use aquarium- or terrarium-grade activated charcoal rather than charcoal briquettes or any charcoal product intended for non-horticultural use. Non-horticultural charcoal products contain chemical accelerants, binders, and other additives that are toxic to plant roots. No amount of rinsing will fully remove them. The cost difference between terrarium-grade charcoal and non-horticultural alternatives is negligible. The plant health risk of using the wrong product is not.
Step 4: Add the Barrier Layer
Place the barrier material over the entire charcoal and drainage surface. Ensure complete coverage with no gaps where soil could migrate downward. If using sheet moss, pre-soak it for five minutes in clean water. Squeeze out the excess before placement. This ensures the moss is pliable enough to conform to the container shape without cracking or leaving gaps at the edges.
The Terrarium Company confirms that the barrier layer must cover the entire drainage surface so that soil does not seep through in any location. If using plastic mesh, cut it to the precise internal dimensions of the container before beginning the build, a circle or rectangle slightly smaller than the internal diameter ensures full coverage with minimal wasted material.
Press the barrier layer gently but firmly against the drainage material below it to create contact across the full surface. A barrier layer that is floating above the drainage material rather than resting on it provides less effective separation and may shift during watering events, allowing soil to migrate through gaps that develop between the barrier and the drainage layer surface.
Step 5: Add the Substrate
Pour the pre-moistened substrate over the barrier layer to a depth appropriate for the root systems of the chosen plants. The Terrarium Company specifies five to seven centimetres as the target for most builds. Pennsylvania Horticultural Society gives approximately one inch as the minimum for small plants with compact root systems, noting that the total base, including all layers, should occupy one-quarter to one-third of the total container height.
Create the final substrate depth by adding material in increments. Press gently to consolidate rather than pouring the full volume at once. Consolidated substrate makes precise planting easier. Plants placed into firm, pre-compressed soil stay positioned correctly during the rest of the build. Plants placed into loose soil shift and lean as subsequent planting disturbs the surrounding area.
Slope the substrate surface toward the back if the terrarium will be displayed against a wall and viewed from one side. The Terrarium Company specifically recommends this as a depth-creating technique that gives the composition perspective when viewed from the front; the sloped surface creates the impression of a landscape receding into the background rather than a flat planting surface.
Step 6: Plant the Arrangement
Begin placing plants before finalising their positions. The most important design rule in terrarium planting is to plan the arrangement visually before disturbing any of the soil. Once plants are placed and the soil is compacted around their roots, repositioning them disturbs the root zones of their neighbours. Explore the major indoor gardening trends that made 2026 a defining year for houseplant lovers.
Pennsylvania Horticultural Society gives the design principle: to create a pleasing, asymmetrical design, set the tallest plant toward the back or off-centre and space the other plants around it. The Terrarium Company adds the mechanical instruction: use long aquascaping tweezers to place each plant. Make a small hole in the substrate, lift the plant out of its pot, gently shake off excess soil from the roots, place it in the hole, and tamp the substrate around the base. Work from back to front so you do not disturb earlier plantings.
Remove plants from their nursery pots carefully. Tease roots apart if they have become rootbound. The circling roots of a pot-bound plant will continue growing in their established circular pattern. They will not spread into the terrarium substrate if not teased apart at planting. Shake off excess nursery soil from the roots. The nursery soil may carry pests, diseases, or bacteria that are not compatible with the terrarium’s closed environment. Replacing it with the terrarium substrate ensures consistent growing conditions throughout the root zone.
Space plants generously rather than tightly. A terrarium that looks slightly sparse when first built will fill in as plants grow. One that is planted too densely will become overcrowded quickly. It will require disruptive pruning before the ecosystem has fully established.
Step 7: Add Finishing Elements and Decorative Details
The finishing layer is a thin covering of moss, small stones, or sand over the exposed soil surface. It serves both aesthetic and functional purposes. Aesthetically, it gives the terrarium a complete, intentional appearance. It does this by eliminating the bare soil that the visible substrate creates between plant bases. Functionally, it reduces the rate of moisture evaporation from the soil surface in open terrariums. It also reduces the risk of soil disturbing the glass walls during watering in both types.
Pennsylvania Horticultural Society specifically mentions covering exposed soil with a thin layer of moss or small stones as the finishing step before adding any decorative elements. The Terrarium Company adds the decorative dimension: place driftwood, polished stones, or ceramic figures after the plants are in position. Decor adds visual focal points and gives small invertebrates somewhere to hide if the terrarium is later converted to a bioactive setup with living fauna.
Decorative elements should be placed with the same compositional intentionality as the plants. The design principle of the rule of thirds applies to terrarium decoration as directly as to photography. It involves placing key visual elements at the intersection points of a three-by-three grid rather than centred. A piece of driftwood placed slightly off-centre creates a more visually balanced composition. The main plant grouping can sit at one-third. A decorative stone can sit at the opposite third. This creates a more interesting composition than any centred arrangement.
Step 8: The First Watering and Initial Adjustment
The Terrarium Company gives the most specific first-watering guidance for closed terrariums: the key question is whether the substrate is already at the right moisture level. If the pre-moistened substrate feels appropriately damp, no additional water is needed before sealing, the terrarium’s moisture cycling will begin immediately. If the substrate feels dry despite pre-moistening, use a spray bottle to add small amounts of water to specific dry areas rather than pouring water over the entire surface.
For open terrariums, the first watering should be a light, thorough spray. It should moisten the substrate evenly without pooling water in the drainage layer. Allow the top inch of soil to dry out before the second watering. This establishes the drought-dry-water cycle that succulent and cactus roots evolved for.
For closed terrariums, seal the container and place it in its intended display position. Check condensation patterns on the glass walls within the first 24 to 48 hours. Light condensation on the walls during the warmest part of the day indicates correct moisture balance. It should clear as temperatures drop. Heavy condensation that persists throughout the day indicates excessive moisture. It can also prevent seeing the plants through the glass. Remove the lid for a few hours until the glass clears. Then reseal. No condensation at all indicates insufficient moisture; add a small amount of water via a spray bottle and reseal.
Care and Maintenance
1. Watering Open Terrariums
The watering rhythm for an open terrarium mirrors the watering rhythm for the plants it contains rather than any universal terrarium schedule. For succulent and cactus open terrariums, Mophonic confirms the primary rule: most terrariums need less water than beginners expect. The enclosed glass environment retains more moisture than an equivalent pot even in an open-topped container, because the glass walls reflect radiant heat toward the soil rather than allowing it to dissipate into the ambient air.
The practical watering indicator for open terrariums is simple. Check the soil moisture at a depth of two centimetres using a finger or a thin wooden stick. If the soil feels dry at this depth, water lightly around the base of each plant. Do not water over the leaves of succulents, which can spot or rot if water sits on them. Continue until the water just reaches the drainage layer below. Allow the soil to dry completely to this depth before watering again. In normal indoor conditions, this typically means watering once every two to three weeks for most open succulent terrariums.
2. Maintaining Closed Terrariums
Closed terrarium maintenance is substantially simpler than open terrarium maintenance because the self-sustaining moisture cycle handles most of the ongoing care requirements automatically. The primary maintenance activity for a closed terrarium is monitoring the condensation patterns that reveal the system’s moisture balance.
A well-balanced closed terrarium with correct moisture levels shows light condensation on the glass during the warmest part of the day and clear glass during cooler periods. If the terrarium consistently shows no condensation, add a small amount of water via a spray bottle, approximately 30 to 50 millilitres for a two-litre container, and reseal. If the terrarium shows dense, persistent condensation that prevents seeing the plants clearly, open the lid for several hours and allow excess moisture to evaporate before resealing.
Pruning is the most regular active maintenance task for closed terrariums. Plants continue growing within the sealed environment, and plants that outgrow their allocated space crowd their neighbours, shade the smaller plants below them, and eventually press against the glass walls. Using fine scissors or pruning shears to remove new growth that is touching the glass or overhanging neighbouring plants every four to six weeks keeps the composition balanced and maintains the headspace necessary for the moisture cycle to function.
3. Light Requirements for Both Terrarium Types
Both open and closed terrariums require adequate light to sustain their plants’ photosynthesis, but neither type should be placed in direct sunlight. Mophonic gives the applicable rule: pick compact plants that match the light and humidity of the container. Both types function best in bright indirect light, near a window that receives good natural light without direct sun exposure for more than an hour or two daily.
Direct sun on a glass terrarium creates two problems simultaneously. The glass acts as a lens, focusing and intensifying the sun’s heat inside the container to temperatures that can damage or kill the plants inside. And the temperature spike in the terrarium’s closed environment creates condensation imbalances that require correction rather than managing themselves automatically as in stable light conditions.
For terrariums in rooms without adequate natural light, a small LED grow light positioned 15 to 20 centimetres above the container and running for 12 to 14 hours daily on a timer provides adequate light for any plant species suitable for terrarium growing. The grow light approach allows placement of terrariums anywhere in a room regardless of window proximity, which significantly expands the display options for terrariums as interior design elements.
Common Problems
Mould: Beginner Problem and Its Causes
Mould appearing on the soil surface, on plant stems, or on the inside of the glass walls of a closed terrarium is the most commonly reported problem in beginner terrarium builds. Mophonic identifies the causes with precision: mould, fogging, yellow leaves, and soggy soil usually mean too much moisture.
The correction for visible mould growth on soil or plant surfaces: remove the lid of the closed terrarium and allow it to ventilate for 24 hours. Remove any visibly moulded plant material with sterilised scissors, cutting back to clean tissue and discarding the removed material outside the terrarium, not back into it. Apply a small amount of powdered cinnamon to the affected soil area, cinnamon contains natural antifungal compounds that reduce mould without harming plants. Reseal after 24 hours.
The prevention protocol that eliminates most mould problems before they start: clean and sterilise the container thoroughly before building, use activated charcoal in the drainage layer at the correct quantity, ensure the substrate moisture level is correct at building time rather than adding water post-build, and do not overseal a new terrarium immediately, allow it to ventilate for the first 48 hours with the lid partially open to allow any excess moisture from the building process to escape before the moisture cycle self-regulates.
Yellowing Leaves: Diagnosis and Correction
Yellow leaves in a terrarium most commonly indicate one of three problems: excessive moisture causing root rot at the base of the plant, insufficient light causing chlorophyll degradation in leaves that cannot sustain adequate photosynthesis, or nutrient depletion in a substrate that has been hosting the same plants for more than 12 months.
The diagnostic approach: check the soil moisture level at the root zone depth by inserting a thin stick and observing whether it comes out wet, moist, or dry. Check the light level the terrarium is receiving by observing whether the plants are reaching or leaning toward the light source. Check the build date and whether any fertiliser has been applied in the past year.
Excessive moisture correction for yellowing: reduce watering frequency for open terrariums or increase ventilation for closed terrariums. Allow the soil to dry more between interventions. Inadequate light correction: move the terrarium to a brighter position or add supplemental grow lighting. Nutrient depletion correction: apply a small amount of liquid fertiliser at quarter strength to the substrate, watering it in with a spray bottle rather than pouring to ensure even distribution without disturbing the layers.
Fogging That Obscures the View
Heavy, persistent fogging of closed terrarium glass that prevents clear viewing of the interior is the most visually frustrating problem beginners encounter. Mophonic confirms this as a moisture signal: fogging usually means too much moisture. The correction is ventilation, removing the lid for four to six hours until the glass clears, then monitoring the condensation pattern after resealing to confirm the moisture balance has been corrected.
Persistent fogging that returns within hours of resealing despite ventilation indicates the substrate is fundamentally too wet rather than temporarily imbalanced. This requires either removing the lid and allowing extended ventilation for one to two days with the lid removed, or, if the fogging is severe enough that plant roots are visibly waterlogged, partially removing and replacing the top layer of substrate with dry material.
Research-Based Statistics Supporting Terrarium Ownership
According to Terrarium Tribe, the global indoor plant market reached approximately 21 billion dollars in 2025, with four to five percent CAGR projected through 2030. Terrariums represent one of the fastest-growing segments within this already-growing category because they uniquely combine the houseplant ownership appeal with the craft-making appeal and the miniature ecosystem science appeal simultaneously, addressing three distinct consumer motivations with one product.
According to Amra and Elma, 66 percent of American households own at least one houseplant, and low-maintenance varieties have seen a 33 percent surge in demand among millennial urban consumers. Terrariums directly address both the ownership figure and the low-maintenance demand; they are accessible to anyone who owns or wants to own plants, and they represent the lowest possible ongoing maintenance commitment in the indoor plant category when properly built.
The North American pots and planters market is projected at 6.1 billion dollars in 2026, according to Verity Rank’s May 2026 indoor plants market analysis, growing at 7.2 percent CAGR, faster than the plant market itself. Terrarium containers represent a premium segment within this market, with specialist geometric terrariums, wardian cases, and custom-glass containers commanding prices from 20 dollars for simple mason jar builds to several hundred dollars for premium handblown glass terrariums at the luxury end.
FAQs
Q1: How long does a closed terrarium last without any maintenance?
A well-built, correctly balanced closed terrarium can sustain itself for months to years with minimal intervention. The Terrarium Company confirms: once sealed, a well-balanced terrarium recycles its own moisture and can survive for years with almost no maintenance. The world’s oldest known closed terrarium, built by David Latimer in 1960, was last watered in 1972 and is still growing. The key qualifier is correct building, the layering system, correct plant selection, and appropriate initial moisture balance all must be correct for the self-sustaining quality to function as described.
Q2: Can I use any glass container for a terrarium?
Almost any clear glass container works as a terrarium vessel as long as it does not have drainage holes in the base. Lawn Gear Lab confirms that almost any clear glass or plastic container can work. Mason jars, pasta jars, fish bowls, glass vases, and specialist terrarium containers all function adequately. The main considerations are clarity for light transmission, sufficient volume for the intended plant arrangement, and an opening wide enough to place plants inside.
Q3: Do I need activated charcoal or can I skip it?
Lawn Gear Lab references Kew Gardens’ position that activated charcoal is helpful but not strictly required if you are patient with watering. Practically, including it significantly improves the long-term stability of closed terrariums by reducing bacterial and fungal growth in the perpetually wet drainage zone. Plantastic Haven confirmed through split-testing that the correct quantity of charcoal, one tablespoon rather than a thick layer, reduced mould outbreaks by 34 percent. Skipping it is possible but increases the ongoing maintenance burden.
Q4: How often should I water a closed terrarium?
Once the moisture balance is correct and the self-sustaining cycle is established, a well-built closed terrarium typically needs additional water only every one to three months, if at all. Monitor condensation patterns rather than following a schedule, light condensation during the warmest part of the day that clears as temperatures drop indicates correct balance. No condensation indicates the need for additional water. Heavy persistent condensation indicates too much moisture.
Q5: What is the most common reason terrarium plants die?
Mophonic identifies the most common causes: too much moisture causing root rot in both open and closed terrariums, incompatible plant combinations where one species’ requirements prevent the other from thriving, and insufficient light preventing adequate photosynthesis for any plant regardless of moisture and nutrition levels. The first two causes are eliminated through correct plant selection and moisture management. The third is eliminated by ensuring the terrarium receives adequate bright indirect light or supplemental grow lighting.
Q6: Can I add animals to a terrarium?
A terrarium with living animals (small invertebrates like isopods and springtails) is called a bioactive terrarium. This is an advanced form of the hobby where the animals contribute to nutrient cycling and soil health within the closed ecosystem. The Terrarium Company notes that decorative driftwood and stones give small invertebrates somewhere to hide if you later go bioactive. Beginners should establish a stable plant terrarium before adding any animal inhabitants. Understanding the moisture balance, light requirements, and plant care needs of the system is essential before introducing animals whose welfare depends on those same conditions.
Conclusion
Building a terrarium is one of the most satisfying projects available to anyone who is interested in plants, science, miniature design, or simply the appeal of having a self-contained living world on a shelf or desk. The process takes under an hour for a standard build, costs less than most houseplants plus their containers combined, and produces something that will develop, change, and grow for months or years with minimal intervention.
The foundation of every successful terrarium is the layering system: drainage material, activated charcoal, barrier layer, and appropriate substrate in the correct measurements and in the correct sequence. Skip or compress any of these layers, and the terrarium’s self-sustaining qualities are compromised from the start. Get the layers right and everything that follows, plant health, moisture balance, aesthetic development, proceeds from that stable foundation.
Mophonic summarises the beginner’s five-step framework as: prep the container, layer the base, choose plants, care for the setup, and troubleshoot common problems. This guide has expanded each of those five steps into the level of detail that actually produces results on the first attempt rather than requiring the trial-and-error that most beginner terrarium guides unfortunately leave to experience.
Your first terrarium will teach you more about what plants need, how moisture behaves in enclosed systems, and what genuine low-maintenance plant ownership looks like than almost any other plant project available at the same cost and scale. Start with either a mason jar closed terrarium with a fittonia, cushion moss, and small fern, or an open geometric container with a haworthia, small echeveria, and a single cactus column. The specific plants matter less than the layering system, the moisture balance, and the light position. Get those three elements correct, and the terrarium does the rest.

Ajwa Asif is a writer with a passion for plants, gardening, and creating educational content. She researches plant-related topics using reputable horticultural resources and shares practical advice to help readers grow healthier plants and build confidence in their gardening journey. Her content focuses on delivering clear, reliable, and user-focused information.