
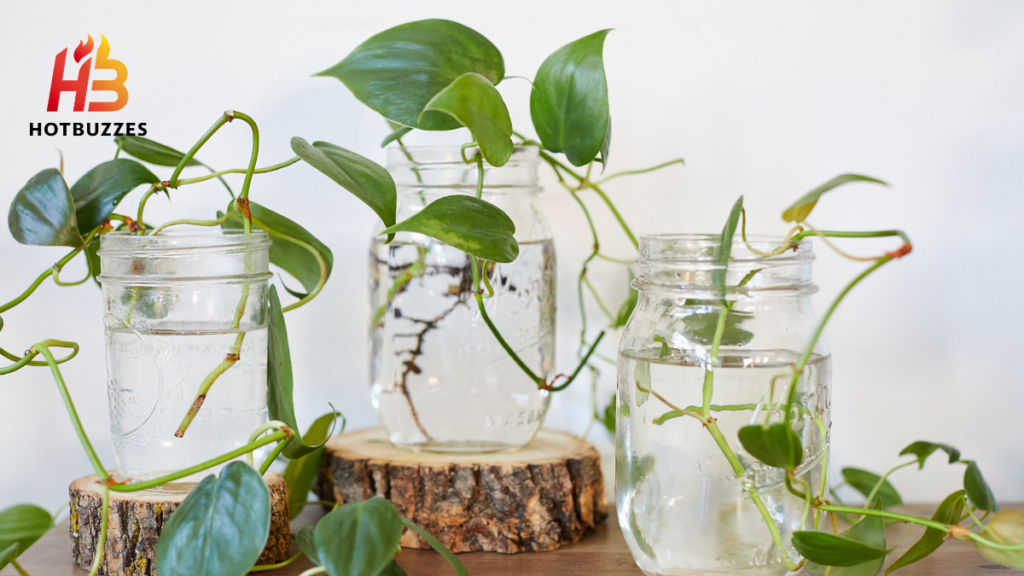
Philodendrons are among the most forgiving houseplants to multiply. A single healthy vine can produce several new plants with only a pair of clean scissors and some patience. The goal may be filling out an existing collection, sharing cuttings with friends, or controlling an overgrown vine. However, propagation always comes down to the same core requirement. The cutting must have at least one healthy node. This small structure determines success or failure. It does so whether the cutting roots in water, soil, or moss. The same applies to air layering directly on the parent plant.
This guide covers water, soil, sphagnum moss, and air layering propagation for philodendron. It also covers node selection, timing, and the most common mistakes that derail an otherwise promising cutting. The guide includes a side-by-side comparison table. It provides guidance on tools, sap safety, variegated and rare cultivars, and seasonal timing. It also covers research-backed facts about the node biology that makes philodendron such a reliably easy plant to propagate.
Understanding the Node
Every philodendron propagation method depends on the same small but essential structure, and understanding exactly what that structure is and why it matters makes every technique covered later in this guide considerably easier to apply correctly.
What a Node Does
A node is the small bump or joint along a philodendron stem. Roots and new growth can form there, according to Hey Rooted’s propagation guide. Nodes function as growth command centers. They are the only points on the stem capable of producing new roots, according to Plant Vault’s step-by-step guide. A cutting without a node will not root in water, soil, or moss. This applies regardless of how healthy its leaves look.
Aerial Roots as a Bonus, Not a Requirement
Including an aerial root on a cutting is recommended when one is present. These thick, finger-like growths naturally help the plant absorb moisture. They can also speed up rooting, according to Plant Vault’s guide. An aerial root is not required for a cutting to succeed. However, its presence generally gives a cutting a head start compared to a node without one.
When to Take a Cutting
Propagation is best attempted during the plant’s active growing season. This means spring and summer, according to Plant Vault’s guide. Warmer temperatures and more available light support faster root development. Cuttings taken during the cooler, more dormant months can still root. However, they typically take longer. Keep them in a consistently warm spot indoors. Keep them away from cold drafts and unheated windowsills.
Choosing the Right Stem
A healthy stem showing signs of overgrowth makes the best candidate for a cutting, according to Plant Vault’s guide. Choose a stem with clearly visible nodes and, ideally, at least one aerial root. Cut a section roughly four to six inches long. Keep two or three leaves attached. Remove any lower leaves that would sit below the water or soil line. This is a widely repeated standard across propagation guides, including Lively Root’s philodendron guide.
Water Propagation
Water propagation is the most commonly used method for philodendrons. It allows the entire rooting process to be observed directly. This gives even a first-time propagator a clear and reassuring sense of progress week to week.
Setting Up the Water Method
Place the cutting in a jar of clean water. Position it so that at least one node, and ideally every node on the cutting, sits fully submerged, according to Houseplant Central’s propagation guide. Filtered or purified water is preferred. However, tap water left out overnight to let chlorine evaporate works as an acceptable substitute, according to Lively Root’s guide.
Maintaining the Water
Change the water every few days to prevent algae and bacteria buildup. These can slow rooting or encourage rot at the node, according to AOL’s horticulturist-sourced propagation guide. Place the jar somewhere with bright, indirect light. Avoid direct sun, which can overheat the water. This supports steadier root development throughout the process.
Timeline and Transition to Soil
Roots typically begin appearing within two to four weeks, according to Plant Vault’s guide. Once they reach at least an inch long, the cutting is ready to be moved into soil, according to Lively Root’s guide. Not every grower finds water propagation reliable. Some horticulturists prefer soil propagation and report limited success rooting philodendron cuttings in water, according to the AOL guide. This is a useful reminder that individual results can vary, even for a generally forgiving plant.
Soil Propagation
Soil propagation skips the water stage entirely. The cutting goes directly into its eventual growing medium from the start. Some growers prefer this approach because it avoids the extra step of later transitioning the cutting between two different media.
Preparing the Soil and Planting
A light, airy mix suits aroids. Use a purpose-built aroid blend or a combination of equal parts peat moss, perlite, and orchid bark. This provides the aeration and moisture retention a rooting cutting needs, according to Bloombox Club’s water versus soil comparison. Plant the cutting with at least one node covered by soil. Lightly moisten the surrounding soil, but do not let it become waterlogged. The cutting has no roots yet to make use of excess water, according to Houseplant Central’s guide.
Why Soil Propagation Can Be Harder to Judge
Roots develop out of sight underground. Therefore, you cannot confirm a soil propagation attempt has succeeded until the first new leaves appear, according to Houseplant Central’s guide. The guide also notes that soil propagation success rates can be somewhat lower than water propagation. This is because keeping the soil consistently and appropriately moist is more difficult to judge by feel. Using a humidity dome or a simple clear plastic bag placed loosely over the pot helps maintain the elevated humidity a rootless cutting benefits from during this early, most vulnerable stage.

Sphagnum Moss Propagation
Sphagnum moss offers a middle ground between the easy monitoring of water propagation and the sturdier root development typical of soil, making it a popular choice for growers who have tried both extremes and want something in between. Learn how to propagate Monstera at home and grow new plants from healthy cuttings.
Wrapping the Cutting
Run the moss under water until it is damp but not dripping. Wrap the cutting’s node directly in the moss. Then, cover it with a ziplock bag to create a small, humid microclimate, according to Houseplant Central’s guide. Dipping the cut end in rooting hormone before wrapping it in moss is optional. It can help speed up the process, according to both Houseplant Central and Plant Vault’s guides.
An Alternative Moss Technique
Rather than wrapping individual cuttings, some growers lay several node cuttings directly on a tray of damp sphagnum moss. They may also add a heat mat underneath for warmth. Spray the moss whenever it begins to dry out, according to Houseplant Central’s guide. Once roots have formed using either the moss technique, the cutting is transferred into standard aroid soil to continue growing.
Water vs Soil vs Moss Propagation
The table below summarizes the core differences between the three main rooting mediums covered in this guide.
| Method | Rooting Time | Ease of Monitoring | Notes |
|---|---|---|---|
| Water | 2 to 4 weeks | Very easy, roots visible | Requires water changes every few days |
| Soil | 3 to 4 weeks or more | Difficult, no visible confirmation until new leaves appear | Sturdier root system from the start |
| Sphagnum moss | 2 to 4 weeks | Moderate, requires unwrapping to check | Good middle ground for humidity control |
Air Layering
Air layering allows a cutting to develop roots while still attached to the parent plant, which removes the riskiest, unrooted phase of propagation entirely, making it especially appealing for anyone working with a plant they would rather not risk losing.
The Air Layering Process
Cut a small notch, less than a quarter inch deep, into the stem just below a leaf. Wrap damp sphagnum moss around the notch. Then, cover it with plastic wrap and secure it loosely with string or twist ties, according to the AOL propagation guide. Keep the moss consistently damp while roots develop. Hey, Rooted’s guide notes that this typically takes a couple of weeks. Once roots develop, cut the rooted section free from the parent plant. Then, pot it in fresh, well-draining soil.
Why Air Layering Suits Thicker Stems and Prized Plants
Air layering is more hands-on than water or soil propagation. However, it is particularly useful for thicker stems or a plant a grower does not want to risk propagating any other way, according to Hey Rooted’s guide. The cutting continues to draw support from the parent plant throughout the entire rooting process. It is not separated and left to root on its own from the very start.
Propagating Non-Trailing Philodendrons
Not every philodendron variety grows as a climbing vine, and upright, self-heading types require a slightly different approach worth understanding before assuming a single propagation strategy applies to every plant in this genus.
Same Methods, Different Pace
Non-trailing philodendrons can be propagated using the same basic water, soil, and air layering methods as vining types. The stem section must include a visible node, though upright varieties tend to root somewhat more slowly, according to Hey Rooted’s guide. Patience matters more with these varieties than with fast-rooting trailing types. A slower rooting timeline is normal for this growth habit and does not mean something has gone wrong.
Propagating by Offset
Some self-heading philodendron varieties produce offsets. These are small baby plants that emerge around the base of the parent plant, according to Hey Rooted’s guide. You can often separate and pot these offsets individually once they develop their own roots. This offers a considerably faster route to a new plant than a stem cutting.
Common Mistakes and How to Avoid Them
A handful of recurring issues account for most failed philodendron propagation attempts.
Cutting Without a Node
Taking a cutting that does not include a node is the single most common reason a propagation attempt fails outright, since no amount of good light, water, or patience can make a nodeless cutting produce roots. Double-checking for a visible node before making any cut avoids wasting an otherwise healthy piece of stem.
Leaves Sitting in Water or Soil
Leaving lower leaves attached to a cutting can cause rot. Submerged leaves can decay and spread bacteria to the node. Remove any leaves that would sit below the waterline or soil surface before propagating. This recommendation appears across nearly every source referenced in this guide. It helps protect soil-propagated cuttings and considerably reduces the risk of rot.
Overwatering a Soil Cutting
A soil-propagated cutting has no roots yet to draw up excess moisture. Keeping the soil too wet increases the risk of the node rotting before it has a chance to root. Lightly moisten the soil rather than soaking it. Allow the surface to dry slightly between waterings. This better matches what a rootless cutting can actually use.
Tools and Supplies for Propagation
Gathering the right materials before starting keeps the entire process considerably smoother.
Cutting Tools
A pair of clean, sharp scissors or pruning shears is essential. A dull blade crushes stem tissue instead of slicing cleanly through it. This increases the risk of rot at the wound site. Wipe the blade with rubbing alcohol before and between cuts. This is especially important when taking cuttings from more than one plant. It helps prevent the transfer of bacteria or fungal spores from one plant to another.
Containers and Growing Mediums
Clear glass jars work well for water propagation. They allow you to monitor root development without disturbing the cutting. Small pots with drainage holes suit soil propagation. A light, airy aroid mix, sphagnum moss, and perlite cover the medium needs for the soil and moss propagation methods discussed throughout this guide. Discover the key propagation mistakes to avoid when growing new plants from cuttings.
Optional Helpful Extras
A spray bottle makes remoistening sphagnum moss easier than pouring water directly. A humidity dome or clear plastic bag helps maintain elevated humidity around a soil-propagated cutting during its earliest, most vulnerable stage. Rooting hormone is optional for most philodendron varieties. However, it is worth having on hand for slower-rooting cuttings or non-trailing types.
Choosing Between Trailing and Climbing Varieties
Philodendrons come in two broad growth habits, and understanding which type a specific plant belongs to shapes how a cutting should eventually be supported once it roots.

Vining Philodendrons
Vining varieties, including heartleaf philodendron and Philodendron micans, naturally trail or climb. Cuttings from these plants tend to root quickly and reliably using any of the methods covered in this guide. These varieties naturally reach for a support structure in the wild. Giving a young, newly rooted cutting a small stake or moss pole encourages the larger, more mature leaves associated with climbing growth.
Self-Heading Philodendrons
Self-heading varieties, such as Philodendron selloum or Philodendron ‘Prince of Orange,’ grow in a more upright, rosette-like form rather than trailing. They can still be propagated from stem cuttings when a stem section with a node is available. However, they more commonly reproduce through offsets, as covered later in this guide. Recognizing the growth habit of a specific philodendron before starting helps set realistic expectations. It also helps you understand the rooting speed and eventual shape of the resulting plant.
Propagating in Different Seasons
While spring and summer remain the ideal window for taking philodendron cuttings, propagation attempted at other times of the year still benefits from a few adjustments.
Propagating During Fall and Winter
Cuttings taken outside the active growing season generally root more slowly. Cooler temperatures and shorter days reduce the energy available for new root growth. Supplementing natural light with a grow light for ten to twelve hours a day can help. Keep the cutting in a consistently warm spot away from cold drafts. These steps help offset some of this seasonal slowdown without changing the propagation method itself.
Adjusting Expectations Rather Than Rushing the Process
Rather than forcing a winter cutting to root at the same pace as a summer cutting, allow extra time. Resist the urge to intervene further by adding fertilizer or repeatedly checking for roots. This generally produces better results than trying to rush an already slower seasonal process. A cutting that takes six weeks to root in winter can still succeed. A summer cutting may typically root in three to four weeks. The longer winter timeline is normal, even though it takes more time than during the ideal growing season.
Aftercare for Newly Rooted Cuttings
Once a cutting has developed a solid root system, its ongoing care follows the same general pattern as that of any mature philodendron.
Light and Watering Once Established
Philodendrons generally thrive in bright, indirect light. Some varieties tolerate lower light reasonably well. However, a newly potted cutting benefits from a slightly less intense spot than a fully established plant. Its still-developing roots have a more limited capacity to support the water demands of strong light. Allow the top one to two inches of soil to dry out between waterings. Avoid keeping the soil consistently damp as you did during rooting. This corresponds to how a mature philodendron is typically watered.
Introducing Fertilizer
Apply a diluted, balanced liquid fertilizer once every four to six weeks during the active growing season. This supports a newly established cutting’s transition into steady, ongoing growth. However, withhold fertilizer until the cutting shows clear signs of new growth. Skip fertilizer during the slower fall and winter months. Resume feeding once the plant shows renewed active growth in spring. This reflects the seasonal feeding pattern generally recommended for mature philodendrons.
Repotting as the Plant Grows
A newly rooted cutting generally does not need repotting for at least the first several months, and moving up only one to two inches in pot diameter at a time, rather than jumping to a dramatically larger pot all at once, helps avoid the excess soil moisture retention an oversized container can create around a still-developing root system. Roots visibly emerging from the drainage holes, or noticeably slower growth despite otherwise good light and watering, both suggest a propagated philodendron has outgrown its current pot and would benefit from sizing up.
Comparing Philodendron to Other Easy-to-Propagate Houseplants
Understanding how philodendron propagation compares to other popular houseplants highlights why it has earned such a strong reputation as a forgiving plant for beginners.
Rooting Speed Compared to Pothos and Monstera
Pothos, a close relative in the same general aroid family, often roots at a similarly fast pace to philodendron, typically within two to three weeks in water under warm, bright conditions. Monstera, while also an aroid, tends to root slightly more slowly and produces larger, more unwieldy cuttings, making philodendron a somewhat easier and more compact plant for a first-time propagator to practice on.
Why Philodendron Is Considered Especially Beginner-Friendly
Philodendron’s forgiving node biology, straightforward polarity rule, and tolerance for several different propagation mediums, water, soil, moss, or air layering, make it accessible even to someone who has never successfully propagated a houseplant before. This combination of reliability and visual reward, since even a small rooted cutting quickly develops the same glossy, recognizable leaves as its parent plant, helps explain why philodendron propagation remains such a popular entry point into the broader houseplant propagation hobby.
Gifting and Sharing Philodendron Cuttings
Because a single healthy vine can produce several viable cuttings, propagation naturally lends itself to sharing plants with others. Compare water and soil propagation to understand which method gives your cuttings the best chance of rooting successfully.
Preparing a Cutting as a Gift
A rooted cutting, already showing a healthy inch or more of root growth, makes a considerably more reliable gift than an unrooted stem section, since the recipient does not need to manage the riskiest early rooting phase themselves. Including a brief note on the specific propagation method used, along with the general light and watering needs a young philodendron has, helps a recipient unfamiliar with the plant get off to a confident start.
Trading Cuttings With Other Growers
Plant swap groups, whether in person or through online plant communities, have become a popular way for philodendron owners to trade cuttings of different varieties without needing to purchase an entirely new plant. Because philodendron cuttings are relatively hardy compared to more delicate houseplant cuttings, they generally tolerate a day or two of transit inside a slightly damp paper towel and a sealed bag reasonably well, making them well suited to this kind of exchange.

Building a Larger Philodendron Collection Through Propagation
For anyone specifically interested in growing a larger philodendron collection, propagation offers a considerably more economical path than purchasing every individual plant from a nursery.
Cost Comparison to Buying Mature Plants
A single mature philodendron, particularly a larger or rarer variety, can be considerably more expensive than propagating an equivalent plant from a cutting over the course of a few months. While propagation requires patience that an immediate nursery purchase does not, the cost savings can be substantial for anyone building out a collection of several plants rather than acquiring just one.
Filling Out a Room With Matching Plants
Propagating multiple cuttings from the same parent plant produces a collection of genetically identical plants that will share the same growth habits and leaf shape. Grouping several propagated philodendrons of different sizes together, some newly rooted and others further along in their development, creates a layered, cohesive display that would be considerably more expensive to assemble by purchasing several individual mature plants outright.
Research-Based Facts About Node Biology and Rooting
Beyond the practical propagation steps, plant science offers a more precise explanation for why the node is so essential and why philodendron in particular roots so reliably.
Why Nodes Are the Only Source of Adventitious Roots
Roots that form on a stem cutting rather than from the plant’s original root system are called adventitious roots, and they develop specifically from a layer of specialized, undifferentiated cells clustered at the node, according to general plant propagation science referenced across multiple horticultural extension sources. This is why no amount of moisture, warmth, or light can coax roots from a random point along a bare section of stem; the specialized tissue capable of producing those roots simply does not exist anywhere except at the node itself.
Why Aroids Root More Reliably Than Many Other Plant Families
Philodendron, along with pothos and monstera, belongs to the aroid family, a group of plants that naturally produce aerial roots along their stems as an adaptation for climbing trees and other structures in its native tropical habitat. This built-in tendency toward producing roots along the stem, rather than only at the plant’s base, is part of why aroids as a family root so much more readily from cuttings than many non-climbing plant families, whose stems have no comparable natural adaptation for producing roots above the soil line.
How Hormones Drive the Rooting Process
Auxin, a plant hormone concentrated near actively growing tips and nodes, plays a central role in triggering the cellular changes that lead to new root formation at a cut site, which is the same biological mechanism that synthetic rooting hormone products are designed to supplement. This hormonal process explains why a cutting taken with a node still attached has everything biologically necessary to root on its own, while rooting hormone simply provides an additional concentration of the same signal the plant would otherwise need to produce entirely on its own over a longer stretch of time.
Propagating Variegated Philodendron Varieties
Variegated philodendron cultivars, prized for their patterned, multi-colored leaves, require a bit of extra consideration during propagation compared to solid green varieties.
Why Variegation Placement Matters
A cutting’s resulting variegation pattern depends heavily on which section of the parent stem’s tissue the cutting was taken from, since variegation in philodendron is generally caused by a genetic mutation present in only part of the plant’s growing tissue rather than uniformly throughout the entire stem. Taking a cutting from a section of stem showing strong, balanced variegation generally, though not always, produces a new plant with a similar pattern, while a cutting taken from a mostly green section of the same plant may grow with little to no variegation at all.
Extra Care for Variegated Cuttings
Because variegated sections of a leaf contain less chlorophyll than solid green tissue, variegated cuttings generally have somewhat less stored energy available to fund root development, which can make them root slightly more slowly or less reliably than an equivalent solid green cutting. Providing slightly brighter, though still indirect, light during the rooting process can help offset this reduced energy reserve, since more available light supports more efficient use of whatever chlorophyll-containing tissue the cutting does have.
Propagating Rare and Expensive Philodendron Cultivars
For growers working with a particularly rare or costly philodendron variety, minimizing risk during propagation becomes considerably more important than it might be for a common, widely available plant.
Why Air Layering Is Often Preferred for Valuable Plants
Air layering, covered earlier in this guide, is generally considered the lowest-risk propagation method for any valuable plant, since the cutting continues drawing support from the parent plant throughout the entire rooting process rather than being separated and left to root entirely on its own from the very start. This makes it a natural first choice for anyone propagating a rare cultivar they cannot easily or affordably replace if a cutting fails.
Taking Multiple Smaller Cuttings Instead of One Large One
Rather than taking a single large cutting from a valuable plant, some growers prefer taking several smaller cuttings from different points along the stem, reasoning that even if one or two fail to root, the odds of at least one succeeding are considerably higher than betting everything on a single larger cutting. This approach does divide the parent plant’s available propagation material across more individual attempts, so it works best on a specimen that is otherwise healthy enough to spare several smaller sections without excessive stress.
Common Signs of a Successfully Rooted Cutting
Because roots often develop out of sight, particularly in soil or moss, knowing what specific signs confirm success helps avoid unnecessary disturbance from repeated checking.
Visible Roots in Water Propagation
In water propagation, confirming success is straightforward, since roots become visible directly through the glass, typically starting as short, pale threads before thickening and lengthening over the following weeks. Once roots reach roughly an inch or more with some visible branching, as covered earlier, the cutting is ready for its transition into soil.
Indirect Signs in Soil and Moss Propagation
For cuttings rooting in soil or wrapped in moss, a very gentle, minimal tug that meets slight resistance suggests roots have begun anchoring the cutting in place, though this check should be done sparingly to avoid disturbing delicate new growth. A more reliable, if less immediate, sign is the emergence of new leaf growth, since a cutting only redirects energy toward producing new foliage once it has established enough of a root system to support that growth.
Troubleshooting a Stalled Cutting
Sometimes a cutting shows no visible progress for several weeks, and knowing how to troubleshoot the situation helps determine whether it has actually failed or simply needs more time.
Checking the Node Itself
A cutting that has shown no root buds after four to six weeks under otherwise good light and temperature conditions may have a node that was not actually intact at the time of cutting, or it may simply be a slower rooting variety that needs more patience than a fast rooting type would. Checking that the node still looks firm rather than mushy or discolored is the first diagnostic step, since a healthy-looking node simply needs more time, while a soft, blackened one indicates the cutting has already begun to fail and is unlikely to recover.
Ruling Out Environmental Issues
Before assuming a cutting has failed entirely, checking that it has been kept in consistently warm conditions, ideally within the general range most tropical houseplants prefer, and in bright but indirect light rather than a dim corner, rules out the most common environmental causes of stalled rooting. Moving a struggling cutting to a warmer, brighter spot and simply allowing more time often resolves what initially looked like a failed attempt.
Pest and Disease Prevention During Propagation
A cutting’s vulnerability during the rooting phase makes preventing pest and disease issues considerably more important than it might be for an already established, mature plant.
Inspecting the Parent Plant First
Any pest infestation present on the parent plant, such as spider mites, mealybugs, or aphids, should be identified and treated before taking cuttings, since propagating from an infested plant simply transfers the same pest problem into every new jar or pot. Inspecting the stem and the underside of leaves closely before cutting, rather than assuming a plant is pest-free just because no obvious damage is visible, helps avoid this particular setback before it starts.
Preventing Fungal Issues During Rooting
Fungal problems, including the kind of rot covered earlier in this guide, thrive in overly wet, poorly ventilated conditions, which is part of why changing water regularly in water propagation and avoiding overly saturated soil or moss in the other methods matter so much. Ensuring at least some airflow around a cutting, even one kept under a humidity dome or plastic bag, by briefly venting the covering every few days, helps prevent the kind of stagnant, consistently damp conditions fungal pathogens favor.
Humidity’s Role in Successful Propagation
Beyond the specific moisture level of whichever medium is chosen, the humidity of the surrounding air also plays a meaningful role in how well a cutting performs during rooting.
Why Leaves Benefit From Higher Ambient Humidity
A cutting’s leaves continue to lose moisture through transpiration even while its roots are still developing, and in a low humidity room, this moisture loss can outpace what the still-limited or entirely absent root system is able to replace, leading to wilting or leaf drop regardless of which propagation medium is being used. Grouping cuttings together, using a humidity dome, or simply placing them in a naturally humid room like a bathroom with good light can reduce this stress during the vulnerable early rooting period.
Supplementing Humidity in Dry Climates or Winter Months
For anyone propagating in a particularly dry climate or during the winter months when indoor heating tends to lower ambient humidity considerably, occasional light misting of the cutting’s foliage, separate from the moisture already present in the rooting medium itself, can help offset this seasonal dryness. This misting is a supplement to, not a replacement for, whichever primary propagation method is being used, since misting alone does not address the actual rooting process happening at the node.
Propagation Boxes and Specialized Setups
For growers looking to improve their odds beyond a basic jar or pot, a few specialized setups have become popular within the houseplant community.
Propagation Boxes and Humidity Domes
A propagation box, essentially a small enclosed container with clear walls, combines some of the benefits of both primary rooting methods, allowing a cutting to root in a lightly moist medium like sphagnum moss while maintaining the elevated humidity and easy visibility more commonly associated with water propagation. These setups are particularly popular for rooting more delicate or slower-rooting cuttings that might otherwise struggle in a plain, uncovered jar or pot.
LED Grow Lights for Faster Rooting
Supplementing natural light with a small LED grow light, particularly during shorter winter days, can meaningfully speed up rooting regardless of the medium chosen, since light availability directly affects how much energy a cutting has available to fund new root growth. This kind of supplemental lighting is not strictly necessary for propagation to succeed, but it can shorten the overall timeline for anyone propagating during a lower-light season.
Propagating Multiple Cuttings at Once
Many growers propagate several cuttings simultaneously rather than one at a time, and a few considerations specific to batch propagation are worth knowing.
Batch Water Propagation
Grouping several cuttings in the same larger container of water is possible, but it also means a single instance of bacterial growth or rot can potentially spread to nodes that were otherwise healthy, which is part of why some growers prefer separate smaller jars for each individual cutting despite the added counter space this requires. Labeling each jar with the cutting date and specific plant variety, particularly when propagating several different philodendron cultivars at once, helps keep track of which cuttings are progressing on schedule and which may need closer attention.
Batch Soil Propagation
Planting several cuttings together in one larger pot works well for cuttings of the same species with similar moisture needs, but mixing different plant types in a single container risks the same kind of mismatched watering problems that affect any mixed planting, giving one cutting too much water while shortchanging another. Individual small pots, while requiring more physical space than a single shared container, generally offer more precise control over each cutting’s specific conditions during this especially sensitive early establishment period.
Displaying a Newly Propagated Philodendron
Once a cutting has rooted and begun growing steadily, how it is displayed can shape both its appearance and how quickly it fills out.
Training Onto a Support Structure
Because most philodendron varieties are natural climbers, introducing a small stake or moss pole at the time of repotting, rather than waiting until the plant has grown large and unwieldy, makes the initial training process considerably easier, since a smaller plant’s stem is more flexible and easier to gently secure into place. Attaching only the thicker, more established stems to the support with a soft tie, while allowing any aerial roots to naturally find their way onto the damp surface on their own, encourages the plant to anchor itself the way it would onto a tree trunk in the wild.
Grouping Several Propagated Cuttings Together
Displaying several small, newly rooted philodendron cuttings together in a cluster of small pots, rather than as a single isolated plant, creates a fuller, more layered look while each individual cutting continues developing at its own pace. This approach also makes it easy to compare how different cuttings from the same batch are progressing, offering a useful visual reference for anyone still learning to judge healthy growth versus a cutting that may need some adjustment to its care.
Long-Term Care Beyond the First Year
Once a propagated philodendron has become a fully established plant in its own right, its care shifts from the rooting-focused concerns covered throughout this guide toward the standard maintenance any mature philodendron requires.
Pruning and Encouraging Fuller Growth
Occasional pruning helps control a mature philodendron’s size and encourages fuller, bushier growth rather than a single long, sparse vine, and any healthy stem removed during this kind of routine pruning can itself become the starting material for an entirely new propagation project. This creates a natural, ongoing cycle where a single well-established philodendron can continue generating new full-sized plants for years, long after the original propagated plant has itself matured into a full sized specimen.
Recognizing a Plant Ready to Provide Its Own Cuttings
A propagated philodendron is generally ready to serve as a source of new cuttings itself once it has developed multiple healthy nodes along an established stem, typically after several months to a year of steady growth following its own initial rooting. At that point, the same node identification, timing, and method selection principles covered throughout this guide apply just as directly to a plant that started life as a cutting as they did to the original parent plant it came from.
SAP Safety and Handling Precautions
Philodendron sap contains calcium oxalate crystals that can cause mild to moderate skin and mouth irritation, which is worth keeping in mind throughout the propagation process.
Handling Cuttings Safely
Wearing gloves while making cuts and handling fresh cutting material reduces the risk of skin irritation for anyone with sensitive skin, and washing hands thoroughly after handling cuttings is a reasonable precaution even without gloves. Keeping cutting tools and fresh cuttings away from small children and pets during the propagation process avoids any risk of an accidental taste test on a plant that, while not highly toxic, can still cause genuine discomfort if chewed or ingested.
Storing Cuttings Safely Before Propagating
If cuttings cannot be propagated immediately after taking them, wrapping the cut end in a slightly damp paper towel and storing them in a sealed bag in a cool, shaded spot for up to a day or two helps preserve their viability without needing to rush the actual propagation setup. Cuttings left exposed to open air for too long before being placed in water, soil, or moss risk drying out at the cut site, which can reduce their chances of rooting successfully once they are finally set up.
Choosing Philodendron Varieties Suited to Propagation Experiments
For anyone specifically interested in comparing propagation methods side by side, certain philodendron varieties make better test subjects than others.
Fast, Reliable Rooters for Comparison Testing
Heartleaf philodendron and Philodendron micans root quickly and reliably across nearly every method covered in this guide, making them ideal choices for anyone wanting to directly compare water, soil, and moss propagation on genetically similar cuttings from the same plant. Their fast, visible rooting timeline also means results from this kind of side-by-side comparison become apparent within just a few weeks rather than requiring months of patience.
Why Testing on a Forgiving Variety First Builds Confidence
Practicing slower-rooting techniques on one of these especially forgiving varieties before attempting a slower rooting or more valuable cultivar allows a grower to build confidence and troubleshoot their general technique, water-changing habits, moisture judgment, and light placement, without risking a plant that would be more costly or disappointing to lose. Once a grower has successfully propagated several cuttings from an easy variety, applying those same refined habits to a more challenging or valuable plant tends to go considerably more smoothly.
Environmental Impact and Sustainability of Propagation
For growers who think about the broader footprint of their gardening habits, propagating from cuttings offers a modest but genuine sustainability advantage over purchasing new plants.
Reducing the Need for New Plant Purchases
Every cutting successfully propagated at home is one fewer plant that needs to be grown, shipped, and packaged by a commercial nursery, which reduces the cumulative transportation and packaging footprint associated with expanding a plant collection. This benefit compounds over time for anyone who regularly shares or trades cuttings with other growers rather than relying entirely on new nursery purchases.
Reusing Materials Across Propagation Projects
Glass jars used for water propagation are effectively permanent and can be reused indefinitely across countless future propagation projects, while plastic nursery pots used in soil propagation can also be washed and reused many times over, provided they are not damaged. Leftover soil mix, moss, and twine from one propagation project typically stretch across several more, further reducing the material waste associated with building out a larger plant collection over time.
A Quick Reference Checklist Before Starting
For anyone about to make their first cut, a short mental checklist can help avoid the most common early mistakes pest-freehroughout this guide.
Before Cutting
Confirming the parent plant is healthy, pest free, and not currently flowering, identifying a clear node on the intended stem section, and having clean, sharp tools ready all set the stage for a cutting with the best possible chance of success. Deciding in advance which propagation method best suits the specific variety and the grower’s own patience for monitoring, rather than defaulting automatically to whichever method feels most familiar, also pays off once the cutting is actually placed in its chosen medium.
After Cutting
Removing any leaves that would sit below the waterline or soil surface, positioning the cutting with correct polarity, and placing it in bright, indirect light rather than direct sun round out the immediate post-cutting checklist. From there, the process becomes a matter of patience, largely, regular but not excessive monitoring, and resisting the urge to intervene further until the cutting shows clear signs of either struggling or succeeding.
FAQS
Q:1 How long does it take for a philodendron cutting to root?
Most cuttings develop roots within two to four weeks in water or sphagnum moss under warm, bright conditions. Soil-propagated cuttings often take a similar or slightly longer stretch, and non-trailing varieties can take even longer than trailing types.
Q:2 Is water or soil propagation better for philodendron?
Neither is definitively better. Water propagation is easier to monitor and works well for most trailing varieties, while soil propagation tends to produce a sturdier root system from the start, though some growers report more consistent results with one method over the other depending on the specific variety being propagated.
Q:3 Can a philodendron cutting root without a node?
No. The node is the only part of the stem capable of producing new roots, so a cutting without one will not root regardless of the method used.
Q:4 Do I need rooting hormone to propagate a philodendron?
No, rooting hormone is optional rather than required, since philodendron generally roots well without it. It can help speed up the process, particularly for soil or moss propagation.
Q:5 When can a rooted cutting be moved into soil?
Once roots reach at least an inch long, a water or moss-propagated cutting is typically ready to be potted into soil, where it can continue developing a fuller root system suited to long-term growth.
Conclusion
Propagating philodendron comes down to one central requirement: every viable cutting needs at least one healthy node, since that single point is the only source of new root growth. From there, the choice between water, soil, sphagnum moss, or air layering depends mostly on how closely a grower wants to monitor progress and how much risk they are willing to accept with a particularly valued plant. With a clean cut, a bit of patience, and the right amount of moisture for whichever method is chosen, a single philodendron vine can steadily become several new, thriving plants.

Asim Usman is a plant enthusiast and content writer who specializes in creating informative, reader-friendly articles on plant care and gardening. He combines thorough research with practical insights to provide accurate, easy-to-follow guidance that helps readers grow healthy plants with confidence. His goal is to make plant care simple, enjoyable, and accessible for everyone.