
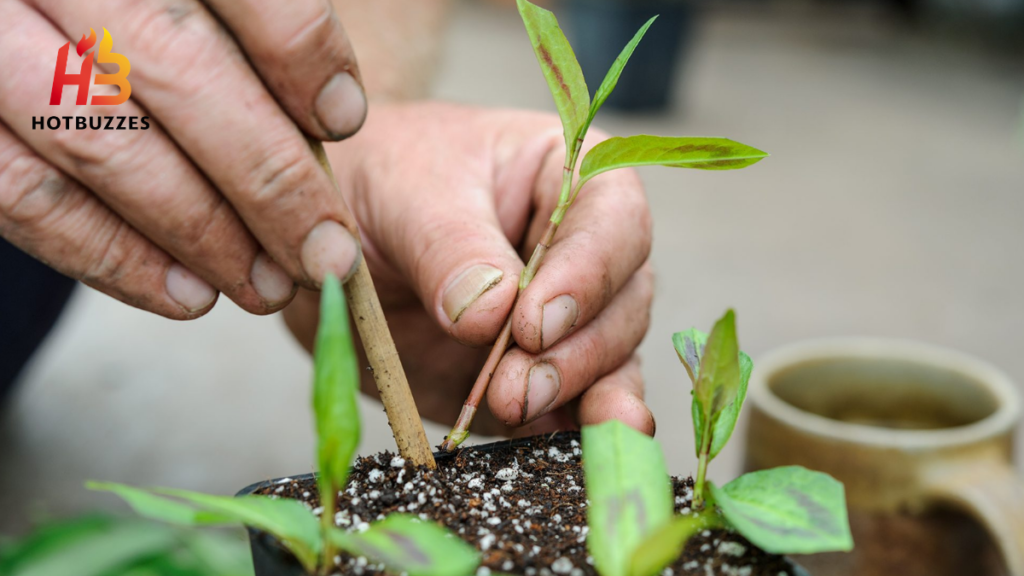
Propagation looks deceptively simple: cut a stem, put it somewhere damp, and wait for roots. In practice, a surprising number of first attempts fail. This is not because propagation is genuinely difficult. A handful of small, easy-to-overlook mistakes can derail an otherwise healthy cutting before it gets the chance to root. Once recognized, these mistakes are almost entirely preventable in future attempts.
This guide covers the most common propagation mistakes beginners make. These include using dull tools, choosing the wrong cutting technique, overwatering, and being impatient. It also covers skipping the callus step that certain plants specifically need. Recognizing these mistakes in advance makes propagation a more reliable process. It helps you understand why each mistake causes failure instead of simply memorizing a list of dos and don’ts.
Using Dull or Dirty Tools
The very first step in propagation, making the cut itself, is also where a surprising number of failures begin.
Why Sharp, Clean Blades Matter
A dull blade crushes plant tissue instead of slicing through it cleanly. This makes it harder for the cutting to develop roots. Dirty tools can also introduce bacteria, fungi, or viruses that cause rot or disease, according to Hormex’s guide to common propagation mistakes. Crushing the base of a stem specifically reduces the chances of successful rooting, according to Homes & Gardens’ houseplant propagation guide. The guide quotes a plant expert who warns that damaged tissue at the cut point is one of the most preventable causes of failure. The wound heals less cleanly and becomes a more likely entry point for infection.
The Fix
Always use sharp, sterilized pruning shears or a clean razor blade. Wipe the blade with rubbing alcohol or a household disinfectant between cuts. This keeps both the cutting and the parent plant healthier, according to Homes & Gardens. Keep a sharpening stone or tool on hand and use it regularly. This small habit pays off across every future propagation attempt, not just the current one.
Cutting in the Wrong Place
Even with a perfectly sharp, clean blade, a cutting taken from the wrong spot on the stem is unlikely to root.
Why Node Placement Matters
Taking a stem cutting is the most common propagation method. However, the cutting will not root if you make the wrong cut, according to LivingEtc’s propagation mistakes guide. The guide stresses always cutting from the correct location on the parent plant. For many tropical plants, including pothos, monstera, and philodendron, cut a two- to four-inch section. Make the cut roughly a quarter inch below a node, according to Backyard Boss’s propagation guide. The node is the only part of the stem capable of producing new roots, regardless of how many healthy leaves the cutting has.
Learn to identify a node before making any cut. A node is the small bump or ring along the stem where a leaf attaches. This removes the guesswork and prevents wasting cutting material on a piece that was never going to root.
Leaving Leaves Submerged
A cutting that looks perfectly healthy at the time of planting can quickly develop problems if lower leaves are left in place.
Why Submerged Leaves Rot
Lower leaves left on a cutting can rot when they remain submerged in water, according to LivingEtc’s propagation guide. The exposed nodes left behind after removing these leaves are precisely where new roots will form. Decaying leaf tissue in water or soil does not stay contained. It can spread bacteria toward the node itself. This increases the risk of the entire cutting rotting before it has a chance to root. In some cases, it can also damage an otherwise viable node.
Removing any leaves that would sit below the waterline or soil surface before propagating, leaving only the leaves that will remain above the medium, keeps a cutting considerably cleaner and lowers the odds of early rot.

Choosing an Unhealthy Parent Plant
Where a cutting comes from matters just as much as how it is cut.
Why a Stressed Plant Produces Weak Cuttings
Cuttings from stressed, diseased, or nutrient-deficient plants are less likely to root successfully. They may also spread disease to other plants nearby, according to Hormex’s propagation guide. A cutting with yellow, mushy, or dying leaves usually means the stem is not healthy enough to survive propagation, according to Backyard Boss’s guide. This remains true regardless of how carefully every other step is followed. That is why parent plant health deserves attention before making a single cut.
The Fix
Select a vigorous, pest-free, non-flowering stem from a well-watered, healthy parent plant. This gives the cutting the best possible starting point, according to BigHaat’s propagation mistakes guide. The guide also notes that a plant focused on flowering tends to root less readily than one focused on vegetative growth.
Rooting Every Plant the Same Way
The ease of water propagation makes it tempting to use for everything, but not every plant responds to it equally well.
Why One Method Does Not Fit All Plants
Rooting absolutely every plant in water, rather than matching the method to the specific species, is a common mistake, since many houseplants, particularly vining plants like pothos, root well in water, while others with different growth habits take far longer or are more prone to rotting before they ever root, according to Homes & Gardens’ houseplant propagation guide, which describes testing ZZ plant cuttings in both soil and water and finding that the soil cuttings developed tubers considerably faster, a result that would have been easy to miss without deliberately comparing the two methods side by side.
Researching a specific plant’s typical propagation behavior before defaulting to whichever method feels most familiar avoids wasted time on a method poorly suited to that species, and switching to soil propagation for slower-rooting or rot-prone plants often produces noticeably better results.
Skipping the Callus Step for Succulents
Succulents and cacti follow a different propagation rule than most other houseplants, and skipping it is a common beginner mistake.
Why Callusing Matters
Succulent and cactus cuttings need to dry out and form a callus over the cut surface for a few days before planting. Skipping this step is the main reason these cuttings turn mushy and rot in the soil, according to BigHaat’s propagation guide.
Unlike pothos or philodendron cuttings, which benefit from immediate contact with water or moist soil, fresh succulent cuts are vulnerable to rot if they meet moisture too soon. Their fleshy, water-storing tissue provides an especially inviting environment for opportunistic bacteria and fungi.
Leave succulent and cactus cuttings on a dry surface for several days. Wait until the cut end feels dry and slightly firm rather than moist. This gives the wound time to seal properly. It also considerably reduces the risk of rot once the cutting meets soil.
Overwatering or Letting Cuttings Dry Out
Moisture management is one of the most common places beginners swing too far in one direction or the other.
Why Both Extremes Cause Failure
Too much water causes root rot and fungal issues. Too little water can lead to dehydration before roots have a chance to form, according to Hormex’s propagation guide. This is why the propagation medium needs to stay consistently moist without becoming soggy. Finding this balance takes some practice. It also varies depending on the specific plant, container, and season.
The Fix
Checking the medium regularly and aiming for a consistently damp, never waterlogged, feel, while maintaining higher humidity around the cutting with a dome or occasional misting rather than by adding more water directly, according to Hormex, keeps moisture levels in the range most cuttings actually need.
Placing Cuttings in Direct Sunlight
Strong light seems like it should help a struggling cutting, but for a rootless plant, it often does the opposite.
Why Direct Sun Stresses a Cutting
Strong, direct sun can stress and scorch rootless cuttings, according to BigHaat’s propagation guide. Use bright, indirect light instead. It provides enough energy for the cutting without drying it out or burning delicate, unestablished tissue. A cutting with no functioning root system has a limited ability to replace moisture lost under intense direct light. Even a brief stretch of unfiltered midday sun can cause noticeable damage. A mature, well-rooted plant could easily tolerate the same conditions.
Placing cuttings in a spot with consistently bright but indirect light, several feet back from a sunny window rather than directly against the glass, supports steady growth without the added stress that direct exposure creates.
Fertilizing Too Early
Well-meaning beginners sometimes try to give a struggling cutting a boost with fertilizer, which usually backfires.
Why Fertilizer Cannot Help a Rootless Cutting
Fertilizer cannot help a cutting with no roots. It may even burn the delicate tissue present, according to BigHaat’s propagation guide. A cutting relies entirely on its stored energy reserves during the earliest rooting phase. It has no functioning root system yet to take up and use nutrients from fertilizer. Wait until new growth appears before introducing fertilizer. New growth is a sign that roots have developed enough to support the plant’s needs. Use a light, diluted fertilizer at this stage. This avoids a common and easily preventable setback.
Checking Too Often and Giving Up Too Early
Impatience causes more failed propagation attempts than most beginners realize.
Why Frequent Checking Backfires
Many cuttings take three to four weeks or longer to root. Constantly disturbing them can break fragile new roots before they have a chance to properly establish, according to BigHaat’s propagation guide. Each disturbance can set root development back rather than speeding it up. This includes tugging on a cutting or repeatedly digging into the soil to check for roots, according to Plantisima’s list of propagation mistakes.
The Fix
Be patient and allow cuttings to develop undisturbed. Check them only occasionally rather than daily. Keep simple notes on what was propagated and when. This helps track progress without constant interference, according to BigHaat’s guide. These notes also build useful, plant-specific knowledge over time.
Common Propagation Mistakes at a Glance
The table below summarizes the mistakes covered in this guide alongside their most common fix.
| Mistake | Why It Fails | Quick Fix |
|---|---|---|
| Dull or dirty tools | Crushes tissue, spreads bacteria | Use sharp, sterilized shears |
| Wrong cutting location | No node present to root from | Cut just below a visible node |
| Submerged leaves | Rot spreads toward the node | Remove lower leaves before planting |
| Unhealthy parent plant | Weak, disease-prone cuttings | Choose vigorous, pest-free stems |
| Same method for every plant | Some species root poorly in water | Match the method to the specific plant |
| Skipping callus step (succulents) | Fresh-cut rots in a moist medium | Let the cut ends dry for a few days first |
| Overwatering or underwatering | Root rot or dehydration | Keep medium damp, never soggy |
| Direct sunlight | Scorches a rootless cutting | Use bright, indirect light |
| Fertilizing too early | No roots to absorb nutrients | Wait for visible new growth |
| Checking too often | Disturbs fragile new roots | Check occasionally, keep notes |
Not Hardening Off Rooted Cuttings
A cutting that has successfully rooted is not necessarily ready for a sudden change in environment.
Why a Gradual Transition Matters
Newly rooted cuttings are delicate. They can experience shock if moved too quickly into full sun or different outdoor conditions, according to Hormex’s propagation guide. Hardening off means gradually exposing a young plant to its new growing conditions rather than shifting it all at once.
Introduce a rooted cutting to brighter light, lower humidity, or an outdoor spot gradually over a week or two. Do not move it directly into its final long-term conditions. This gives the young plant time to adjust without the stress a sudden change could cause.
Using the Wrong Growing Medium
Beyond overwatering or underwatering, beginners sometimes choose a growing medium poorly suited to the specific plant or propagation method being attempted.
Why Medium Choice Matters
Using a heavy, slow-draining potting soil for a succulent cutting can cause problems. A very light, fast-draining cactus mix can also work against a moisture-loving tropical cutting. Each plant needs a medium that matches its moisture requirements. This remains important regardless of how carefully watering is managed. A mismatched medium can undermine even an excellent propagation technique. The cutting ends up fighting its growing environment instead of being supported by it.
The Fix
Match the growing medium to the plant category. Use a light, fast-draining mix for succulents and cacti. Use a slightly more moisture-retentive but still well-aerated mix for tropical houseplant cuttings. This removes one more variable that could complicate an already delicate process. Research the specific medium recommendations for a plant before starting. Do not simply reach for whatever potting soil happens to be on hand. This pays off considerably once roots begin developing.
Ignoring Seasonal Timing
Many beginners attempt propagation at whatever time of year they happen to think of it, without considering how the season affects success.
Why Timing Affects Rooting Speed
Most houseplants and succulents root fastest and most reliably during their active growing season. This is typically spring and summer, when warmer temperatures and longer daylight hours support energy production and root development. Cuttings taken during fall or winter dormancy can still root, but they often take much longer. They are also more prone to rot because reduced metabolic activity makes them more vulnerable to excess moisture.

The Fix
Timing propagation attempts to align with a plant’s natural growing season whenever possible, and adjusting expectations toward a longer timeline if propagation is attempted during a dormant period helps avoid the frustration of assuming a slow-rooting winter cutting has failed when it may simply need more patience.
Forgetting to Label and Track Cuttings
A surprisingly common and easily avoidable mistake involves losing track of which cutting is which, especially when propagating several plants at once.
Why Tracking Matters
Without labels or notes, it becomes difficult to remember which cutting came from which parent plant, when it was taken, or which propagation method is being used for each one, particularly for anyone propagating several similar-looking cuttings simultaneously. This confusion can lead to inconsistent care, watering one cutting on a schedule meant for a different plant entirely, or simply losing track of how long a particular cutting has actually been rooting.
Using simple plant tags, sticky labels, or a written log noting the plant name, cutting date, and propagation method for each attempt removes this confusion entirely and also builds a useful record of what worked and what did not for future propagation projects.
Propagating an Already Stressed or Sick Plant
Beginners sometimes attempt to propagate from a plant that is already struggling, hoping to save at least part of it, without realizing this approach rarely works as intended.
Why This Approach Usually Backfires
A plant that is already stressed, whether from disease, pest infestation, or poor care, typically lacks the energy reserves needed to fund the additional demands of root development on a separated cutting. Propagating from a sick plant also risks spreading whatever problem originally caused the plant to decline into the new cutting, effectively starting the new plant off with the same issue rather than giving it a genuinely fresh start.
The Fix
Addressing the underlying health issue in the parent plant first, whenever realistically possible, and only taking cuttings once the plant has stabilized and shows signs of active, healthy growth again, gives any resulting propagation attempt a much better chance of success than rushing to propagate a plant that is actively struggling.
Research-Based Facts About Propagation Failure
Beyond individual grower advice, a bit of underlying plant science helps explain why certain propagation mistakes are so consistently damaging.
The Role of Auxin in Root Formation
Auxin, a plant hormone concentrated near the cut end of a stem, plays a central role in triggering the cellular changes required for new root formation at a wound site, which is the same natural process that synthetic rooting hormone products are designed to supplement. This hormonal process explains why a fresh, clean cut healed by proper callusing tends to root more reliably than a crushed or torn one, since damaged tissue disrupts the plant’s ability to concentrate this hormone efficiently at the wound site.
Why Oxygen Availability Matters as Much as Moisture
Roots require oxygen just as much as they require water, and consistently waterlogged soil or standing water that has not been changed regularly depletes the oxygen available to a developing root system, according to general plant physiology referenced across multiple horticultural extension sources. This is part of why overwatering causes rot even though the cutting is, in a literal sense, receiving plenty of moisture; the problem is not a lack of water but a lack of the oxygen roots need alongside it.
Why Callusing Specifically Protects Succulent Tissue
Succulent and cactus tissue is adapted to store large amounts of water within thick, fleshy cells, and an uncallused fresh cut on this kind of tissue provides an easy entry point for the bacteria and fungi responsible for rot, according to general succulent care research. The callusing process seals this vulnerable entry point with a dry, protective layer before the cutting is exposed to any moisture, which is precisely why skipping this step so reliably leads to a mushy, rotted cutting rather than a rooted one.
Mistakes Specific to Water Propagation
While many of the mistakes covered so far apply broadly across propagation methods, water propagation carries its own set of specific pitfalls worth calling out individually.
Using the Wrong Container Size or Shape
A container that is too wide relative to the cutting can allow too much of the stem or too many leaves to sit in water, increasing rot risk, while a container that is too narrow can make it difficult to properly submerge the node without also submerging leaves that should stay above the waterline. Choosing a container sized appropriately to the specific cutting, narrow enough to hold it upright with the node submerged but leaving it clear of the water, avoids this easily overlooked sizing mistake.
Forgetting to Account for Evaporation
Water in an open jar evaporates gradually over time, which can leave a node exposed to air even if the water was initially at the correct level, particularly in a warm or dry room. Checking water levels regularly, not just checking for cloudiness, and topping off as needed between full water changes prevents a node from unexpectedly drying out partway through the rooting process.
Mistakes Specific to Soil Propagation
Soil propagation carries a different, though overlapping, set of common beginner errors.
Burying a Cutting Too Deep
Planting a cutting too deep into the soil, rather than at the appropriate depth for the specific node placement, can cause the buried portion of the stem above the node to rot, since that tissue is not meant to spend extended time in contact with moist soil. Following the specific depth guidance for the plant being propagated, generally just deep enough to cover the node itself, avoids burying more of the stem than necessary.
Using a Pot Without Drainage
A pot without a drainage hole traps excess water at the bottom with nowhere to go, recreating many of the same low-oxygen, rot-prone conditions associated with overwatering, but hidden underground where the problem is much harder to notice until it has already caused significant damage. Always choosing a container with proper drainage, even for a small propagation pot, removes this risk from the outset.
Mistakes Specific to Air Layering
Air layering, while generally considered a lower-risk propagation method, has its own particular failure points worth understanding.
Letting the Moss Dry Out Completely
Because an air-layered cutting remains attached to the parent plant and relies on a wrapped section of moss to stay consistently damp, letting that moss dry out completely halts root development and can cause the wound site to callus over in a way that makes future rooting attempts at the same spot more difficult. Checking the moss every few days and re-moistening it with a spray bottle before it dries out entirely keeps the rooting process moving steadily forward.
Cutting the Layer Free Too Early
Separating an air-layered section from the parent plant before it has developed a sufficiently established root system risks losing the cutting entirely, since it no longer has the parent plant’s support to fall back on if its own roots are not yet capable of sustaining it. Waiting until roots are clearly visible and reasonably developed through the clear plastic wrapping, rather than cutting free at the first sign of any root growth at all, gives the new cutting a much better chance of surviving independently.

Mistakes Beginners Make After a Cutting Has Rooted
Propagation mistakes are not limited to the rooting phase itself, and a few common errors occur specifically once a cutting has already succeeded.
Repotting Too Aggressively
Moving a newly rooted cutting directly into a large, mature-sized pot, rather than a modestly sized container appropriate to its still-small root system, can lead to excess soil retaining more moisture than the young plant’s limited roots can actually use, increasing the risk of root rot shortly after an otherwise successful propagation. Sizing up gradually, one to two inches in pot diameter at a time as the plant actually grows, avoids this particular setback.
Moving a New Plant Into Direct Sun Too Quickly
A newly rooted cutting that has spent its entire rooting period in indirect light is not yet adapted to handle intense direct sun, and moving it too abruptly into a bright, sunny spot can cause sudden leaf scorch or stress. Gradually acclimating a young plant to brighter conditions over a week or two, rather than making an abrupt change, allows it to adjust without the shock a sudden shift would otherwise cause.
Mistakes Related to Tools and Equipment Beyond the Blade
Beyond simply using a sharp, clean blade, a few other equipment-related habits trip up beginners more often than expected.
Reusing Contaminated Water or Soil
Reusing water from a previous, failed propagation attempt, or reusing soil from a pot that previously held a diseased or pest-infested plant, can introduce the same problems into a brand-new cutting before it even has a chance to establish itself. Starting with fresh water and fresh, or at least thoroughly sterilized, soil for every new propagation attempt removes this avoidable risk entirely.
Skipping a Humidity Dome When One Would Help
For plants that specifically benefit from elevated humidity during rooting, tropical foliage plants in particular, skipping a humidity dome or improvised plastic covering when one is called for can leave a cutting more vulnerable to moisture loss than necessary, especially in a dry indoor environment. A simple clear plastic bag loosely draped over a pot, or a purpose-built humidity dome, costs very little and can noticeably improve outcomes for humidity-sensitive cuttings.
Mistakes Related to Plant Selection
Beyond choosing an unhealthy parent plant, beginners sometimes select the wrong type of plant material entirely for their first propagation attempt.
Starting With an Overly Difficult Species
Attempting a first propagation project with a notoriously slow-rooting or finicky species, rather than starting with an easy, forgiving plant like pothos or a common succulent, sets a beginner up for a discouraging first experience that has more to do with plant choice than any mistake in technique. Building basic skills and confidence on a genuinely easy plant before moving on to a more challenging species tends to produce better long-term results and a more enjoyable learning process.
Taking Cuttings From the Wrong Part of the Plant
Beyond simply missing the node, taking a cutting from very new, still-soft growth at the tip of a plant, rather than from more mature, established stem sections, can result in a cutting with insufficient stored energy to fund root development. Choosing cuttings from reasonably mature but still healthy and actively growing sections of a plant, rather than either the very newest or the very oldest growth, generally produces more reliable results.
Misreading Early Warning Signs
Beginners often misinterpret what a cutting’s appearance is actually telling them, either panicking unnecessarily or missing a genuine warning sign.
Assuming Leaf Drop Always Means Failure
As covered earlier in this guide regarding soil-propagated cuttings, losing a leaf or two during the early rooting period does not necessarily mean a cutting has failed, since this can be a normal part of the plant redirecting its limited energy toward root development rather than maintaining every single leaf. Judging a cutting’s overall trajectory over several weeks, rather than reacting to any single leaf drop as an immediate crisis, gives a more accurate picture of whether propagation is actually succeeding.
Missing the Signs of Genuine Rot
On the other hand, a cutting that develops a soft, mushy texture, a foul or sour smell, or blackened discoloration at the cut end is showing genuine signs of rot rather than normal adjustment stress, and this distinction matters considerably for how a grower should respond. Recognizing the difference between benign, temporary stress and actual, progressing rot allows a beginner to intervene, trimming away affected tissue and starting fresh, before an entire cutting is lost to a problem that was catchable early on.
Mistakes When Propagating for the First Time in a New Climate or Home
Growers who move to a new home or climate sometimes carry over propagation habits that no longer suit their new environment.
Assuming Previous Success Guarantees Future Success
A propagation routine that worked reliably in one home’s specific light, humidity, and temperature conditions may not translate directly to a new home with different characteristics, even when using the exact same technique and plant species that previously worked well. Treating a first propagation attempt in a new environment as a fresh learning process, rather than assuming automatic success based on past experience elsewhere, helps avoid the frustration of an unexpected failure in otherwise familiar territory.
Not Adjusting for Local Water Quality
Tap water quality varies considerably between different regions, and unusually hard or heavily treated water in a new location can sometimes affect propagation success in ways that were not a factor in a previous home. Switching to filtered water, or water that has been left out overnight to let chlorine dissipate, is a simple adjustment worth trying if propagation results seem unexpectedly inconsistent after a move.
Building Good Habits From the Start
Rather than treating each of these mistakes as an isolated risk to avoid individually, a few broader habits address several potential problems at once.
Keeping a Simple Propagation Journal
Recording the plant species, cutting date, method used, and any observations along the way, as briefly mentioned earlier in this guide, builds a body of personal, plant-specific knowledge that generic propagation advice cannot fully replace. Over time, this kind of record reveals patterns specific to a grower’s own home and habits, which spot particular plants root fastest, which methods tend to work best in that specific space, and so on.
Starting Small and Scaling Up Gradually
Propagating just one or two cuttings at a time when still learning, rather than attempting a large batch project immediately, makes it considerably easier to give each cutting the individual attention and observation needed to catch problems early. Once basic skills and confidence are established through a few smaller successful attempts, scaling up to larger batch propagation projects becomes a much more manageable next step.
Mistakes When Propagating in Batches or Groups
Propagating several cuttings at once introduces its own particular set of beginner pitfalls beyond what a single cutting typically presents.
Mixing Incompatible Plants in the Same Container
Placing cuttings from plants with very different moisture or light needs into the same jar or pot forces a compromise that shortchanges at least one of them, whether that means one cutting sitting in water that is too stagnant for its taste or another drying out faster than the shared container’s watering schedule accounts for. Grouping only cuttings with genuinely similar needs together and giving mismatched plants their own separate containers avoids this easily overlooked batch propagation mistake.
Losing Track of Individual Cutting Progress
When propagating many cuttings simultaneously, it becomes easy to lose track of which specific cuttings are progressing well and which are struggling, especially without the labeling system discussed earlier in this guide. Checking each cutting individually on a rotating basis, rather than glancing at the batch as a whole and assuming uniform progress, helps catch an individual problem cutting before it has the chance to affect its neighbors through spreading rot or mold.
Mistakes Related to Timing New Growth Expectations
Beginners often misjudge how quickly a successfully rooted cutting should start showing visible above-ground progress, leading to premature concern or unnecessary intervention.
Expecting Immediate Leaf Growth After Rooting
A cutting that has just developed its first roots does not necessarily produce new leaf growth right away, since the plant often prioritizes further root development before redirecting energy toward new foliage above the surface. Assuming a rooted cutting has stalled simply because a new leaf has not yet appeared and responding with fertilizer or a sudden change in care can disrupt a process that was actually proceeding normally on its own timeline.
Not Accounting for Plant-Specific Growth Rates
Different plant species and even different varieties within the same species can have meaningfully different growth rates once established, and comparing a naturally slow-growing plant’s progress against a naturally fast-growing one leads to inaccurate conclusions about whether propagation actually succeeded. Researching the typical growth pace of the specific plant being propagated, rather than assuming a universal timeline applies to every species, sets more realistic expectations for what steady, healthy progress actually looks like.
Mistakes That Stem From Overcorrecting Previous Failures
Ironically, learning from a past propagation failure sometimes leads beginners to overcorrect in ways that create new problems.
Swinging From Overwatering to Underwatering
A grower who previously lost a cutting to overwatering sometimes overcorrects by withholding water excessively on the next attempt, effectively trading one extreme for the other rather than finding the actual balance in between. Returning to the specific, moderate moisture guidance covered throughout this guide, rather than reacting purely off the memory of a single past failure, helps avoid simply replacing one mistake with its opposite.
Becoming Overly Cautious About Necessary Steps
Similarly, a grower who once damaged a cutting by checking on it too frequently might swing toward the opposite extreme, neglecting a cutting so thoroughly that a genuine problem, like a jar of water that badly needs changing, goes unnoticed for far too long. Striking a reasonable middle ground, checking regularly enough to catch real problems while still resisting the urge to constantly disturb a developing cutting, avoids both ends of this particular overcorrection.
When to Accept a Propagation Attempt Has Failed
Even with every precaution taken, not every cutting successfully roots, and recognizing when to let go of a failed attempt is itself a useful skill.
Signs a Cutting Is Not Going to Recover
A cutting that has turned entirely soft, black, or foul-smelling at the node, or one that has completely dried out and shriveled beyond any hope of rehydration, has generally passed the point where recovery is realistic. Continuing to hold onto a clearly failed cutting, hoping for a turnaround, mainly delays the decision to try again with fresh material rather than actually improving the odds of success.
Learning From a Failed Attempt Rather Than Repeating the Same Mistake
Reviewing what went wrong with a failed cutting, whether that was a missed node, poor water hygiene, incorrect medium, or simple bad timing, and adjusting the next attempt accordingly turns a single failure into useful, specific knowledge rather than just a discouraging setback. This kind of honest troubleshooting, informed by the specific mistakes covered throughout this guide, is often what separates a beginner who eventually becomes reliably successful at propagation from one who gives up after an early disappointment.
Mistakes Related to Pest and Disease Prevention
A cutting’s vulnerability during propagation makes preventing pest and disease issues considerably more important than it might be for an already established, mature plant, and a few related mistakes are worth calling out specifically.
Not Inspecting the Parent Plant Before Cutting
Skipping a close inspection of the parent plant’s stems and the undersides of its leaves before taking a cutting risks transferring an existing but not yet obvious pest infestation, such as spider mites or mealybugs, directly into the new propagation attempt. Treating any identified pest issue on the parent plant first, before taking cuttings, prevents this problem from being built into a new plant from the very start.
Failing to Quarantine New Cuttings From an Existing Collection
Placing a newly rooted cutting immediately alongside an established plant collection, without a brief period of separate observation, risks spreading an undetected problem to otherwise healthy plants if the cutting turns out to be carrying pests or disease after all. Keeping new cuttings in a separate area for a couple of weeks after they root, checking them periodically during that stretch, catches most latent issues before they have a chance to spread further.
Mistakes That Come From Following Generic Advice Too Rigidly
Propagation advice, including much of what is covered in this guide, is necessarily somewhat general, and treating every single recommendation as an unbending rule rather than a helpful starting point can itself become a mistake.
Ignoring a Plant’s Individual Response
Some plants respond well to slight deviations from standard advice, rooting faster in conditions slightly different from what a general guide recommends, and rigidly sticking to generic instructions despite clear signs that a specific plant is responding better to a different approach can hold back otherwise good results. Paying attention to how an individual plant is actually responding and adjusting accordingly tends to produce better outcomes over time than mechanically following the same fixed routine regardless of the results it is producing.
Not Accounting for a Specific Home’s Unique Conditions
Every home has its own particular combination of light, humidity, temperature, and airflow, and generic propagation advice cannot account for every one of these variables precisely. Treating widely available propagation guidance as a well-informed starting point, then adjusting based on direct observation of how cuttings actually perform in a specific space, ultimately produces more reliable long-term results than following any single guide, including this one, without any room for personal adjustment.
A Quick Pre-Propagation Checklist
For anyone about to attempt their first cutting, running through a short mental checklist beforehand addresses the majority of mistakes covered throughout this guide in one pass.
Before Making Any Cut
Confirming the parent plant is healthy, pest-free, and not currently flowering, identifying a clear node on the intended stem section, and having clean, sharp, sterilized tools ready all set the stage for a cutting with the best possible chance of success. Deciding in advance which growing medium and propagation method best suit the specific plant being propagated, rather than defaulting automatically to whichever approach feels most familiar, also pays off once the cutting is actually placed in its chosen environment.
After the Cutting Is Placed
Removing any leaves that would sit below the waterline or soil surface, positioning the cutting correctly, placing it in bright but indirect light, and labeling it with the date and plant name round out the immediate post-cutting checklist. From there, the process becomes a matter of patience, largely, regular but not excessive monitoring, and resisting the urge to intervene further until the cutting shows clear signs of either struggling or succeeding, exactly the discipline that separates a beginner still working through this list of common mistakes from a more experienced grower who has already internalized these habits.
Mistakes Related to Sourcing Cutting Material
Where a cutting comes from, beyond simply the health of the parent plant already covered earlier, introduces a few additional considerations beginners sometimes overlook.
Taking Cuttings Without Permission or From Unknown Sources
Taking a cutting from a plant at a public garden, a friend’s home without asking, or an unfamiliar outdoor source risks both the ethical issue of removing plant material without consent and the practical issue of not knowing that plant’s health history or exposure to pesticides and pests. Sourcing cutting material only from plants a grower has permission to take from, and ideally already knows the general care history of, avoids both of these problems at once.
Purchasing Cuttings From Unreliable Online Sellers
Buying cuttings shipped from an online seller introduces its own risk, since a cutting that spends several days in transit, particularly through extreme temperatures, arrives already stressed before propagation has even begun. Choosing reputable sellers with good shipping practices and expecting a somewhat lower success rate from shipped cuttings compared to those taken fresh from a locally available plant sets more realistic expectations for this particular sourcing method.
FAQS
Q:1 What is the single most common reason a cutting fails to root?
Taking a cutting without including a node is one of the most frequent causes of failure, since the node is the only part of the stem capable of producing new roots. A close second is rot caused by submerged leaves or an overly wet growing medium.
Q:2 How often should I check on a propagating cutting?
Checking every few days is generally enough to monitor water clarity or soil moisture without disturbing developing roots. Avoid tugging on the cutting or digging into the soil to check for roots more than occasionally, since this can damage fragile new growth.
Q:3 Do all cuttings need rooting hormone?
No. Many common houseplants root reliably without it. Rooting hormone can help speed up the process or improve success rates for slower-rooting or more difficult species, but it is not a strict requirement for easy-to-propagate plants.
Q:4 Why did my succulent cutting turn mushy after I planted it?
This is almost always caused by skipping the callusing step. Succulent and cactus cuttings need their cut end to dry and form a protective callus for several days before contacting soil or moisture, unlike most other houseplant cuttings.
Q:5 Is it better to propagate in water or soil?
Neither is universally better. Water propagation is easier to monitor and suits many trailing houseplants well, while some species, including certain succulents and plants like the ZZ plant, tend to root faster and more reliably in soil.
Conclusion
Most failed propagation attempts trace back to one of a small handful of preventable mistakes, dull tools, a poorly placed cut, submerged leaves, the wrong moisture balance, or simply not enough patience once a cutting is actually rooting. None of these mistakes require advanced skill to avoid, only a bit of awareness before starting, which is exactly why propagation has such a strong reputation as a rewarding, low-cost way to grow a plant collection once the early trial-and-error phase is behind a beginner. With sharp tools, the right cut, matched growing conditions, and enough patience to let a cutting develop undisturbed, most common houseplants root far more reliably than their reputation for difficulty might suggest.

Ajwa Asif is a writer with a passion for plants, gardening, and creating educational content. She researches plant-related topics using reputable horticultural resources and shares practical advice to help readers grow healthier plants and build confidence in their gardening journey. Her content focuses on delivering clear, reliable, and user-focused information.