
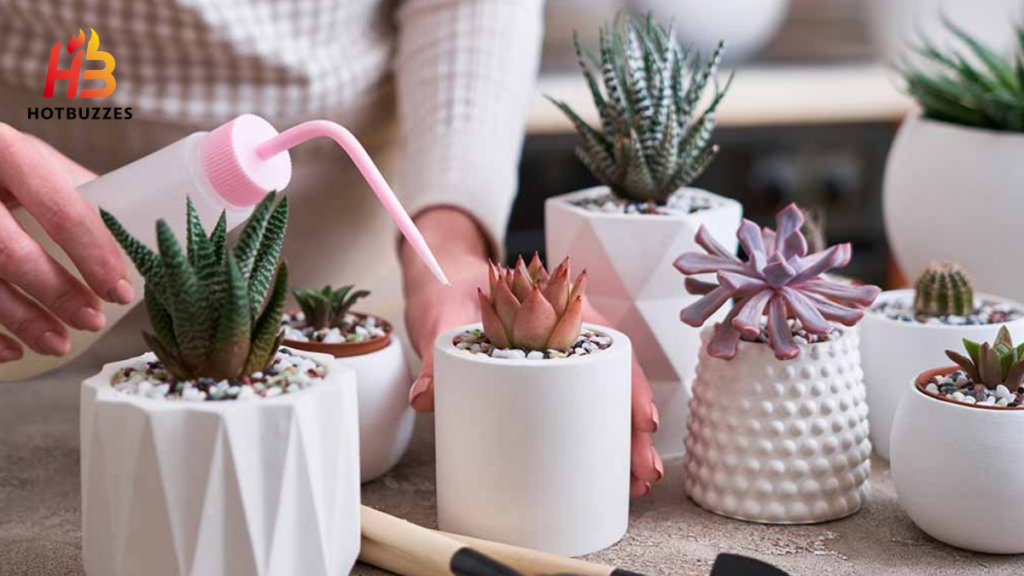
Rot is probably the most infamous disease among succulent lovers, and for good reason. It often sneaks up quietly and goes unnoticed. A plant that looked perfectly healthy a week ago may suddenly develop translucent, mushy leaves. Its stem may also give way at the slightest touch. By the time rot reaches this stage, the window for saving the plant has usually closed. That is why prevention matters more than any treatment step covered later in this guide. Catching the earliest signs can make the biggest difference in whether a plant survives.
This guide explains what causes mushy rot in succulents and how to spot it at every stage. It covers the earliest warning signs through advanced, likely unsalvageable damage. You’ll also learn the specific treatment steps that give a struggling plant its best chance of recovery.
Why Succulents Are So Prone to Rot
Understanding the underlying biology explains why this single problem causes so much damage across the succulent growing community. Root rot is usually caused by overwatering or poor drainage, according to Cafe Planta’s guide to common succulent diseases. Succulents store water in their leaves and stems because they are adapted to infrequent watering. However, sitting in soggy soil causes their roots to decay instead of simply staying hydrated. This water storage strategy helps succulents survive drought. However, it becomes a liability when their roots stay consistently wet.
Insufficient Oxygen at the Root Level
Beyond fungal infection itself, insufficient oxygen at the root zone can also contribute to rot, according to Planet Desert’s root rot treatment guide. Waterlogged soil pushes air out of the small pockets that roots normally rely on to breathe. Without enough oxygen, roots weaken and become more vulnerable to the fungal pathogens that cause decay. This means overwatering can damage a succulent through two separate but related mechanisms.
The Specific Fungi Responsible
The fungi behind most cases of root rot typically spread through contaminated gardening tools or already infected soil. Fusarium and Pythium are among the most common culprits, according to Planet Desert’s guide. A separate but related cause is Armillaria mellea, also known as honey or oak root fungus. It typically affects oak trees but is not exclusive to them. It can also infect succulents and produce clusters of light brown mushrooms around the plant’s base, according to Gardener’s Path’s guide to succulent rotting.
The Early Warning Signs Before Rot Becomes Mushy
Catching rot before it progresses to the mushy stage covered in this guide’s title is the single biggest factor separating a saved plant from a lost one. Discover which indoor plants are trending in 2026 and learn how they can complement different spaces.
Stunted Growth as an Early Signal
A succulent that has stopped growing, especially after thriving until recently, may show an early sign of root rot, according to Planet Desert’s guide. First, rule out other causes such as inadequate sunlight, an incorrectly sized pot, or a watering routine that needs adjusting. Stunted growth alone does not confirm root rot. However, when it appears with other signs covered below, it becomes a meaningful early warning worth investigating.
Yellowing Leaves and What They Indicate
If the bottom leaves are yellowing but the stem shows no signs of rot, the more likely cause is simple overwatering rather than active rot, according to Plant Care Today’s guide to succulent root rot. In this case, the guide recommends simply reducing watering. If the top leaves turn yellow, the pattern is more likely to indicate a nutrient deficiency. Repotting and fertilizer may be needed instead of rot treatment. Checking which leaves are affected is an important first step before assuming the worst.
Limp, Shriveled, and Translucent Leaves
Limp, shriveled, and yellow leaves can indicate that succulent roots are rotting, according to Gardening Know How’s guide to succulent root rot control. Leaves that become translucent and start falling off indicate that the plant is already in serious trouble, according to Cafe Planta’s guide. The translucent appearance is more distinctive than simple wilting. It can help separate root rot from ordinary drought stress or underwatering.
What Root Rot Actually Looks Like Once You Unpot the Plant
Because many of the above signs can have other explanations, physically inspecting the roots remains the most reliable way to confirm rot is actually present.
Healthy Roots vs Rotting Roots
Healthy roots are usually white, firm, and strong, never mushy, according to Planet Desert’s guide. Rotting roots, by contrast, feel soft and appear dark brown or black. They often also have a distinctly foul odor. Together, these signs leave little doubt once the plant is removed from its pot for inspection.

Distinguishing Root Hair From Fungal Growth
A light, fuzzy coating on healthy roots may be natural root hair. It may also be beneficial mycorrhizal fungi that help with nutrient uptake, according to Sublime Succulents’ root rot guide. Unpotting a plant can remove much of this natural fuzz. However, this is usually not a major concern unless it happens repeatedly. Confusing beneficial fuzz with harmful fungal infection is a common mistake. Color and texture matter more than the presence of fuzz. Healthy roots are light and fine, while rotten roots are usually dark and mushy.
When Rot Has Reached the Stem
At advanced stages, rot symptoms appear on the stem and then the lower leaves. Both gradually pale and turn yellow before becoming mushy, according to Sublime Succulents’ guide. Once tissue reaches this mushy stage, there is no fixing it. The progression moves from roots to stem and then to leaves. This explains why catching rot at the root level, before it reaches the stem, gives the plant the best chance of recovery.
Signals That Rot Has Progressed Too Far to Save
Knowing when a plant is genuinely beyond saving prevents wasted effort and helps a grower move on to salvaging what can still be recovered.
Mushy Tissue Is a Point of No Return
Rotting is irreversible once tissue has turned mushy. At this stage, the standard recommendation is to dispose of the decayed plant and its potting soil entirely, according to Gardener’s Path’s guide. Fungicides do not cure decay that has already occurred. They only help prevent further spread. This distinction is important throughout this guide. Every treatment step works by removing dead tissue and protecting the remaining healthy tissue. It does not reverse damage that has already happened.
When the Stem Itself Has Rotted
Once rot spreads into the stem, healing the plant becomes very difficult and is often not possible, according to Sublime Succulents’ guide. Several succulent species have leaves that hide the stem base. This can make stem rot easy to miss until the damage is already extensive. Check the stem during any rot inspection, not just the roots or visible leaves. This can help catch advanced and more dangerous rot before it becomes obvious from a distance.
Prevention Strategies at a Glance
The table below summarizes the core prevention practices covered throughout this guide, organized by the specific risk factor each one addresses.
| Risk Factor | Prevention Strategy | Why It Works |
|---|---|---|
| Overwatering | Water only when soil at drainage holes is dry | Prevents soggy conditions fungi need to establish |
| Poor drainage | Use a well-draining cactus or succulent mix | Reduces standing water around roots |
| Contaminated soil | Fumigate or sterilize soil before planting | Kills existing fungus, bacteria, or larvae |
| Contaminated tools | Wipe tools with alcohol between uses | Prevents spreading fungal spores between plants |
| Winter overwatering | Reduce watering frequency by half in winter | Matches reduced water use during dormancy |
| Standing dead leaves | Remove dead leaves promptly | Prevents moisture retention against the stem |
| Overhead watering | Water the soil directly, not the foliage | Reduces fungal spore activation on leaves |
Step-by-Step Prevention Practices
Beyond the summary table, a few prevention habits deserve more detailed explanation. New to plant propagation? Discover common mistakes that can prevent cuttings from rooting successfully.
Choosing and Preparing the Right Soil
Succulent root rot control starts with proper planting and care. Use a well-draining succulent soil or a homemade mix of potting soil, sand, and peat, according to Gardening Know How’s guide. The guide also recommends fumigating or sterilizing soil before planting. This helps kill existing insect larvae, fungi, or bacteria that may already be present. Using clean, well-draining soil addresses both primary causes covered earlier: poor drainage and pathogen exposure.
Watering by Signal, Not Schedule
Water only when the bottom of the soil near the drainage holes feels dry. This fits a succulent’s actual water needs better than following a fixed schedule, according to Gardening Know How’s guide. Reduce watering by roughly half during winter. Succulents grow more slowly and use less water during their dormant season. This seasonal adjustment also appears in broader houseplant care guidance.
Managing Dead Leaves and Debris
Inspecting a plant’s lower and bottom leaves and the base of the stem on a regular basis, and removing any dead leaves promptly, helps prevent rot from reaching advanced stages, according to Plant Care Today’s guide, since dead leaves tend to retain a lot of moisture and can encourage rot to develop against the stem even when the rest of the plant is being watered appropriately. This simple, regular housekeeping habit costs almost nothing in time but meaningfully reduces one specific, easily overlooked rot risk.
Avoiding Overhead Watering
Watering the soil directly rather than the foliage prevents wetting leaves unnecessarily, since overhead watering that wets the leaves often activates fungal spores responsible for diseases like anthracnose, according to Gardener’s Path’s guide, which notes this particular fungal disease can progress down the stem toward the roots if left unchecked. This distinction, soil-level watering versus overhead watering, is a small technique change that meaningfully reduces exposure to airborne fungal spores that thrive specifically on wet foliage.
Step-by-Step Treatment Once Rot Is Confirmed
Once inspection confirms genuine rot, a clear, methodical process gives a plant the best possible chance at recovery.
Step One: Remove the Plant and Inspect Thoroughly
Carefully take the succulent out of its pot, being gentle to avoid further damaging any roots that remain healthy, then examine the roots closely for brown or black coloring, which indicates rot, according to Cafe Planta’s guide. Rinsing the roots under lukewarm water to wash away dirt and any loose, rotted material makes this inspection considerably easier and clearer than trying to assess dry, soil-caked roots.
Step Two: Prune Away All Affected Tissue
Using sterilized, sharp shears or scissors, cut away every soft, dark, or rotten root, wiping the blade with bleach or rubbing alcohol between each cut to avoid spreading the disease to healthy tissue, according to Sod Lawn’s guide to root rot treatment. Removing all affected parts matters considerably, since even a small remaining bit of rot left behind can spoil the entire plant, according to Planet Desert’s guide, which recommends trimming leaves from the stem if only a small portion of the root system remains healthy after pruning.
Step Three: Sterilize the Container and Discard Old Soil
Scrubbing the original container with a diluted bleach solution, roughly one part bleach to nine parts water, kills any lingering fungus or hidden pathogens that could cause rot to return, according to Sod Lawn’s guide. The old soil should be discarded entirely rather than reused, since it is likely contaminated with the same fungus responsible for the original rot, according to a guide on black root rot from Old Garden Shop.
Step Four: Disinfect the Roots Before Repotting
Mixing a bowl of water with a drop of antibacterial dish soap, then using fresh cotton swabs to carefully wipe the remaining healthy roots, or dunking those roots into a diluted antifungal preparation, adds an extra layer of protection before the plant goes back into fresh soil, according to Gardening Know How’s guide. Letting the roots dry completely before repotting is an essential final step in this process, since replanting damp, freshly treated roots directly into moist soil reintroduces exactly the conditions that caused the original problem.
Step Five: Repot Into Fresh, Well-Draining Soil
Adding fresh soil, ideally a potting mix with added perlite for better drainage, and confirming the new pot has proper drainage holes, addresses the underlying drainage problem that likely contributed to the original rot in the first place, according to Sod Lawn’s guide. If poor drainage was clearly part of the original issue, correcting it at this stage matters just as much as removing the rotted tissue itself, since replanting into the same flawed conditions all but guarantees a repeat episode.
Step Six: Allow the Plant to Rest Before Watering Again
Allowing the plant to stay dry for approximately two weeks after repotting, observing it closely during that stretch, gives any remaining minor fungal presence time to be outcompeted by the plant’s own healing process before moisture is reintroduced, according to Gardening Know How’s guide. Planet Desert’s guide echoes this same caution, recommending watering only when needed after treatment and avoiding frequent fertilizer, since fertilizer can actually weaken an already stressed, recovering plant.
Using Fungicide as a Supplementary Treatment
For rot caught early enough, a fungicide application can support recovery, though it should never be relied on as a standalone cure.
Copper Fungicide
Certain succulents can be saved with an application of copper fungicide, applied either as a soil drench or a foliar spray, according to Gardening Know How’s guide, though this treatment works best when combined with the physical pruning and repotting steps covered earlier rather than used alone as a substitute for them.
Powdered Sulfur
Many experienced growers recommend powdered sulfur, dusted onto a plant’s roots at the time of repotting, since it acidifies the soil and helps protect fragile succulent roots from fungi and bacteria, according to Succulents Box’s root rot treatment guide, which cautions that sulfur can also harm beneficial microbes alongside the harmful ones, and importantly, does not cure rot that has already been caused by overwatering.
Neem Oil for Related Fungal Diseases
For anthracnose specifically, a related but distinct fungal disease that causes dark, watery lesions on foliage, nontoxic neem oil serves as an effective organic treatment, according to Gardener’s Path’s guide, which notes it carries a strong, garlic-like smell as a practical downside worth being aware of before applying it indoors.
Saving a Plant When Only Part of It Is Affected
Not every case of rot requires discarding an entire plant, and a few salvage strategies apply specifically when damage is limited to one area.
Propagating From Healthy Offsets
Many succulents produce offsets that can be divided away from an affected parent plant, allowed to callus, and replanted separately, according to Gardening Know How’s guide, offering a practical way to preserve at least part of a valuable or sentimental plant even when the main specimen cannot be fully saved.
Taking Cuttings From Unaffected Leaves or Stems
As a last resort, taking cuttings from any visibly healthy leaves or stem sections and propagating one or more new plants preserves the genetic line of a decayed specimen even when the original plant itself cannot realistically be recovered, according to Gardener’s Path’s guide. This approach mirrors standard succulent leaf propagation technique, requiring the same callusing period before the cutting meets any soil or moisture.
When to Simply Start Over
Depending on the scope of damage and how replaceable the specific plant is, discarding a badly decayed succulent and purchasing or propagating a new one is often more practical than investing significant time attempting to save a small, uncertain remnant, according to Gardener’s Path’s guide. Reserving the more intensive salvage efforts covered in this section for genuinely valuable or sentimental plants, rather than every single case of rot, keeps the overall time investment reasonable.
Research-Based Facts About the Fungi Behind Succulent Rot
Beyond practical prevention and treatment steps, understanding the specific pathogens involved explains why this problem behaves the way it does.
How Black Root Rot Spreads So Aggressively
Black root rot fungal spores travel through water and soil to infect other plants, and if left unchecked, the disease can spread rapidly enough to devastate an entire collection of succulents in a short period, according to Old Garden Shop’s guide. Because aboveground symptoms like soft, black leaves or sudden plant death often only appear once the rot is already well established underground, immediate and aggressive treatment at the very first sign of infection offers by far the best chance of containing the problem before it spreads to neighboring plants.

Why Identifying the Specific Pathogen Is So Difficult
One of the most significant challenges in treating succulent rot is that it’s easy to recognize a mushy, pale, failing plant, but considerably harder to identify which specific pathogen is actually responsible, according to Gardener’s Path’s guide, which lists multiple distinct fungal diseases, including anthracnose and Armillaria root rot, alongside more generic root rot fungi like Fusarium and Pythium. This diagnostic difficulty is part of why the general prevention and treatment steps covered throughout this guide focus on addressing the shared underlying conditions, excess moisture and contaminated soil or tools, that nearly every one of these different pathogens depends on to establish an infection in the first place.
Building a Regular Inspection Habit
Because rot develops underground before showing obvious above-ground symptoms, building a simple, recurring inspection habit is one of the most effective long-term prevention strategies available.
What to Check and How Often
Setting aside a few minutes every couple of weeks to check the base of each succulent’s stem, gently move aside lower leaves to look for early discoloration, and confirm the soil surface is drying out at an expected rate creates an early warning system that catches problems long before they progress to the mushy, advanced stage covered throughout this guide. This kind of routine check costs very little time but consistently outperforms a reactive approach that only investigates once a plant already shows obvious, visible distress.
Keeping Notes Across a Collection
For anyone managing several succulents at once, jotting down brief notes on watering dates and any concerns noticed during inspection helps distinguish a genuinely developing problem from normal, expected variation between individual plants. This kind of lightweight tracking also makes it easier to identify whether a specific watering habit or pot type is contributing to repeated rot issues across multiple plants, rather than treating each case as an isolated incident.
FAQS
Q1. Can a succulent recover once its leaves have turned mushy?
Generally no. Once tissue has actually turned mushy, the damage is considered irreversible, and the standard recommendation is to remove and discard the affected plant material, then attempt to salvage any remaining healthy sections through propagation rather than trying to save the mushy tissue itself.
Q2. How can I tell the difference between healthy root fuzz and early rot?
Healthy root hair or beneficial mycorrhizal fungi appears as a light, fine fuzz on otherwise white, firm roots. Rot, by contrast, shows up as roots that are dark brown or black, soft to the touch, and often accompanied by a distinctly foul smell.
Q3. How often should I water my succulents to prevent rot?
Water only when the soil at the bottom of the pot, near the drainage holes, feels completely dry, rather than following a fixed schedule. Reduce watering frequency by roughly half during winter to match the plant’s naturally slower growth and reduced water needs.
Q4. Does fungicide cure root rot?
No. Fungicides, including copper fungicide and powdered sulfur, can help prevent further fungal spread and support a plant’s recovery when used alongside pruning and repotting, but they do not reverse or cure tissue that has already rotted.
Q5. Why did my succulent’s bottom leaves turn yellow without any rot present?
Yellowing limited to the bottom leaves, without any softness or discoloration on the stem itself, is more likely a sign of simple overwatering rather than active rot. Cutting back on watering frequency typically resolves this before it progresses any further.
Q6. Can I reuse the soil from a plant that had root rot?
No. Old soil from a rotted plant is very likely contaminated with the same fungus responsible for the original infection and should be discarded entirely rather than reused, even for a different, currently healthy plant.
Conclusion
Preventing mushy rot in succulents comes down almost entirely to managing moisture correctly, since nearly every fungal pathogen responsible for this damage depends on the same excess water and poor drainage conditions to establish itself in the first place. Well-draining soil, watering only when the root zone is genuinely dry, promptly removing dead leaves, and keeping tools and containers clean between uses address the root causes covered throughout this guide before rot ever has the chance to take hold. Because rot spreads underground before becoming visible above the soil line, regular root and stem inspection, rather than waiting for obvious above-ground symptoms, remains the single most reliable way to catch a developing problem while it is still treatable.
When rot does appear, treating it quickly and thoroughly, pruning away every trace of affected tissue, sterilizing tools and containers, and repotting into fresh, well-draining soil gives a plant its best realistic chance at recovery, provided the damage has not already progressed to the mushy, irreversible stage this guide’s title specifically addresses. For plants that cannot be saved in their entirety, propagating from any remaining healthy leaves, stems, or offsets offers a practical way to preserve at least part of a valued succulent, turning what looks like a total loss into the starting point for its own recovery.

Asim Usman is a plant enthusiast and content writer who specializes in creating informative, reader-friendly articles on plant care and gardening. He combines thorough research with practical insights to provide accurate, easy-to-follow guidance that helps readers grow healthy plants with confidence. His goal is to make plant care simple, enjoyable, and accessible for everyone.