
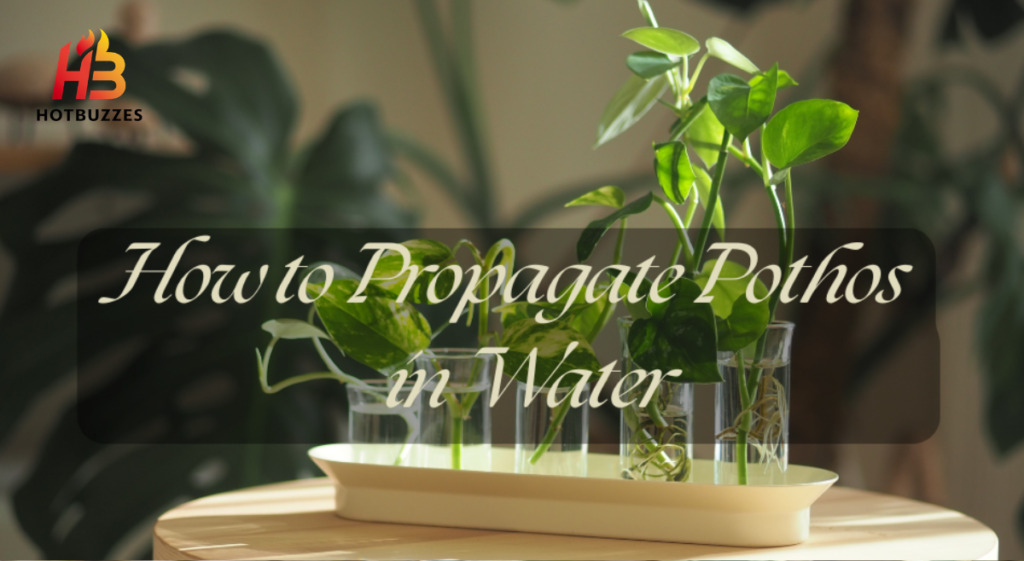
Pothos is one of the most loved houseplants in the world, and for good reason. It grows fast, looks beautiful, and is almost impossible to kill. But here is the best part: anyone can make more pothos plants at home for free, using just a glass of water. This guide covers everything about pothos water propagation, from picking the right cutting to moving the rooted plant into soil.
Whether someone is a total beginner or has been growing plants for years, propagating pothos in water is one of those projects that almost always works out. It takes no special skills, no fancy tools, and very little time. The whole process is simple, fun, and incredibly satisfying to watch as tiny white roots start to grow inside the jar day by day.
Here is a quick overview before diving into the full guide:
| Factor | Details |
|---|---|
| Rooting Time | 3 to 6 weeks on average |
| Best Water Temperature | Room temperature (around 70°F / 21°C) |
| Water Change Frequency | Every 5 to 7 days |
| Ideal Cutting Length | 4 to 6 inches |
| Transfer to Soil | When roots are 2 to 3 inches long |
| Best Light Condition | Bright indirect light |
| Best Season to Propagate | Spring or Summer |
| Permanent Water Growth | Possible with liquid fertilizer |
What Exactly Is a Pothos Plant?
Before we get into the how, it helps to understand what you are working with. According to Wikipedia, the pothos plant’s scientific name is Epipremnum aureum, and it originally comes from Mo’orea, an island in French Polynesia. It belongs to the Araceae family and has picked up many nicknames over the years, including golden pothos, devil’s ivy, Ceylon creeper, and, in many parts of South Asia, people simply call it the money plant.
The reason it gets called “devil’s ivy” is that it is nearly impossible to kill. It stays green even in the dark. In the wild, this plant can grow up to 20 meters tall, climbing trees using tiny aerial roots. At home, it stays manageable and trailing, which makes it perfect for shelves, hanging baskets, and windows.
According to USDA Floriculture statistics cited in plant patent records, pothos ranked third among all cultivated foliage plant genera in the United States in 2018, with a wholesale value of $22.89 million. That gives you a sense of how popular and commercially important this plant really is.
Why Propagate in Water?
There are two main ways to propagate pothos. You can do it in water or directly in soil. Both work, but water propagation is preferred by most beginners for one simple reason: you can actually see the roots growing. There is something deeply satisfying about watching little white roots emerge from a bare stem over the course of a few weeks.
A blogger at Cali Girl In A Southern World put it nicely when she described starting with just two pothos plants and ending up with five successfully propagated ones at home. She said the process gave her a tremendous sense of confidence as a plant parent, something that soil propagation simply does not offer in the same way because you cannot see what is happening underground.
Water propagation also gives you control. You can monitor root health, catch any rotting early, and simply enjoy watching the process unfold. It is free, it requires almost nothing in terms of equipment, and it works nearly every time if you follow the basic steps.

What You Need
You do not need much. Here is what to gather before you start:
- A healthy, mature pothos plant to take cuttings from.
- A pair of clean, sharp scissors or garden snips.
- A clear glass jar or vase. Room temperature tap water.
- A spot near a window with bright but indirect sunlight.
That is genuinely all of it. No fancy rooting powder is required, though you can use it to speed things up if you want. Find out how to grow a healthy ZZ plant with easy care tips and common mistake prevention.
Step One: Find the Right Stem and Node
This is the most important part of the whole process. You cannot just cut any random piece of the vine and expect it to root. Step One: Finding the node. A node is a small brown bump on the stem of the pothos vine. It usually sits just below where a leaf connects to the stem.
According to plant experts at Young House Love, nodes are easy to find because they appear as small bumps on the vine, often with a leaf growing from the opposite side. Every node has the potential to grow into a new plant on its own.
When you are ready to cut, look for a vine that has gotten long and a bit leggy. These are the best candidates for propagation. Gardening experts describe this as “giving your pothos a haircut,” and the trimmed vines do not go to waste because they become your new cuttings.
Use your scissors to cut just below a node, about a centimeter under the bump. Make a clean, angled cut. Avoid using dull scissors because they can crush the stem tissue and make it harder for roots to develop. Each cutting should ideally have two to four leaves and at least one or two nodes.
Step Two: Prepare the Cutting: Once you have your cutting, remove any leaves that would end up sitting in the water. If a leaf is submerged, it will rot. Rotting leaves make the water dirty and can cause problems for the developing roots.
Leave the upper leaves on. You want at least two or three healthy leaves above the waterline. These leaves will continue to photosynthesize and feed the cutting while the roots are developing below.

Step Three: Place in Water
Fill a clean glass jar with room temperature water. Tap water works perfectly fine for this. Cold water can stress the cutting, so try to use water that has been sitting out for a little while if your tap runs cold.
Place the cutting in the jar so that the nodes are fully submerged, but the leaves stay above the waterline. The roots will grow from the nodes, so they need to be in contact with the water. The leaves should not be touching the water at all.
Bricks ‘n Blooms recommends using a clear jar so you can keep an eye on root development and water clarity. A clear vessel also lets light reach the cutting, which helps. If the cutting keeps falling over or slipping, you can use a clothespin or a rubber band across the mouth of the jar to hold it in place.
Step Four: Choose the Right Spot
Put your jar somewhere it will get bright, indirect light. A kitchen windowsill, a desk near a window, or a bathroom shelf with good light all work well. Direct sunlight is not ideal because it can heat the water too quickly and encourage algae to grow.
Greg.app’s propagation guide notes that pothos cuttings can grow roots anywhere from 3 to 6 weeks under normal conditions. You can speed this up by giving them more warmth and humidity. If you propagate in spring or summer, when the plant is in its natural growing season, things move faster.
Young House Love also points out that fall and winter propagation is possible, but roots may take longer to appear, and some cuttings simply will not root during the colder months.

Step Five: Change the Water Regularly
This is something a lot of first-time propagators forget. Stagnant water is not good for your cutting. It allows bacteria to grow, the water turns murky, and roots can start to die. Change the water every five to seven days.
When you do, be gentle because the tiny roots forming at the nodes are delicate. You do not want to snap them off accidentally. Just pour out the old water, rinse the jar, and refill with fresh room-temperature water.
Lemon8 plant community members who have shared their propagation experiences recommend changing water every few days for the cleanest results, especially in warmer climates where bacteria multiply faster.
What to Expect Week by Week
Many plant lovers are curious about the timeline, and it varies depending on the season, the health of the cutting, and the light it receives.
- In the first one to two weeks, you may not see anything happening. This is normal. The cutting is adjusting to its new environment, and the nodes are beginning to develop root initials beneath the surface.
- By week three or four, you should start to see tiny white root threads emerging from the nodes. This is the exciting part. The roots will be thin at first and almost translucent.
- By weeks five through eight, the roots will have grown significantly. Once they reach about two to four inches in length, your cutting is ready to move to the soil.
A garden forum user on Garden.org shared that about four months after propagating a batch of cuttings together and potting them up, the combined pot looked full and thriving. Potting multiple cuttings together from the start is a well-known trick for getting a fuller-looking plant faster.
How Many Cuttings Should You Propagate at Once?
Here is something practical that experienced growers always say: do not just propagate one or two cuttings. Do six or more. Horticulturist Will Creed, referenced in a Garden.org forum thread, explains that a single stem cutting will always remain just one vine that gets longer over time. It will never branch or push out new stems from the soil on its own.
To get a plant that looks bushy and full, you need to pot multiple cuttings together from the start. This is why experienced plant parents always take several cuttings when they trim their pothos. It costs nothing extra and results in a much more attractive plant once everything is potted up.
Moving from Water to Soil
Once your roots are two to four inches long, it is time to transfer the cutting to soil. This step needs some care because roots grown in water are slightly different from roots that grow in soil. Water roots are softer and more adapted to a wet environment, so they need some time to adjust. Make snake plant care easy with these essential tips for beginners and first-time plant owners.
Choose a well-draining potting mix. Fill a small pot with water and water the soil thoroughly before planting, so it is evenly moist but not soggy. Make a hole in the center and gently place your cutting in, covering the roots and any bare nodes with soil.
For the first week or two after transfer, keep the soil consistently moist to help the roots adapt. Do not let it dry out completely during this adjustment period. After that, you can return to a normal watering routine, which for pothos means waiting until the top inch of soil feels dry before watering again.
Some people experience a rough transition at this stage, and the plant may look a little droopy for a few days. This is normal. The roots are rebuilding their ability to absorb water from a solid medium rather than a liquid one. Be patient and do not panic or overwater.
Common Mistakes to Avoid
- Leaving leaves in the water is the most common error. Any leaf that touches the water will rot and cloud the jar. Always strip off lower leaves before placing a cutting in water.
- Not changing the water often enough is another issue. Even if the water looks clear, it is picking up bacteria over time. Regular changes keep the environment clean and help roots develop faster.
- Cutting below a node is also something beginners sometimes get wrong. If your cutting has no node, no roots will grow from it. Nodes are non-negotiable.
- Putting cuttings in direct sunlight can heat the water and encourage algae. Bright indirect light is always the goal.
- Finally, moving too quickly to soil before roots are established is a recipe for disappointment. Wait until roots are at least two inches long, ideally a bit more, before making the transfer.

Tips That Actually Help
- Using a clear jar matters more than people think. Being able to see the roots growing keeps you engaged and lets you spot problems early.
- Putting multiple cuttings in the same jar is fine and actually helpful. More nodes in the water means more root mass to work with when you pot up.
- Propagating in spring or early summer gives you the best results because the plant is already in active growth mode.
- If you want to speed things up, you can dip the cut end in rooting hormone powder before placing it in water. It is not required, but it can shave a week or two off the process.
- Keeping the jar in a warm spot also helps. Pothos roots grow faster when the ambient temperature is between 65 and 85 degrees Fahrenheit.
A Few Words on the Plant Itself
Pothos is one of those plants that people have kept in their homes for generations, and for good reason. Beyond being easy to propagate, it is genuinely one of the most forgiving houseplants you can own.
According to Wikipedia’s entry on Epipremnum aureum, the plant has naturalized in tropical and subtropical forests around the world, including parts of South Africa, Australia, Southeast Asia, and the Pacific Islands, which shows just how adaptable it is.
The plant also has a reputation for tolerating low light conditions that would kill most other houseplants, which is why it earned the nickname “devil’s ivy.” It keeps growing and stays green in conditions where almost nothing else survives.
For anyone just getting started with plants, pothos is one of the best choices you can make. And once you have one thriving plant, propagating it in water is a completely free way to grow your collection, fill your home with greenery, or share plants with friends and family.
FAQs
How long will it take for a pothos to root in water?
Pothos cuttings usually take 3 to 6 weeks to root in water. Some varieties, like Jade Pothos, can show roots in as little as 4 to 6 days.
Why are my pothos cuttings not rooting in water?
The most common reason is that the node is not submerged in water. Low light or cold temperatures can also slow down or stop root growth completely.
Is it better to propagate pothos in water or soil?
Water is easier for beginners because you can watch roots grow. Soil gives stronger roots with less transfer shock, so both methods work well depending on preference.
Where to cut when propagating pothos?
Cut just below a node at a slight angle using clean scissors. The node is the small brown bump on the stem where the leaf meets the vine.
Final Thoughts
Propagating pothos in water is something almost anyone can do with no experience and no special equipment. You just need a healthy cutting with a node, a jar of water, some patience, and a sunny windowsill. Roots will appear within a few weeks, and within a couple of months, you will have a new plant ready to pot up and enjoy.
The most important lessons are to keep the leaves out of the water, change the water regularly, be patient during the water-to-soil transition, and always propagate more cuttings than you think you need. Do that, and you will almost certainly succeed.
Thousands of plant lovers across the world do this every season, turning one pothos plant into five, ten, or even more. There is genuinely no easier way to build a green home for free.

I started growing houseplants a little over 3 years ago with a single pothos cutting and a windowsill. Since then, my collection has grown to more than 40 plants (snake plants, ZZ plants, peace lilies, a couple of orchids). I’m still intimidated by, and one aloe that has survived three moves despite my best efforts to kill it.
I’m not a botanist or a certified horticulturist, I’m a hobbyist who’s made most of the beginner mistakes so you don’t have to: overwatering, underwatering, ignoring root rot until it was too late, and putting a sun-loving plant in the darkest corner of my apartment. HotBuzzes is where I share what I’ve actually learned from keeping plants alive (and occasionally failing), along with research from reliable sources to back it up.