
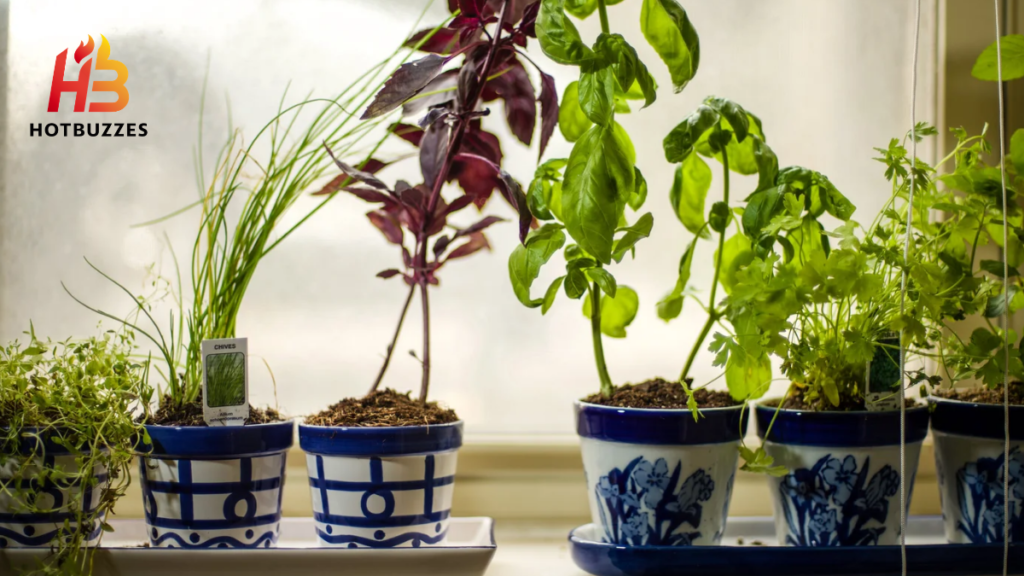
A pot of lettuce on the windowsill, scallions growing in a glass on the counter, or a tray of microgreens leaning toward the light can feel like a genuine kitchen miracle. Even growing a small amount of food indoors can create this sense of connection. Homegrown food also deepens a person’s connection to what ends up on their plate. The entire process happens somewhere visible instead of starting on a grocery store shelf, according to food writer and culinary educator Dr. Julia Skinner, quoted in Food & Wine’s guide to easy windowsill greens.
This guide covers the easiest edible plants and herbs to grow on a windowsill, organized from the truly fastest options through slower but still manageable choices, along with the specific light, container, and watering needs each one requires.
What Makes a Plant Windowsill Friendly
Before choosing specific plants, it helps to understand what makes some windowsill edibles easier to grow than others. Compact plants with shallow root systems fit well into the limited space and container depth a windowsill offers. Deep-rooted vegetables need much more soil volume to thrive. This is why leafy greens, herbs, and microgreens appear on nearly every list of easy indoor edibles. Root vegetables and sprawling vines rarely do.
Fast Turnaround From Seed to Harvest
A sunny windowsill or a simple grow light works well for many crops. Choosing fast-growing varieties can also keep a small space productive. Some are ready to harvest in as little as seven days, according to The Apartment Homestead’s guide to windowsill crops. This quick turnaround means you do not have to wait months for the first harvest.
Microgreens: The Fastest Windowsill Crop
For anyone wanting near instant results, microgreens are difficult to beat. Microgreens are young seedlings of vegetables and herbs such as broccoli, kale, radish, and basil. They are harvested soon after their first true leaves appear, according to Homegrown Garden’s guide to easy edible indoor plants. Despite their small size, microgreens are flavorful and nutrient-dense. The entire plant is edible, including the roots, according to a chef quoted in Food & Wine’s coverage.
Growing Microgreens Step by Step
A shallow tray or repurposed takeout container works well. Poke a few small drainage holes in the bottom. Fill it with about one to two inches of damp potting soil or coconut coir, according to Gardening Etc’s guide to growing microgreens indoors. Scatter the seeds densely, about a quarter inch apart. Lightly cover them with soil, according to The Manual’s indoor gardening guide. Keep the soil surface consistently damp with a spray bottle. Avoid heavy streams of water that can wash away tiny seedlings during germination, according to Homegrown Garden’s guide.
Timing and Popular Varieties
Most microgreens are ready to harvest within 7 to 21 days, depending on the variety. Beginner-friendly choices include radish, broccoli, and arugula, according to The Apartment Homestead’s guide. Sunflower and pea shoots are also common microgreen varieties, according to Northern Homestead’s guide to indoor edible gardens. A bright windowsill with about four hours of direct light per day is generally enough to keep microgreens growing steadily, according to Homegrown Garden’s guide.
Loose-Leaf Lettuce and Salad Greens
Lettuce is one of the easiest crops in windowsill gardening precisely because it forgives a wide range of light conditions. Lettuce does not need a particularly sunny window. A few hours of direct or indirect sunlight is generally enough. A grow light can provide extra light when natural light is limited, according to The Apartment Homestead’s guide. Its fast growth and compact size make lettuce a good choice for apartments. A wide, shallow container works better than a deep one.

Cut-and-Come-Again Harvesting
Rather than waiting for a full head to form, snipping the outer leaves as needed and allowing the plant to keep producing new growth extends a single planting’s productive life considerably, according to Food & Wine’s coverage. Loose-leaf varieties like ‘Black Seed Simpson’ or ‘Oakleaf’ suit this harvesting style particularly well, according to Homegrown Garden’s guide, which recommends leaving the central bud intact so the plant can continue generating fresh leaves for several successive harvests.
Beyond Lettuce: Other Easy Salad Greens
Spinach, arugula, chard, kale, sorrel, and mustard greens can all be grown indoors using the same general cut-and-come-again approach, according to Garden Betty’s guide to the easiest indoor vegetables, offering a wider variety of flavors and textures beyond plain lettuce without requiring meaningfully different care. Want healthier indoor plants? Explore these essential care tips for keeping your houseplants thriving.
Green Onions and Scallions: The Zero-Waste Crop
Few windowsill edibles offer a better return on effort than regrowing scallions from kitchen scraps that would otherwise be thrown away. Green onions are incredibly easy to grow indoors, according to The Apartment Homestead’s guide, and chives and scallions rank among the easiest vegetables to grow indoors overall, according to The Manual’s guide. Placing the root end of a scallion, saved after cooking, into a small glass of water on a sunny windowsill lets it regenerate new green shoots within days, essentially turning kitchen waste into a genuinely renewable crop.
Ongoing Care
Once established in water or transferred into a small pot of soil, scallions need only bright light and regularly refreshed water to keep producing, making them one of the lowest maintenance options covered in this entire guide.
Garlic Shoots and Sprouted Alliums
Similar to scallions, sprouting garlic offers another simple way to turn a kitchen staple into fresh, edible greenery. A sunny, south-facing window is generally sufficient for growing garlic shoots, along with regrowing scallions or starting microgreens, according to Savvy Gardening’s indoor food garden guide. Placing a sprouting garlic clove in a small container of soil allows the green shoots to grow upward, and these shoots carry a milder, more delicate garlic flavor well suited to garnishing dishes.
The Best Herbs for a Windowsill
Herbs remain some of the easiest and most rewarding plants to grow when producing food at home, since they generally need only small pots and modest light to thrive, according to The Apartment Homestead’s guide. Basil, thyme, rosemary, parsley, and oregano are the herbs used most often by experienced indoor growers, according to Savvy Gardening’s guide, while chives, mint, and dill also perform well in small windowsill pots, according to The Apartment Homestead’s guide. Basil in particular grows easily from cuttings, according to Northern Homestead’s guide, making it simple to start a new plant without buying fresh seeds each time.
Matching Herbs to Available Light
A sunny windowsill or a grow light works well for most herbs, though drought tolerant varieties like rosemary and thyme generally need brighter, more consistent light than moisture loving herbs like basil and mint, a distinction covered in more depth in dedicated indoor herb growing guidance.
Cherry Tomatoes for the More Ambitious Grower
For anyone willing to put in a bit more effort, dwarf cherry tomato varieties bring a genuine vegetable harvest to a windowsill setup. Tomato plants are a versatile option for a compact garden, and the key to success lies in choosing a variety specifically bred for minimal space rather than a standard, sprawling outdoor tomato plant, according to The Apartment Homestead’s guide. Compact, dwarf, or “patio” cultivars are worth the extra effort compared to other windowsill edibles, since they require more consistent light and larger containers than herbs or greens.
Light and Container Requirements
Because tomatoes need considerably more light than leafy greens or herbs, a south-facing window is close to essential, and supplementing with a grow light during winter’s shorter days can make a meaningful difference, according to Savvy Gardening’s guide, which specifically recommends grow lights for crops like tomatoes and hot peppers when natural light runs short.
Windowsill Edibles at a Glance
The table below summarizes the plants covered throughout this guide by difficulty, light needs, and time to harvest.
| Plant | Difficulty | Light Needs | Time to Harvest |
|---|---|---|---|
| Microgreens | Easiest | ~4 hours of direct light | 7 to 21 days |
| Scallions (regrown) | Easiest | Bright light | Days to a couple of weeks |
| Garlic shoots | Easiest | South-facing window | 1 to 2 weeks |
| Loose-leaf lettuce | Easy | A few hours direct/indirect | 3 to 4 weeks for first harvest |
| Other salad greens (spinach, arugula, kale) | Easy | A few hours direct/indirect | 3 to 5 weeks |
| Herbs (basil, chives, mint, parsley) | Easy to moderate | Bright, varies by herb | Several weeks, ongoing |
| Cherry tomatoes (dwarf varieties) | Moderate | Full sun or grow light | 2 to 3 months |
Container and Watering Basics Across Every Plant
While specific needs vary, a few practical basics apply across nearly everything covered in this guide. Microgreens need only about one to two inches of soil depth, according to Gardening Etc’s guide, while lettuce and herbs generally do better with a medium-sized container offering good drainage, according to Food & Wine’s coverage. Confirming that any container, including repurposed food containers, has drainage holes poked into the bottom protects against the same overwatering and rot risk that affects nearly every kind of container gardening.
Keeping Moisture Consistent Without Overdoing It
A simple spray bottle works well for delicate microgreens, where a heavy watering stream risks washing away tiny seedlings, according to Homegrown Garden’s guide, while lettuce and other salad greens need consistently moist soil, since letting them dry out can cause the leaves to turn bitter, according to the same guide. Herbs vary more by individual species, with some, like basil, preferring consistent moisture and others, like rosemary, preferring the soil to dry out somewhat between waterings.
Research-Based Facts About the Windowsill Growing Trend
Besides individual plant care, a bit of context helps explain why small-scale indoor food growing has become such a popular hobby in recent years. A quick look at social media shows a huge interest in easy-to-grow edible plants specifically, with posts related to basil, mint, and microgreens easily topping 50,000 mentions daily across the globe, according to Homegrown Garden’s guide. This online interest reflects a genuine, broader shift toward sustainability and hands-on food production, rather than existing purely as a passing aesthetic trend.
The Psychological Value of Growing Food
There is something genuinely meditative about checking on a plant each day and watching it slowly grow, according to Dr. Julia Skinner, quoted in Food & Wine’s coverage, who connects this daily ritual to a deeper sense of connection with the food eventually eaten. This wellbeing dimension echoes broader research on indoor plants and stress reduction discussed in general houseplant coverage, suggesting that windowsill edibles offer psychological benefits that go well beyond the practical value of a fresh garnish.
Radishes and Other Fast-Growing Windowsill Vegetables
Beyond the microgreen stage, a handful of vegetables can be grown to full, harvestable size in a windowsill container without needing anywhere near the space a tomato plant requires. Radishes are among the fastest full-sized vegetables available for indoor growing, often ready for harvest within three to four weeks of sowing, considerably faster than most other root vegetables.
A container at least six inches deep, filled with loose, well-draining soil, gives radish roots enough room to develop properly, and consistent moisture throughout the growing period helps prevent the woody, overly spicy texture that can develop in radishes grown under inconsistent watering. Create a productive indoor herb garden with these easy tips for growing fresh herbs year-round.
Baby Carrots and Compact Root Vegetables
Dwarf or “baby” carrot varieties, bred specifically for container growing, can also be grown on a bright windowsill, though they require a deeper pot than radishes and considerably more patience, typically two to three months before reaching a harvestable size. These varieties work best in a narrow but deep container, since carrots need vertical room to develop even in their compact forms.
Herb and Vegetable Pairings for a Cohesive Windowsill Setup
Rather than growing every plant in this guide separately, thoughtfully grouping compatible plants together creates a more efficient, cohesive windowsill garden. Grouping the bright-light, drought-tolerant herbs like rosemary and thyme together, separate from the more consistently moist-loving lettuce and basil, makes daily watering considerably more predictable, since each grouping can be checked and watered on its own appropriate schedule rather than treating every container identically. This same grouping principle, covered in more depth in dedicated indoor herb care guidance, applies just as directly to a mixed windowsill setup that includes vegetables alongside herbs.
Succession Planting for Continuous Harvests
Because many of the fastest windowsill crops, microgreens and radishes in particular, have a short productive window before they are fully harvested and the container needs replanting, starting a new tray or pot every one to two weeks keeps a continuous supply coming rather than facing a gap between one harvest and the next. This staggered approach works especially well for microgreens, where a small rotation of two or three trays at different growth stages can keep fresh greens available essentially every day of the week.
Choosing Seeds and Starting Materials
The quality and type of seed used has a meaningful effect on how successfully a windowsill garden performs, particularly for beginners still building confidence. Seed companies offer individual packets specifically for microgreens, including varieties like broccoli, arugula, and radish, as well as pre-mixed blends often divided into “mild” or “spicy” flavor profiles, giving beginners an easy way to experiment with different flavors without purchasing many separate packets. Choosing seed specifically labeled for microgreen or baby leaf production, rather than standard full-size vegetable seed, generally produces better results for these particular fast harvest crops.
Starting From Kitchen Scraps vs Starting From Seed
While scallions and garlic shoots regrow easily from kitchen scraps that would otherwise be discarded, most other plants covered in this guide genuinely need proper seed to get started, since produce purchased for eating is not bred or treated the same way as seed sold specifically for planting. Keeping both approaches in the same windowsill garden, some plants started from scraps and others from seed, maximizes variety without requiring a large upfront seed purchase.
Common Windowsill Growing Mistakes
A handful of recurring mistakes account for most disappointing windowsill harvests, and nearly all of them are easy to correct once identified.
Overcrowding Containers
Planting too many seeds too closely together, particularly for lettuce and other salad greens, forces plants to compete for the same limited light and nutrients, resulting in weak, leggy growth rather than the compact, productive plants this guide has focused on throughout. Thinning seedlings once they emerge, removing the weakest sprouts to give the remaining plants adequate space, considerably improves the overall health and yield of a crowded planting.
Forgetting That Microgreens Are a One-Time Harvest
Unlike lettuce or herbs, which regrow after a cut-and-come-again harvest, microgreens will not keep growing once their leaves have been trimmed, since they are cut at such an early stage of development, according to The Manual’s guide. Planning to sow a fresh tray immediately after harvesting an existing one, rather than expecting a single tray to regenerate, keeps a continuous supply of microgreens coming without a gap in production.
Inconsistent Watering Across Multiple Containers
Managing several different containers with genuinely different watering needs, as covered in the pairing section above, becomes considerably harder without some kind of system, and watering everything on the same schedule regardless of individual plant needs is one of the most common ways an otherwise promising windowsill garden underperforms. Keeping a simple written note of each container’s watering frequency, at least while still learning each plant’s specific pattern, removes much of this early guesswork.
Seasonal Adjustments for Windowsill Gardens
Even indoors, the changing seasons outside still affect how a windowsill garden performs throughout the year.
Managing Reduced Winter Light
Shorter winter days reduce the total light available to every plant on a windowsill, which can slow growth considerably even for otherwise easy crops like lettuce and herbs. Rotating containers regularly to ensure even light exposure, and adding a supplemental grow light for light-hungry crops like tomatoes specifically during this period, helps maintain consistent production through the darkest months rather than accepting a seasonal slowdown as unavoidable.

Taking Advantage of Stronger Summer Light
During summer, when natural light is abundant, windowsill gardens often produce more vigorously than they do the rest of the year, which makes this an ideal time to experiment with slightly more demanding crops, like cherry tomatoes, that might struggle during a darker season. Watching for excessive heat directly against a sun-exposed window during summer afternoons, however, matters just as much as ensuring adequate light, since intense, prolonged direct sun can stress or scorch tender seedlings.
Using a Windowsill Harvest in the Kitchen
Once a windowsill garden starts producing, a few practical habits help make the most of what is often a smaller, steadier supply than a traditional outdoor garden delivers.
Harvesting at the Right Time for Flavor
Snipping herbs and greens in the morning, before the day’s heat has a chance to affect their moisture and oil content, generally captures the freshest flavor and texture, a principle that applies to windowsill herbs in much the same way it does to a larger outdoor herb garden. Using clean scissors or a sharp knife for every harvest, rather than pinching or tearing leaves by hand, reduces stress on the remaining plant and keeps cut edges healthier for the plant’s continued regrowth.
Making the Most of Small Harvests
Because windowsill crops typically produce smaller quantities at any given time compared to an outdoor garden bed, incorporating fresh microgreens, lettuce, or herbs as a finishing touch, a garnish on soup, a handful tossed into a sandwich, or a bright addition to eggs, tends to make more practical sense than planning an entire meal around a single windowsill harvest. This approach also matches how these plants are actually grown, in small, frequent batches, rather than the large, all-at-once yield a bigger garden typically produces.
Combining a Windowsill Garden With Other Indoor Growing Methods
For anyone who finds windowsill growing rewarding, a few complementary techniques extend the same basic principles into slightly more involved setups.
Hydroponic Systems for Greens
A simple hydroponic setup, growing lettuce or herbs in water with dissolved nutrients rather than soil, can produce fresh, crisp leaves year-round with a genuinely rapid growth cycle, according to The Apartment Homestead’s guide, offering an alternative to soil-based containers for anyone specifically drawn to lettuce and other fast-growing greens. This method requires a bit more initial setup than a simple soil-filled pot but can reduce some of the watering guesswork covered throughout this guide, since a hydroponic reservoir delivers moisture and nutrients on a more automated basis.
Stacked and Vertical Growing Setups
For a windowsill with limited horizontal space, stacking shallow trays, as described earlier for weighing down microgreen seeds during germination, or using a vertical, tiered plant stand extends the effective growing area without requiring additional floor or counter space. This kind of vertical arrangement works particularly well for herbs and microgreens specifically, since both stay compact enough to fit comfortably on narrow shelving without shading out whatever is growing beneath them.
Building Confidence Before Expanding a Windowsill Garden
For anyone genuinely new to growing any kind of food at home, a measured, gradual approach tends to produce better long-term results than attempting everything covered in this guide all at once.
Starting With the Fastest, Most Forgiving Crops First
Beginning with microgreens or a regrown scallion, both covered early in this guide specifically because of how quickly and reliably they produce results, builds the kind of early confidence that makes tackling a slower, more demanding crop like cherry tomatoes considerably less intimidating later on. Early, visible success with an easy crop also helps a new grower develop a feel for how their specific windowsill’s light and temperature actually behave throughout the day, information that proves useful for every subsequent plant added to the space.
Expanding Gradually Based on What Actually Thrives
Rather than filling an entire windowsill with every plant covered in this guide at once, adding one or two new plants at a time and observing how each one performs in that specific spot allows a grower to genuinely understand their space’s particular strengths and limitations before committing to a larger, more complex setup. This gradual approach also naturally surfaces which plants a household will actually use regularly in cooking, which matters just as much as a plant’s ease of growth when deciding what is genuinely worth the ongoing windowsill space.
Frequently Asked Questions
Q1. What is the single fastest edible plant to grow on a windowsill? Microgreens are the fastest option by a wide margin, with wide varieties ready to harvest in as little as 7 to 14 days from seeding, compared to several weeks for lettuce or herbs and even longer for a crop like cherry tomatoes.
Q2. Do windowsill vegetables need a grow light, or is natural window light enough? It depends on the plant and the season. Microgreens, lettuce, scallions, and most herbs generally do fine with a sunny window alone, but more light-demanding crops like cherry tomatoes and hot peppers, especially during winter’s shorter days, gain greatly from a supplemental grow light.
Q3. Can I really regrow scallions from kitchen scraps? Yes. Placing the root end of a used scallion in a small glass of water on a sunny windowsill lets it regenerate new green shoots within days, making it one of the easiest and most cost-effective windowsill edibles available.
Q4. How much soil depth do microgreens actually need? Very little. A shallow tray with just one to two inches of soil is sufficient, since microgreens are harvested so young that their root systems never develop very far into the growing medium.
Q5. Why do my lettuce leaves taste bitter? Bitter-tasting lettuce is most often caused by the lettuce drying out between waterings. Keeping the moisture level consistent, rather than letting the container dry out repeatedly, generally resolves this issue.
Q6. Are herbs or vegetables easier to grow on a windowsill overall? Herbs are generally considered the most consistently easy and forgiving option, particularly basil, chives, and mint, while vegetables like cherry tomatoes require more light and larger containers, making them a step up in difficulty compared to herbs, greens, or microgreens.
Conclusion
A windowsill can support a surprising range of edible plants. Microgreens can be ready within a week, while dwarf cherry tomatoes can provide a slower but rewarding harvest a couple of months later. Starting with easy options can build confidence and provide a steady supply of fresh food. Microgreens, regrown scallions, basil, and chives are good starting points. You can then move on to crops that need more attention, such as lettuce, salad greens, or compact tomato varieties.
None of the plants covered in this guide require a backyard, balcony, or advanced gardening skills. You only need a reasonably sunny spot, a container with drainage, and consistent but not excessive watering. For anyone interested in growing their own food, a windowsill offers a simple starting point. It can provide fresh ingredients within days instead of the months a traditional outdoor garden often requires.

Ajwa Asif is a writer with a passion for plants, gardening, and creating educational content. She researches plant-related topics using reputable horticultural resources and shares practical advice to help readers grow healthier plants and build confidence in their gardening journey. Her content focuses on delivering clear, reliable, and user-focused information.